Introduction
A garage door opener is a crucial part of your home, providing convenience and security. But when it starts malfunctioning, you may wonder, “How easy is it to replace a garage door opener?” The good news is that with the right tools, a bit of patience, and basic DIY skills, replacing a garage door opener is a manageable task.
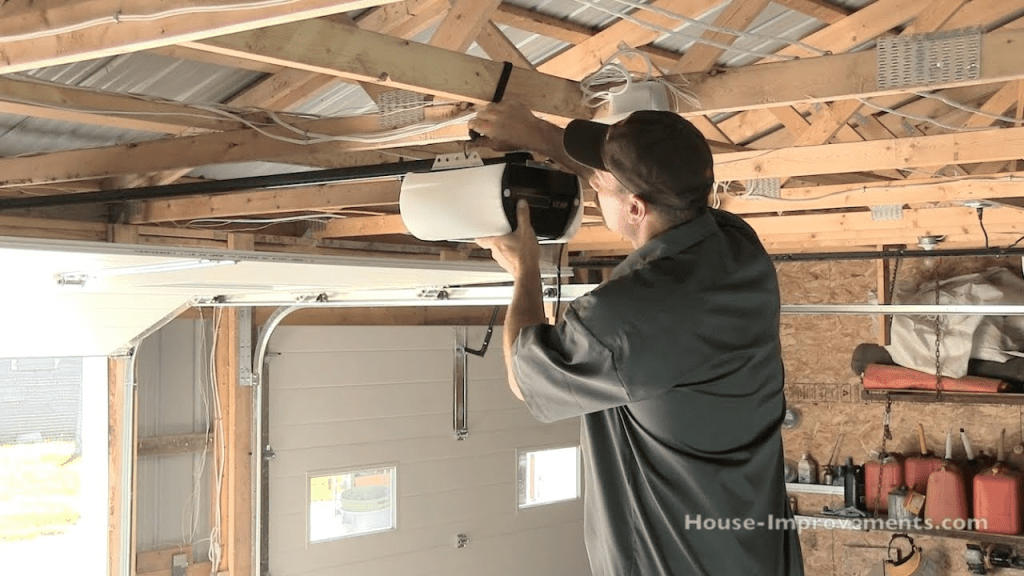
In this article, we will guide you through the process, discuss the tools you’ll need, and help you determine whether you should do it yourself or hire a professional.
Read too: Mastering Quantum Garage Door Opener Programming: A Comprehensive Guide
How Easy Is It To Replace A Garage Door Opener?
Replacing a garage door opener is easier than many people think. If you’re comfortable using power tools and following instructions, you can install a new opener in just a few hours.
Factors That Affect the Difficulty Level:
- Type of Garage Door Opener – Chain-drive, belt-drive, and screw-drive openers have slightly different installation processes.
- Existing Setup – If you’re replacing an old opener with a new one of the same type, installation is much simpler.
- Wiring and Power Supply – If your garage already has the necessary wiring and outlets, the process is easier.
- Garage Door Condition – A well-balanced door will make installation smoother, while a misaligned door may cause issues.
If you’re replacing an outdated or broken garage door opener, following the proper steps will ensure a smooth installation.
Tools and Materials You Need
Before starting the replacement, gather these essential tools and materials:
Tools Required:
✔ Adjustable wrench
✔ Screwdriver (Phillips and flathead)
✔ Power drill
✔ Socket set
✔ Pliers
✔ Measuring tape
✔ Stepladder
Materials Needed:
✔ New garage door opener kit
✔ Mounting brackets and hardware (included in most kits)
✔ Safety sensors
✔ Electrical wiring (if needed)
Once you have everything ready, follow the steps below to replace your garage door opener.
Step-By-Step Guide to Replacing a Garage Door Opener
Step 1: Remove the Old Garage Door Opener
- Disconnect Power – Unplug the opener from the electrical outlet to prevent shocks.
- Detach the Garage Door Arm – Use a wrench to remove the bolts connecting the opener to the garage door.
- Remove the Mounting Brackets – Unscrew the brackets holding the opener motor to the ceiling.
- Lower the Opener – Carefully take down the old unit with the help of an assistant if needed.
Step 2: Install the New Garage Door Opener
- Assemble the Rail and Trolley System
- Follow the manufacturer’s instructions to connect the rail sections.
- Attach the trolley to the rail, which will move the garage door up and down.
- Mount the Opener Motor Unit
- Secure the motor unit to the ceiling using the provided brackets.
- Ensure it is level to prevent operational issues.
- Attach the Garage Door Arm
- Connect the new opener’s arm to the garage door, aligning it properly.
- Install Safety Sensors
- Position the sensors at the bottom of the garage door tracks.
- Make sure they are aligned and free from obstructions.
Step 3: Wire and Test the Garage Door Opener
- Connect Electrical Wiring
- Plug the new opener into the power outlet.
- If hardwiring is required, follow the manufacturer’s wiring guide.
- Program the Remote Control
- Sync your remote or keypad with the new opener using the programming instructions.
- Test the Opener
- Open and close the garage door multiple times to ensure smooth operation.
- Adjust travel limits if needed to prevent the door from stopping too soon or closing too forcefully.
Should You Replace a Garage Door Opener Yourself or Call a Professional?
If you’re asking “How easy is it to replace a garage door opener?”, it depends on your comfort level with DIY projects.
DIY Installation: When to Do It Yourself
✅ You have basic knowledge of power tools and electrical wiring.
✅ Your garage already has the necessary mounting brackets and wiring.
✅ You are comfortable following step-by-step instructions.
Hiring a Professional: When to Call an Expert
❌ Your garage door is off-track or unbalanced.
❌ You need new electrical wiring installed.
❌ You don’t have time or the proper tools for the job.
While replacing a garage door opener yourself can save money, hiring a professional ensures proper installation and safety.
Common Mistakes to Avoid When Replacing a Garage Door Opener
- Not Checking the Garage Door Balance – If your door isn’t properly balanced, the opener may struggle to function.
- Skipping Safety Sensor Alignment – Misaligned sensors can prevent the door from closing.
- Forgetting to Adjust Travel Limits – This can cause the door to open or close improperly.
- Using the Wrong Tools – Always use the recommended tools for installation.
- Not Reading the Manual – Each opener brand has unique instructions, so always follow the manual.
By avoiding these mistakes, you’ll ensure a smooth and safe installation.
Maintaining Your New Garage Door Opener
Once you’ve successfully replaced your garage door opener, regular maintenance will keep it working efficiently.
Essential Maintenance Tips:
✔ Lubricate Moving Parts – Apply lubricant to the rail, chain, or belt every six months.
✔ Check Safety Sensors – Keep them clean and properly aligned.
✔ Test the Auto-Reverse Feature – Place an object under the door and check if it reverses upon contact.
✔ Inspect the Remote and Keypad – Replace batteries as needed.
Regular maintenance extends the lifespan of your garage door opener and prevents costly repairs.
Conclusion
So, how easy is it to replace a garage door opener? For most homeowners, it’s a straightforward DIY task that can be completed in a few hours. By following the step-by-step guide above, using the right tools, and avoiding common mistakes, you can successfully replace your garage door opener and enjoy smooth operation for years to come.
However, if you encounter electrical wiring issues, an unbalanced garage door, or difficulty following instructions, it may be best to call a professional for assistance.
With proper installation and regular maintenance, your new garage door opener will provide convenience and security for your home.



Leave a Reply