Installing a garage door is a significant undertaking that not only enhances the aesthetics of your home but also improves security and convenience. However, if you’re planning to install a new garage door, you might be wondering how long the process will take. In this comprehensive guide, we’ll explore the factors that affect the installation time, provide typical timelines for different types of installations, walk you through the step-by-step process, discuss whether you should hire a professional or consider a DIY approach, and answer frequently asked questions. Let’s dive in!
Section 1: Factors Affecting Installation Time
Before we can estimate the time it takes to install a garage door, it’s crucial to understand the various factors that influence the duration of the installation process. Let’s explore these factors in detail:
Size and Complexity of the Door
The size and complexity of the garage door play a significant role in determining the installation time. Single doors are generally quicker to install compared to double doors, as they require fewer components and adjustments. Additionally, doors with intricate designs or customizations may require more time for precise installation.
Material of the Door
Different garage door materials, such as wood, steel, or aluminum, have varying installation requirements. For instance, wooden doors often require more time for proper fitting and finishing. Steel and aluminum doors, on the other hand, are generally easier and faster to install due to their lighter weight.
Additional Features and Customization Options
If you opt for additional features like windows, insulation, or decorative elements on your garage door, the installation time will naturally increase. Each extra component requires careful installation and alignment, contributing to an extended timeline.
Existing Infrastructure and Garage Condition
The condition of your existing garage infrastructure can impact the installation time. A well-maintained and structurally sound garage will facilitate a smoother installation process. However, if repairs or modifications are needed to accommodate the new door, additional time will be required.
Accessibility and Ease of Installation
The accessibility and ease of installation also influence the duration of the process. Factors such as clearance around the garage opening, the presence of obstructions, or limited workspace can slow down the installation. A clutter-free and accessible area allows for a more efficient and timely installation.
Remember, each installation is unique, and the combination of these factors will determine the overall time required for your specific garage door installation.
Section 2: Typical Timelines for Garage Door Installation
While the installation time can vary significantly depending on the factors we discussed, let’s provide some general guidelines for different types of installations. Please note that these timelines are approximate and can fluctuate based on individual circumstances.
Standard Installation: 4-6 Hours
For a standard garage door installation without any additional complexities, you can expect the process to take around 4 to 6 hours. This duration includes the time required for measurements, assembly, track installation, opener setup, and safety checks.
Moderate Installation: 6-8 Hours
If you opt for a garage door with additional features like windows or insulation, or if you require some modifications to the garage structure, the installation time may extend to approximately 6 to 8 hours. These modifications might involve extra steps such as framing, insulation installation, or adjusting the track to accommodate the new features.
Complex Installation: 8+ Hours
In cases where you have a large double door, a customized design with intricate details, or significant modifications to the garage structure, the installation time can exceed 8 hours. Complex installations require more meticulous measurements, precise adjustments, and extra care during the entire process to ensure a flawless result.
It’s important to consult with a professional installer or refer to the manufacturer’s guidelines for a more accurate estimate based on your specific requirements.
Section 3: Step-by-Step Garage Door Installation Process
Now that we have an understanding of the factors and timelines, let’s walk through the step-by-step process of installing a garage door. While it’s always recommended to follow the manufacturer’s instructions, here’s a general overview of the installation process:
Step 1: Preparations and Safety Precautions
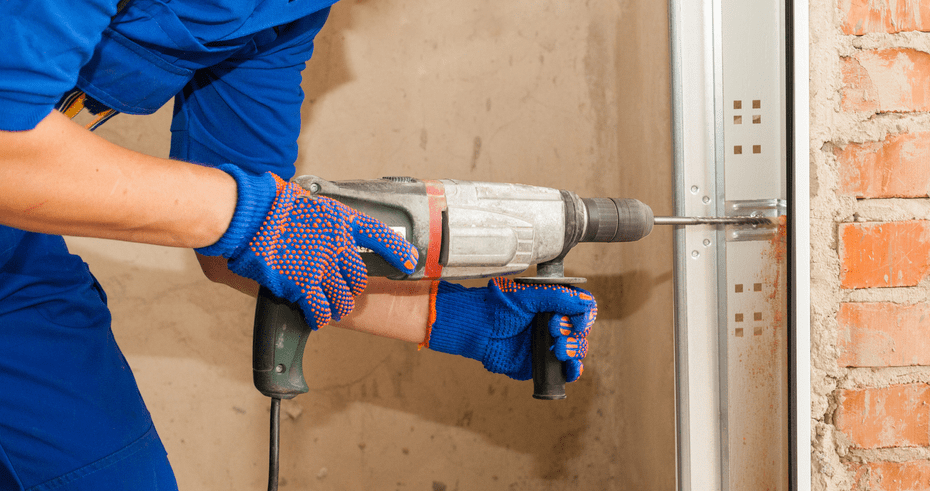
Before diving into the installation, ensure you have all the necessary tools and equipment. Read through the manufacturer’s instructions thoroughly, and gather any additional materials required for the installation. It’s crucial to prioritize safety, so wear protective gear and take necessary precautions throughout the process.
Step 2: Measuring and Preparing the Opening
Accurate measurements are essential to ensure a proper fit. Measure the width and height of the opening, and mark the centerline. Prepare the opening by cleaning any debris and ensuring a level base for the door installation.
Step 3: Assembling and Installing the Door Sections
Following the manufacturer’s instructions, assemble the door sections according to the provided guidelines. Once assembled, lift the sections into place and attach them securely, ensuring proper alignment and smooth operation.
Step 4: Installing the Track and Rollers
Install the vertical and horizontal tracks according to the manufacturer’s instructions. Ensure that the tracks are level and securely fastened. Attach the rollers to the door sections, ensuring smooth movement along the tracks.
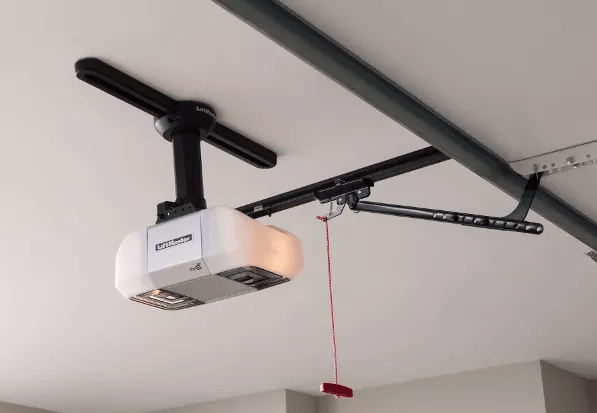
Step 5: Mounting the Opener and Testing the System
If you’re installing a garage door opener, follow the instructions to mount it securely to the ceiling or wall. Connect the opener to the door and test the system to ensure smooth operation and proper functionality.
Step 6: Adjustments, Fine-Tuning, and Final Safety Checks
Once the door and opener are installed, make necessary adjustments to ensure proper balance, alignment, and tension. Test the safety features, such as the auto-reverse mechanism and sensors, to ensure they are functioning correctly. Perform a thorough inspection to address any potential issues and make the final adjustments.
Remember, this is a general overview of the installation process. Always refer to the manufacturer’s instructions specific to your garage door model for precise guidance.
Section 4: Hiring a Professional vs. DIY Installation
Now that you understand the installation process, you may be wondering whether you should hire a professional or consider a DIY approach. Let’s weigh the pros and cons of each option:
Hiring a Professional
Pros:
- Experience and Expertise: Professional installers have extensive experience handling various garage door types and installations, ensuring efficient and accurate work.
- Proper Installation and Performance: Hiring professionals guarantees that your garage door will be installed correctly, promoting optimal performance and longevity.
- Warranty Coverage and After-Sales Service: Many professional installers offer warranties on their work, providing you with peace of mind and assistance in case of any issues down the line.
Cons:
- Cost: Hiring a professional installer may involve additional expenses compared to a DIY installation.
- Scheduling: Depending on the availability of the installer, you may need to align your installation timeline with their schedule.
DIY Installation
Pros:
- Cost Savings: By opting for a DIY installation, you can save money on labor costs if you have the necessary skills and tools.
- Sense of Accomplishment: Successfully installing your garage door can give you a sense of accomplishment and pride in your own work.
- Customization Opportunities: DIY installations provide you with the flexibility to customize and personalize your garage door according to your preferences.
Cons:
- Skill and Knowledge Requirements: DIY installation requires a certain level of expertise and familiarity with tools and construction, which may be challenging for individuals without prior experience.
- Time and Effort: Installing a garage door yourself can be time-consuming and physically demanding, especially if you’re not accustomed to such tasks.
Consider your skills, available time, budget, and the complexity of the installation when deciding whether to hire a professional or tackle the installation yourself.
Section 5: Frequently Asked Questions
To address any lingering queries you may have about garage door installation, let’s answer some frequently asked questions:
- How long does it take to install a new garage door?
- The installation time depends on various factors, such as door size, complexity, additional features, and modifications required. On average, a standard installation can take 4 to 6 hours.
- What affects the installation time of a garage door?
- Factors like door size, complexity, material, additional features, existing infrastructure, and accessibility can impact the installation time.
- Can I install a garage door by myself?
- If you have the necessary skills, tools, and knowledge, you can consider a DIY installation. However, complex installations may require professional assistance.
- How much time does it take to replace a garage door opener?
- The time required to replace a garage door opener depends on the specific model and complexity. It generally takes 1 to 2 hours.
- What steps are involved in installing a garage door?
- The installation process typically involves preparations, measuring, assembling and installing door sections, installing tracks and rollers, mounting the opener, and performing adjustments and safety checks.
- How much does professional garage door installation cost?
- Professional garage door installation costs vary based on factors like the door type, additional features, and geographical location. It’s best to obtain quotes from multiple installers for accurate pricing.
- How can I customize my garage door during installation?
- Many garage door manufacturers offer customization options, such as window inserts, decorative hardware, colors, and finishes. Discuss your preferences with the installer or consult the manufacturer for available customization choices.
- Are there any safety precautions I should take during the installation process?
- Yes, safety is paramount during garage door installation. Wear protective gear, follow all safety instructions, and ensure proper handling of heavy components. If unsure, consult a professional installer.
- Do I need special tools to install a garage door?
- Yes, installing a garage door requires specific tools such as a level, measuring tape, wrenches, power drill, ladder, and more. Refer to the manufacturer’s instructions for the complete list of required tools.
- Can I install a garage door on my own if I have no prior experience?
- Installing a garage door without prior experience can be challenging. It’s advisable to seek professional assistance to ensure a safe and successful installation.
Conclusion
Installing a garage door is a task that requires careful consideration and planning. By understanding the factors affecting installation time, having knowledge of the typical timelines, following the step-by-step process, and evaluating the pros and cons of hiring professionals or doing it yourself, you can make an informed decision. Remember to prioritize safety and consult the manufacturer’s instructions or seek professional assistance when needed. With the right approach, your new garage door will provide security, convenience, and enhance the overall appeal of your home for years to come.ShareSave


Leave a Reply