If your Chamberlain remote stopped working or you bought a new one, you may be wondering how to add a remote to a Chamberlain garage door opener without calling a technician. Don’t worry—this process is simpler than most people expect. With just a few steps and the right guidance, you can complete the setup safely and quickly.
In this guide, I’ll walk you through everything you need to know, from understanding Chamberlain’s “Learn” button to troubleshooting pairing issues.
How To Add Remote To Chamberlain Garage Door Opener (Step-by-Step)
This first section answers the most common user question found in People Also Ask:
“How do I program a Chamberlain remote to my garage door opener?”
Follow the instructions carefully to avoid errors.
Read too: Door and Garage Door Companies: Choosing the Right Partner for Your Needs
1. Identify Your Chamberlain Opener’s “Learn” Button
Chamberlain openers have a “Learn” button on the back or side of the motor housing. This button controls pairing and memory functions. It’s typically located:
- Under the light cover
- Next to the antenna wire
- Near the wiring terminals
The button color determines compatibility with different remotes:
| Learn Button Color | Remote Compatibility | Notes |
|---|---|---|
| Yellow | Security+ 2.0 | Newer models (after 2011) |
| Purple | Security+ 315 MHz | Mid-range models |
| Red/Orange | Security+ 390 MHz | Older models |
| Green | Basic 390 MHz | Legacy models |
According to Chamberlain, the color also affects which frequency your opener uses.
If you’re unsure about your model, you can cross-check Chamberlain’s product list or look up the frequency label inside your opener. (You may also check garage door opener info in sources like Wikipedia for general background.)
2. Prepare the New Remote
Before pairing:
- Install a new CR2032 or CR2016 battery (varies by remote model).
- Make sure you are using a Chamberlain-compatible remote, not a universal remote unless it explicitly lists compatibility.
- Stand within 10 feet of the garage motor during programming.
A weak battery can prevent pairing, so this step is more important than people think.
3. Enter Programming Mode on the Opener
This step is where most people get stuck.
How to enter programming mode:
- Locate the Learn button.
- Press and release it once—do not hold it.
- A small LED will light up and stay on for 30 seconds.
This means the opener is now ready to accept a new remote signal.
Important:
If you hold the Learn button for too long, you will erase all existing remotes from memory. Avoid this unless you want to reset everything.
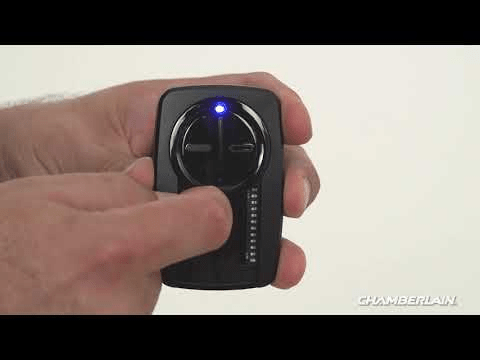
4. Press the Remote Button To Sync It
Once the Learn light is on:
- Press and hold the button on your remote for 2–3 seconds.
- Release it and wait for the system to respond.
- You may hear a click or see the garage light blink once or twice.
This confirms the remote has been successfully programmed.
If it doesn’t work:
Try pressing the remote button again within the 30-second window.
Sometimes it takes 2 attempts, especially with older openers.
5. Test Your Remote
Stand a few feet away and press the remote:
- If the door opens or closes → Success
- If nothing happens → You may need to repeat the steps or check compatibility
Be sure the antenna wire on the opener is hanging down fully. A bent or damaged antenna can limit the remote range.
Why Your Chamberlain Remote Won’t Program
This section answers another major “People Also Ask” query:
“Why won’t my Chamberlain remote program?”
Here are the most common reasons:
1. Wrong Remote Frequency
The Learn button color determines compatibility. A yellow Learn button opener won’t work with a purple-button remote.
2. Weak Remote Battery
Low voltage reduces signal strength.
3. Interrupted Programming Window
The 30-second Learn light may shut off before you complete the pairing.
4. Overloaded Memory
Chamberlain openers store up to 5 remotes on most units.
If full, you must clear memory:
To clear:
Hold the Learn button for 6 seconds until the LED turns off.
5. Blocked RF Signal
LED garage bulbs can sometimes interfere with wireless signals.
Use “garage door opener safe” bulbs instead.
6. Safety Sensor Issues
If the safety sensors aren’t aligned, the opener may reject remote signals for safety.
Different Ways To Add a Remote to a Chamberlain Opener
Users often ask:
“Can I add multiple remotes to a Chamberlain opener?”
and
“Can I use a universal remote?”
Here are your options:
1. Add an Original Chamberlain Remote (Best Option)
Pros:
- Easy pairing
- Maximum compatibility
- Better range
Cons:
- Slightly more expensive
2. Use a Universal Garage Remote
Universal remotes work if they support:
- Security+ 2.0
- Security+ 315 MHz
- Security+ 390 MHz
Pros:
- Works across many openers
- Good for multi-garage households
Cons:
- More programming steps
- Not always compatible with newest yellow button models
3. Use a Smart Remote / MyQ Integration
This lets you operate the garage from a phone.
Pros:
- Remote access anywhere
- Smart notifications
Cons:
- Requires Internet setup
- Slight delay vs manual remote
Step-by-Step: Adding a Universal Remote to Chamberlain (Optional Section)
Some users ask for this, so here is an extended tutorial:
- Put opener in Learn Mode (press Learn button once).
- On the universal remote, choose the correct program button (varies by brand).
- Enter the frequency code (example):
- 1 button press = 315 MHz
- 2 presses = 390 MHz
- Press the remote button until the garage light blinks.
- Test the remote at a distance of 15–20 feet.
Always check the remote’s manual for exact configuration.
Chamberlain Remote Compatibility Table
| Chamberlain Opener Type | Learn Button Color | Compatible Remotes | Notes |
|---|---|---|---|
| Security+ 2.0 (2011+) | Yellow | 891LM, 893LM | New models |
| Security+ 315 MHz | Purple | 371LM, 373LM | Mid-generation |
| Security+ 390 MHz | Red/Orange | 971LM, 973LM | Older |
| Basic 390 MHz | Green | 61LC | Legacy |
Understanding your opener type is the #1 key to successful pairing.
Troubleshooting: Remote Works Intermittently
If your remote works only sometimes, try these:
1. Replace the battery
Even new remotes ship with partially drained batteries.
2. Reduce LED bulb interference
Avoid non-garage-safe LED bulbs.
3. Check the antenna wire
It should hang down 4–6 inches.
4. Reprogram the remote
Occasionally signals need refreshing.
5. Reset the opener (only if needed)
Hold the Learn button for 6 seconds to clear memory.
Safety Tips When Adding a Remote
- Never stand under a moving garage door.
- Keep remotes away from children.
- Always test the door’s auto-reverse safety feature after programming.
- Replace safety sensor wiring if it’s damaged.
Frequently Asked Questions (FAQ)
Q1: How long does it take to add a remote to a Chamberlain opener?
Most people complete the process in 2–5 minutes, depending on the opener model and remote type.
Q2: Can I program two remotes to one Chamberlain opener?
Yes. Chamberlain openers typically store up to five remotes at once.
Q3: What if my Learn button won’t light up?
This may indicate:
- A blown logic board fuse
- Power supply issues
- Light cover interfering with the LED
Try removing the light cover and checking the outlet.
Q4: Does adding a new remote erase old ones?
No—unless you hold the Learn button for around 6 seconds, which clears all memory.
Q5: Why does my remote only work up close?
Poor signal range often comes from:
- Weak battery
- RF interference
- Damaged antenna wire
Check these before reprogramming.
Q6: Do universal remotes work with Chamberlain?
Yes, but only if the universal remote supports your opener’s frequency and security protocol.
Conclusion
Adding a remote to a Chamberlain garage door opener is simple once you know how the Learn button works. By following the steps above, you can pair a new remote in minutes, avoid compatibility issues, and keep your garage system running smoothly.


Leave a Reply