With modern smart home technology, adding a camera to your MyQ garage door opener lets you monitor your garage remotely, enhancing security and convenience. Many homeowners ask, “How to add camera to MyQ garage door opener?” This guide provides a detailed step-by-step process to install, connect, and test your camera so you can watch your garage anytime, anywhere.
Why Add a Camera to Your MyQ Garage Door Opener
Adding a camera brings multiple benefits:
- Real-time monitoring: See who enters or exits your garage instantly.
- Enhanced security: Prevent theft and vandalism with visual evidence.
- Remote notifications: Receive alerts on your smartphone when activity occurs.
- Integration with smart home systems: Works with Alexa, Google Home, and other MyQ-enabled devices.
Read too: How To Replace Garage Door Roller Like a Pro? Step-by-Step Guide
According to a 2023 Statista report, over 40% of US households with smart home devices use security cameras to monitor entrances and garages, emphasizing the growing need for connected home security.
Choosing the Right Camera
When adding a camera to your MyQ opener, consider:
- Compatibility: Must be MyQ-supported or third-party compatible.
- Resolution: Minimum 1080p for clear video.
- Night vision: Essential for 24/7 security.
- Field of view: Wide-angle lens for full garage coverage.
- Connectivity: Wi-Fi enabled, preferably dual-band 2.4GHz/5GHz for stability.
Step-By-Step Installation Guide
Step 1: Gather Materials
- MyQ-compatible camera
- Smartphone with MyQ app installed
- Ladder, screwdriver, and mounting hardware
Step 2: Select a Camera Location
- Position the camera where it captures the full garage door.
- Avoid direct sunlight or glare.
- Ensure Wi-Fi signal is strong at the chosen spot.
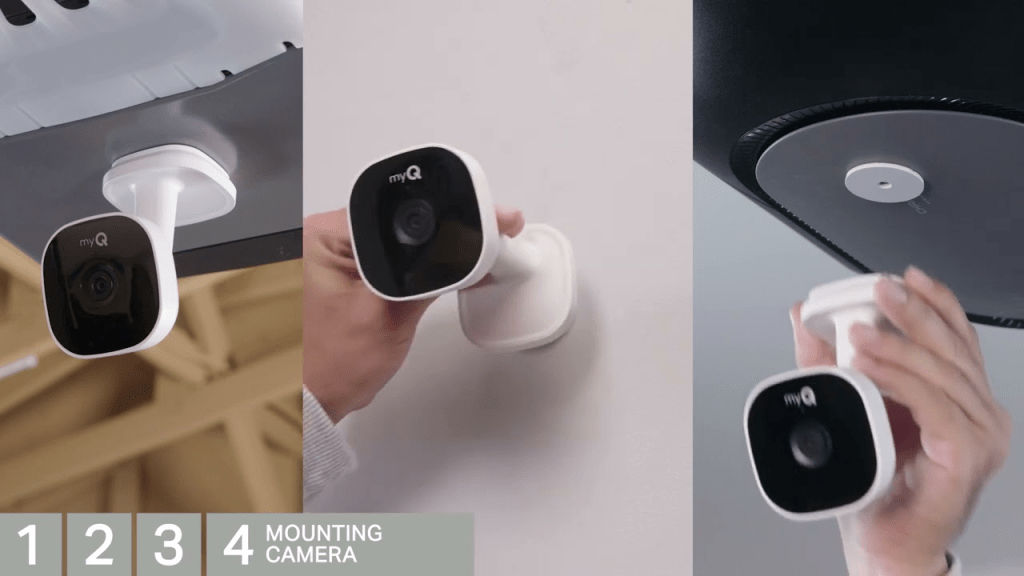
Step 3: Mount the Camera
- Follow manufacturer instructions.
- Use screws, brackets, or adhesive mounts included in the package.
- Keep the camera stable and level.
Step 4: Connect to Power
- Plug in the camera using the provided adapter or connect to an outlet.
- Some cameras may support battery operation for flexible placement.
Step 5: Configure in MyQ App
- Open the MyQ app on your smartphone.
- Navigate to “Add Device” → “Camera”.
- Follow on-screen prompts to pair the camera with your garage door opener.
- Test the live feed and adjust angle if necessary.
Step 6: Test Alerts and Notifications
- Ensure push notifications are enabled.
- Open and close your garage to confirm the camera records and sends alerts correctly.
Troubleshooting
| Issue | Cause | Solution |
|---|---|---|
| Camera won’t connect | Weak Wi-Fi | Move camera closer to router or use Wi-Fi extender |
| App cannot detect camera | Outdated firmware | Update MyQ app and camera firmware |
| Video feed lag | Network congestion | Reduce simultaneous streaming devices |
| Alerts not received | Notifications off | Enable alerts in MyQ app settings |
Expert Tips
- Mount cameras high for full coverage and security.
- Regularly clean the lens for optimal image clarity.
- Test the camera monthly to ensure functionality.
- Consider integrating with smart lights for enhanced security alerts.
- Check Wikipedia – Garage Door Opener for technical background on opener types.
FAQ Section
Q1: Can I add any camera to MyQ garage door opener?
A: Only cameras listed as MyQ-compatible or certified third-party devices can integrate fully with the app.
Q2: Do I need professional installation?
A: Most cameras are DIY-friendly, but ensure you follow safety and electrical guidelines.
Q3: Can I view the camera feed remotely?
A: Yes, the MyQ app allows real-time viewing from anywhere with internet access.
Q4: Will the camera work during a power outage?
A: Only if it has battery backup or is connected to a UPS system.
Q5: Can multiple users access the camera?
A: Yes, MyQ supports sharing access with multiple family members or trusted users.
Q6: How do I update camera firmware?
A: Updates are typically pushed via the MyQ app; check notifications for available updates.
Conclusion
Knowing how to add camera to MyQ garage door opener enhances your home’s security and convenience. By following these steps, you can monitor your garage, receive alerts, and integrate with smart home systems effectively. Share this guide with friends and family to help them secure their garages too!
Leave a Reply