A keyless entry garage door opener offers convenience and security for homeowners. However, there are times when you need to change the access code—whether for security reasons, after moving into a new home, or simply to update your system.
Changing the code on your keyless entry garage door opener might seem complicated, but with the right steps, it’s a straightforward process. In this guide, we’ll take you through everything you need to know about how to change the code on a keyless entry garage door opener quickly and efficiently.
Read too: How To Replace Garage Door Roller Like a Pro? Step-by-Step Guide
Why You Should Change Your Keyless Entry Garage Door Opener Code
Before we dive into the step-by-step process, let’s discuss why updating your garage door code is essential:
- Enhanced Security – Changing your code regularly helps prevent unauthorized access, especially if you’ve shared it with someone in the past.
- New Homeowners – If you’ve recently moved into a new house, the previous owners or their acquaintances may still have access.
- Forgotten or Shared Code – If you’ve shared the code with temporary guests or service personnel, it’s best to change it periodically.
- Malfunctioning Keypad – Sometimes, resetting the code can help fix issues with a malfunctioning keypad.
Now that we understand the importance of updating your garage door opener code, let’s get into the step-by-step guide.
How To Change Code On Keyless Entry Garage Door Opener
Different garage door opener brands have slightly different methods for changing the access code. However, the general process remains the same. Follow these steps to update your code safely and efficiently.
Step 1: Locate the Learn Button
Most garage door openers come with a “Learn” or “Program” button, which is key to resetting and updating the code. Here’s how to find it:
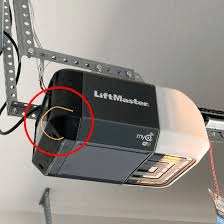
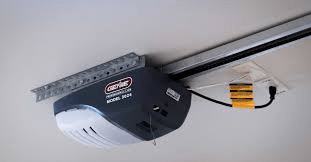
- Check the back or side of the garage door opener motor unit mounted on the ceiling of your garage.
- The Learn button is usually colored (yellow, red, purple, or green) and located near the antenna wire.
- Some models may require you to remove a light cover to access it.
Step 2: Erase the Old Code (If Necessary)
Before setting a new code, you may need to erase the existing one:
- Press and hold the Learn button for about 6–10 seconds.
- The LED light on the motor unit should turn off, indicating the old codes have been erased.
Step 3: Set Up a New Keyless Entry Code
Now that the old code is erased, follow these steps to enter a new one:
- Press the Learn Button – Once, until the LED light turns on.
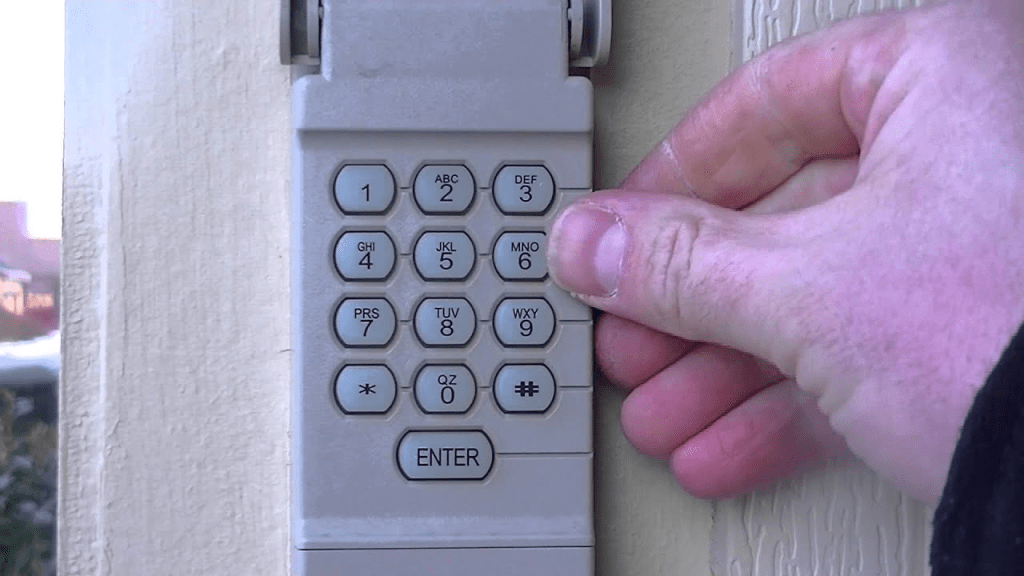
- Enter Your Desired Code – On the keypad outside your garage, type a new access code (usually 4 to 6 digits).
- Press the Enter Button – Depending on your garage door brand, you may need to press a confirmation button (such as Enter or OK).
- Wait for Confirmation – The garage door opener’s light may flash, or you may hear a click, indicating that the new code has been successfully saved.
Step 4: Test the New Code
After programming the new code, test it to ensure it works properly:
- Stand outside and enter the new code on the keypad.
- Press Enter and check if the garage door opens.
- If it doesn’t work, repeat the process carefully to ensure proper programming.
Troubleshooting Common Issues When Changing the Code
Sometimes, you might encounter issues while changing the code on your keyless entry garage door opener. Here are a few common problems and how to resolve them:
1. The New Code Isn’t Working
- Double-check that you followed the correct sequence.
- Ensure that the Learn button was pressed properly.
- Try resetting the code again from the beginning.
2. Keypad Isn’t Responding
- Check if the keypad’s battery needs replacement.
- Clean the keypad to remove dirt or debris.
- Ensure that the keypad is not exposed to extreme weather conditions.
3. The Garage Door Opener Light Doesn’t Blink After Programming
- Some models may not blink but will make a clicking sound instead.
- Try pressing and holding the Enter button a little longer.
How Often Should You Change Your Garage Door Keypad Code?
For security reasons, it’s a good practice to update your garage door keypad code every 6 months or whenever you suspect unauthorized access. If you frequently share your code with guests or service personnel, consider updating it more often.
Additional Security Tips for Your Garage Door
Besides changing the code, here are a few extra steps you can take to enhance your garage security:
- Use a Rolling Code Opener – This type of system generates a new code every time the opener is used, making it harder to hack.
- Keep the Keypad Clean – Worn-out buttons may indicate frequently used numbers, making it easier for someone to guess your code.
- Cover Your Keypad When Entering the Code – Prevent strangers from seeing your code while you enter it.
- Disable the Keypad Temporarily – If you’re going on vacation, consider turning off the keypad.
- Install a Security Camera – Having a camera near your garage entryway can help deter unauthorized access.
Final Thoughts
Knowing how to change the code on a keyless entry garage door opener is crucial for maintaining security and convenience. Whether you’re updating the code for personal safety, after moving into a new home, or simply as a precaution, the process is simple and effective.
By following the step-by-step guide above, you can easily reset your garage door keypad and ensure your home remains secure. Always test the new code after setting it up and troubleshoot any potential issues to guarantee smooth operation.
If you’re still facing difficulties, consult your garage door opener’s user manual or contact the manufacturer for additional support. Stay safe and keep your home protected!
Leave a Reply