Programming a garage door opener is usually a straightforward task, but what if your system doesn’t have the typical “Learn” button? You may be wondering how to program a garage door opener without the Learn button. This can happen with older models or certain types of openers, and it can seem tricky at first. However, there are several methods you can use to program your opener even without this feature.
In this guide, we’ll cover everything you need to know about programming your garage door opener when the Learn button isn’t available, providing clear, step-by-step instructions. Whether you’re replacing a remote or reprogramming your system, this article will make the process easy to understand.
Read too: The Complete Guide to Tighten Chain On Garage Door Opener for Smooth Operation
Understanding Garage Door Opener Programming Without a Learn Button
Before we get into the actual programming steps, it’s important to understand why some garage door openers lack a Learn button and how the system works without it.
Most modern garage door openers include a Learn button as part of the programming process. This button allows you to sync a remote control or keypad to the opener with just a few simple steps. However, older models or certain brands of openers may not have this button, which can make programming seem like a challenge. Instead of a Learn button, these systems may require programming via dip switches, keypads, or manual wiring connections.
No need to worry, though – even without the Learn button, it’s possible to sync your garage door opener with your remote. The method used will depend on the specific model of your opener, and this guide will cover some of the most common techniques used for such situations.
How To Program A Garage Door Opener Without Learn Button: Step-by-Step Guide
Programming your garage door opener without the Learn button can be done in a few different ways, depending on your specific opener type. Here are the most common methods:
Method 1: Using Dip Switches to Program Your Garage Door Opener
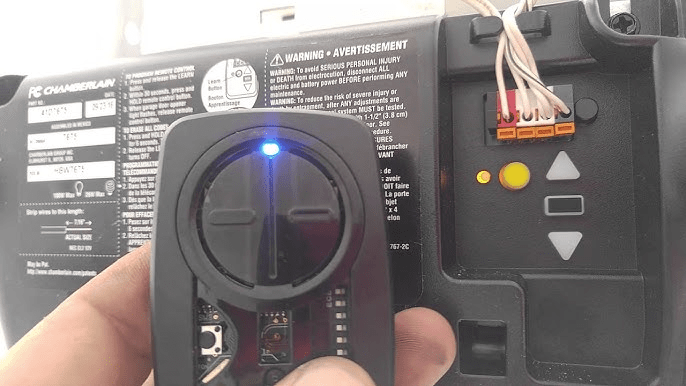
If your garage door opener was made before the widespread use of Learn buttons, it’s likely that your system uses dip switches. Dip switches are small switches found inside both the garage door opener and the remote, which allow you to manually set a matching code. Here’s how you can program your garage door opener using dip switches:
- Locate the Dip Switches: The first step is to find the dip switches on both your garage door opener and your remote control.
- For the opener, you’ll need to open the unit, which is typically mounted on the ceiling of your garage. Look for a small compartment that houses the dip switches.
- For the remote, remove the back cover to access the dip switches.
- Set the Dip Switches:
- Each dip switch has two positions: “on” and “off.” You’ll need to set the dip switches on both the opener and the remote to the same configuration. Typically, you will align them in a specific pattern.
- For example, if you have 10 switches, you might set switches 1, 5, and 9 to “on” and the others to “off.” Make sure the pattern on the remote matches the one set on the opener exactly.
- Close the Units: After adjusting the dip switches on both the remote and opener, replace the covers and secure them.
- Test the Remote: Press the button on the remote to check if the opener responds. If it does, your system has been successfully programmed.
Method 2: Using Keypad Programming
If your garage door opener doesn’t have a Learn button and also doesn’t use dip switches, it may be possible to program your opener via a keypad. Many garage door openers can be programmed using a wired or wireless keypad. Here’s how you can program a garage door opener using a keypad:
- Locate the Keypad: Keypads are often mounted on the outside of your garage, near the door frame. If your opener is keypad-compatible, you should find a small numeric keypad.
- Enter the Programming Mode: On the keypad, there will usually be a button to enter programming mode. This could be labeled as “Program” or “Set.” If your keypad doesn’t have a dedicated button for this, you may need to press and hold a certain key combination (refer to your opener’s manual for the exact method).
- Enter the Code: You’ll need to enter a code on the keypad to sync it with your opener. This is usually a four- or six-digit code that’s unique to your opener. After entering the code, the garage door should respond by opening or closing.
- Test the Keypad: Once the programming is complete, test the keypad by entering the code and pressing the appropriate button to open or close the door.
Method 3: Manual Programming Without a Learn Button (For Older Openers)
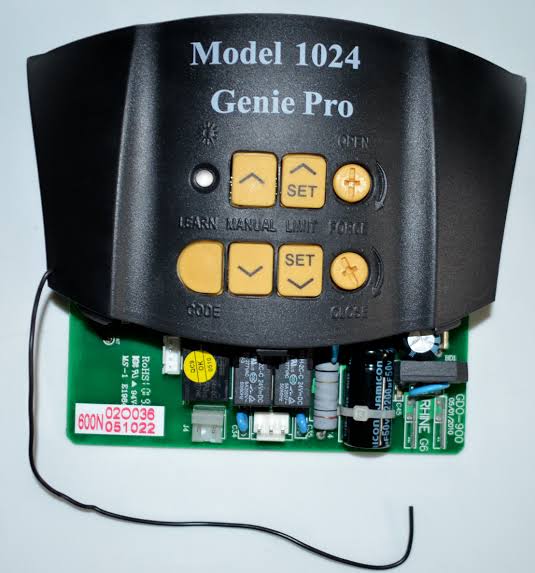
For even older models, some garage door openers lack both a Learn button and dip switches. In these cases, programming may require a more manual approach. Here’s a general guide on how to manually program your opener:
- Turn off the Power: Before beginning any manual setup, make sure the garage door opener is powered off. This is a safety precaution to prevent any accidents.
- Locate the Programming Port: Many older openers have a programming port located near the motor unit. This is where you can plug in your remote or keypad to sync the devices.
- Connect the Remote to the Programming Port: Insert the remote or keypad into the programming port. The remote should now be connected to the opener unit.
- Activate the Motor Unit: Power up the opener, and it should automatically sync with the remote or keypad. You may hear a beep or see a flashing light as the devices communicate.
- Test the Remote: Once the programming is complete, test the remote by pressing the button. The door should either open or close depending on your settings.
Method 4: Reprogramming Using Wired Remote Controls
Some older garage door openers that don’t feature a Learn button rely on wired remotes that are directly connected to the opener. In this case, programming is done by wiring the remote control into the opener’s motor unit. Here’s how to do it:
- Locate the Remote Wiring Port: The first step is to find the wiring port on your garage door opener. This port is often located near the motor or control panel.
- Connect the Remote: Plug the wired remote into the port. The remote should come with a cable that is compatible with the opener’s wiring system.
- Test the System: Once connected, press the button on the remote. The door should open or close, indicating the remote is successfully programmed.
Troubleshooting: Common Issues When Programming a Garage Door Opener Without Learn Button
Even with these methods, it’s possible to encounter a few problems when programming your garage door opener. Here are some common issues and how to resolve them:
1. Opener Doesn’t Respond
- Solution: Double-check that the dip switches, keypad, or remote code match exactly between the opener and the remote.
- Ensure the opener’s power is on and the batteries in the remote are functional.
2. Remote Doesn’t Work After Programming
- Solution: If using dip switches, make sure the remote and opener both have matching switch positions. Also, check the battery in the remote to ensure it’s not dead.
3. Programming Doesn’t Take
- Solution: Some older models may require you to reset the opener’s settings before programming it again. You can typically do this by unplugging the opener for 30 seconds, then trying the programming steps again.
Why You Might Need to Program a Garage Door Opener Without a Learn Button
The Learn button is a convenient feature, but it’s not available on every garage door opener model. Older models, for example, often use dip switches or keypads to sync with remotes, and there may be a need to manually wire remotes or enter specific programming codes. Understanding how to program a garage door opener without a Learn button allows you to take full control of your opener setup and ensure it functions smoothly.
Conclusion: Successfully Program Your Garage Door Opener Without a Learn Button
Programming your garage door opener without a Learn button is certainly possible, even though it may require a bit more effort. By following the appropriate method – whether through dip switches, a keypad, or manual programming – you can easily sync your remote or keypad with your opener. Just remember to ensure that your dip switches match between the opener and the remote, check that all connections are secure, and test the system after programming.
With the information provided in this guide, you should now have the knowledge to successfully program your garage door opener, even without a Learn button.
Leave a Reply