In the realm of home security, the garage door plays a pivotal role in safeguarding your property. Understanding how to program your garage door opener is crucial for ensuring smooth and secure access. In this guide, we will walk you through the steps on “How To Program Garage Door Opener Overhead Door,” demystifying the process and empowering you to take control of your home’s security with confidence.
How To Program Garage Door Opener Overhead Door: A Step-by-Step Guide
Setting the Stage: How To Program Garage Door Opener Overhead Door
Before we delve into the specifics, it’s essential to understand that the process of programming a garage door opener may vary slightly depending on the model and brand. However, for the purpose of this guide, we’ll focus on a general step-by-step approach that applies to many Overhead Door garage door openers.
1. Gather Necessary Information
Before you start the programming process, gather essential information. This typically includes the garage door opener’s model number, which can usually be found on the motor unit, and your garage door remote.
2. Access the Garage Door Opener Controls
Locate the motor unit of your Overhead Door garage door opener. This is usually mounted on the ceiling of the garage. Once located, find the “Learn” or “Program” button on the motor unit. This button is crucial for initiating the programming mode.
3. Clear Existing Codes (If Needed)
If you are reprogramming your garage door opener or experiencing issues with the existing codes, it’s a good practice to clear out the memory. Press and hold the “Learn” or “Program” button until the indicator light on the motor unit turns off, signifying that the existing codes have been cleared.
4. Initiate Programming Mode
Press the “Learn” or “Program” button once again, and you should see an indicator light turn on. This indicates that the garage door opener is now in programming mode, ready to learn new codes.
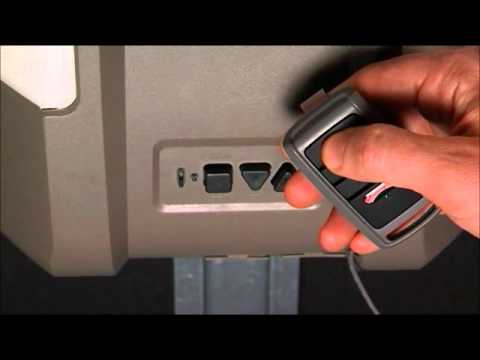
5. Program Your Remote Control
Hold your garage door remote close to the motor unit and press the button you wish to use to operate the door. Hold the button down until you see the indicator light on the motor unit flash, confirming that the remote control has been successfully programmed.
6. Test the Remote Control
To ensure successful programming, test the remote control by pressing the programmed button. The garage door should respond by opening or closing. If it does, congratulations – you’ve successfully programmed your garage door opener.
7. Program Additional Remotes (Optional)
If you have multiple remotes or want to program additional devices, repeat the process with each remote. Each successfully programmed device will have its own designated button on the remote control.
8. Program the Wall Console (Optional)
In some cases, you may want to program the wall console in your garage. Follow similar steps by locating the “Learn” or “Program” button on the console, initiating programming mode, and then pressing the desired button to program it.
9. Finalize Programming
Once you have programmed all your devices, press the “Learn” or “Program” button one more time to exit programming mode. The indicator light should turn off, indicating that the garage door opener is now ready for regular use.
Troubleshooting Tips: How To Program Garage Door Opener Overhead Door
- If the programming process is unsuccessful, double-check that you are following the correct steps for your specific garage door opener model.
- Ensure that the remote control batteries are fresh and properly installed.
- Clear out any interference by removing nearby electronic devices or appliances that may disrupt the signal.
Read too: How To Program Your Overhead Door Garage Door Opener with Ease? Mastering Convenience
Additional Tips for Optimal Performance
- Regularly check and replace the batteries in your remote controls to maintain consistent performance.
- Keep the area around the garage door sensors clean and free from obstructions for reliable operation.
- Consult your garage door opener’s user manual for model-specific instructions and troubleshooting guidance.
Conclusion: Securing Your Home with Confidence
Knowing “How To Program Garage Door Opener Overhead Door” is an empowering skill that contributes to the overall security of your home. By following these step-by-step instructions and incorporating the additional tips provided, you can ensure that your garage door operates smoothly and securely, providing you with peace of mind and convenience in your daily life.


Leave a Reply