If your garage door wall button is cracked, unresponsive, or needs replacing, you’re not alone. Many homeowners search for how to remove Chamberlain garage door opener wall button because the process looks intimidating at first glance.
The good news? With the right steps and basic tools, this task is simple, safe, and beginner-friendly—even if you’ve never worked on a garage door system before.
Read too: Mastering Quantum Garage Door Opener Programming: A Comprehensive Guide
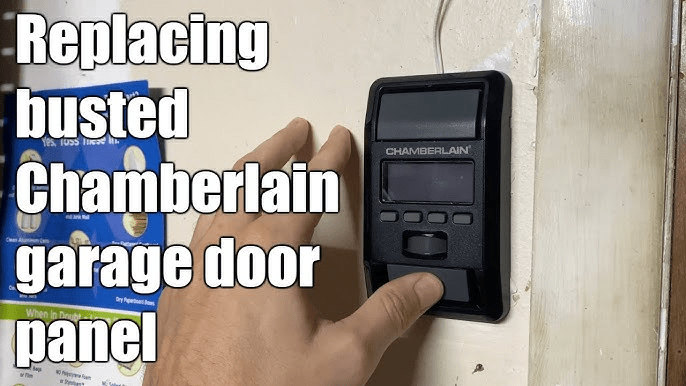
What Is a Chamberlain Garage Door Opener Wall Button?
The wall button (also called a wall control or wall console) is the indoor switch that lets you open, close, and lock your garage door. Depending on the model, it may include:
- Open/close button
- Lock/vacation mode
- Light control
- Motion sensor (newer models)
Chamberlain wall buttons are low-voltage devices, which makes them safer to handle than many other home electrical components.
Why Would You Need to Remove the Wall Button?
Homeowners usually remove the wall button for one of these reasons:
- The button no longer responds
- You are upgrading to a smart wall control
- The plastic housing is cracked or yellowed
- You’re repainting or remodeling the wall
- Wiring behind the button is damaged
According to garage door service professionals, wall control issues account for nearly 25% of “garage door won’t open” service calls, even when the motor itself is working fine.
Is It Safe to Remove a Chamberlain Wall Button Yourself?
Yes. Chamberlain wall buttons operate on low-voltage wiring (typically 12–24 volts). While they are much safer than standard household wiring, basic precautions are still important:
- Turn off power to the opener
- Avoid pulling on exposed wires
- Label wires if you plan to reinstall
For most homeowners, this is a 10–15 minute DIY task.
Tools You Will Need
You do not need professional equipment. Prepare these items:
| Tool | Purpose |
|---|---|
| Flathead screwdriver | Pry off wall button cover |
| Phillips screwdriver | Remove mounting screws |
| Voltage tester (optional) | Extra safety check |
| Masking tape | Label wires |
| Small container | Hold screws |
How To Remove Chamberlain Garage Door Opener Wall Button (Step-by-Step)
Step 1: Disconnect Power to the Garage Door Opener
Unplug the garage door opener from the ceiling outlet.
If it’s hardwired, turn off the corresponding breaker.
👉 This prevents accidental door movement and protects the opener’s circuit board.
Step 2: Identify Your Wall Button Type
Chamberlain wall buttons generally fall into two categories:
- Basic push-button control
- Smart or multi-function wall control (with lock, light, or motion sensor)
Knowing the type helps you understand how the cover is attached.
Step 3: Remove the Wall Button Cover
Most Chamberlain wall buttons use a snap-on or slide-off faceplate.
- Insert a flathead screwdriver gently into the bottom seam
- Twist lightly to pop the cover loose
- Pull the cover straight off
⚠️ Do not force it—excess pressure can crack the plastic.
Step 4: Unscrew the Wall Button Base
Once the cover is off, you’ll see 1–2 mounting screws.
- Use a Phillips screwdriver
- Turn counterclockwise
- Place screws in a safe container
The wall button base should now pull slightly away from the wall.
Step 5: Disconnect the Low-Voltage Wires
Behind the button, you’ll see two thin wires (usually white and red).
- Note their positions or take a photo
- Loosen terminal screws or press release tabs
- Gently pull wires free
💡 Use masking tape to label wires if reinstalling later.
Step 6: Remove the Wall Button Completely
With wires disconnected, lift the wall button off the wall.
You’ve now successfully completed the removal.
What Do the Wires Do? (Quick Explanation)
| Wire | Function |
|---|---|
| Red | Signal to open/close |
| White | Common/return wire |
These wires send a simple signal—not power—to the opener motor.
Common Mistakes to Avoid
- ❌ Pulling wires instead of loosening terminals
- ❌ Forgetting to disconnect power
- ❌ Mixing up wire placement during reinstallation
- ❌ Over-tightening screws on a new wall button
Avoiding these mistakes prevents unnecessary repairs.
Can You Remove the Wall Button Without Turning Off Power?
Technically yes—but strongly not recommended.
While low-voltage systems rarely cause shock, live wiring can:
- Short the opener circuit
- Trigger unintended door movement
- Damage the wall control
Turning off power takes less than 30 seconds and adds a big safety margin.
Kelebihan vs Kekurangan: DIY Wall Button Removal
Pros
- Saves service fees
- Fast and simple
- No special skills required
- Easy upgrade opportunity
Cons
- Risk of wiring confusion
- Cosmetic wall damage if rushed
- May reveal hidden wiring issues
When Should You Call a Professional?
Consider professional help if:
- Wires are brittle or damaged
- The wall button wiring disappears into the wall
- The opener still fails after replacement
- Your unit is under warranty and requires authorized service
Upgrading After Removal: Is It Worth It?
Many homeowners replace old buttons with smart wall controls. Benefits include:
- Motion-activated lighting
- Lock mode for security
- Compatibility with smart home systems
Industry surveys show that smart wall controls reduce accidental garage openings by over 30% in households with children.
Brand Trust & Authority
Chamberlain is one of the most recognized garage door opener manufacturers in the U.S., known for reliability and safety features. For general background on the company and its product ecosystem, you can reference Wikipedia.org (Chamberlain Group).
Troubleshooting After Wall Button Removal
If your garage door doesn’t work after reinstalling:
- Double-check wire connections
- Ensure terminals are tight
- Test remote control functionality
- Reset the opener by unplugging for 60 seconds
If remotes work but the wall button doesn’t, the issue is almost always wiring-related.
FAQ: Chamberlain Wall Button Removal
Q1: Do all Chamberlain wall buttons remove the same way?
Most follow the same basic process, but smart wall controls may have hidden clips or additional screws.
Q2: Are wall button wires dangerous?
No. They are low-voltage, but power should still be disconnected for safety.
Q3: Can I replace a basic wall button with a smart one?
Yes, as long as your opener model supports it.
Q4: Why does my garage door work with the remote but not the wall button?
This usually indicates a faulty wall control or loose wiring.
Q5: Can I leave the wall button disconnected?
Yes, but you’ll lose indoor control and safety lock features.
Q6: How long does wall button removal take?
For most homeowners, 10–15 minutes from start to finish.
Conclusion
Knowing how to remove Chamberlain garage door opener wall button gives you control over a common household repair without unnecessary service calls. With basic tools, clear steps, and careful handling, this task is safe, quick, and empowering.
If this guide helped you, share it on social media so other homeowners can fix their garage door issues with confidence. Small DIY wins make a big difference.


Leave a Reply