If you’re searching for answers because My Garage Door Opener Light Will Not Turn On, you’re likely dealing with a dark garage and a bit of frustration. The opener works, the door moves—but the light stays off.
The good news? In most cases, this issue is electrical but minor. With a systematic approach, you can diagnose and often fix it yourself.
Let’s walk through the exact causes and practical solutions.
Read too: Mastering Quantum Garage Door Opener Programming: A Comprehensive Guide
Why My Garage Door Opener Light Will Not Turn On
When homeowners report “My Garage Door Opener Light Will Not Turn On,” the problem typically falls into one of these categories:
- Burned-out or incompatible bulb
- Faulty light socket
- Loose wiring
- Logic board failure
- Disabled light timer setting
Modern openers combine mechanical movement with electronic circuitry. To understand how these components integrate, you can review how a garage door opener system works.
According to home service industry reports, over 40% of garage opener light issues are bulb-related, not circuit board failures. That’s encouraging.
Let’s diagnose step by step.
1. Is the Light Bulb Burned Out or Incompatible?
The Simplest Cause First
Garage door openers vibrate significantly. Standard incandescent bulbs often fail prematurely in this environment.
Signs It’s Just the Bulb:
- Door operates normally
- No flickering
- No clicking sound from light relay
Step-by-Step Bulb Check
- Unplug the opener.
- Remove the light cover.
- Unscrew the bulb.
- Inspect for:
- Broken filament
- Darkened glass
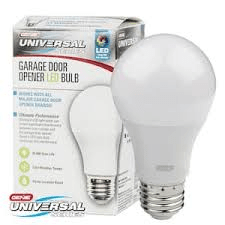
- Replace with:
- Vibration-resistant LED bulb
- 60W max equivalent
- Temperature-rated for garages
💡 Use bulbs labeled “garage door opener compatible.” Some LED bulbs interfere with opener frequencies.
2. Could the Light Socket Be Damaged?
If replacing the bulb doesn’t fix it, inspect the socket.
Warning Signs:
- Bulb base feels loose
- Visible corrosion
- Burn marks inside socket
How to Inspect Safely:
- Disconnect power completely.
- Use a flashlight.
- Look inside the socket.
- Gently press the metal contact tab upward with a non-metal tool.
If the tab is flattened, the bulb may not connect properly.
⚠️ If you see melted plastic, socket replacement is required.
3. Is the Light Timer or Motion Feature Disabled?
Many modern openers include:
- Adjustable light timers (1–5 minutes)
- Motion sensor activation
- Smart app controls
Sometimes the light feature gets disabled unintentionally.
Reset Procedure:
- Unplug the opener.
- Wait 60 seconds.
- Plug back in.
- Press and hold the wall console light button for 10 seconds.
Consult your specific model manual for exact steps.
4. Could the Logic Board Be Failing?
If:
- The bulb is new
- The socket is intact
- No timer issue exists
The problem may be the logic board.
The logic board controls both door movement and lighting circuits. It acts like the system’s brain.
Signs of Logic Board Failure:
- Intermittent light function
- Burn smell
- Visible scorch marks
- Other electronic glitches
According to repair data, logic board replacement accounts for 15–20% of advanced opener repairs.
5. Are There Wiring Issues?
Internal wiring may loosen due to vibration over years of operation.
Inspection Checklist:
- Check wire harness connections
- Look for pinched wires
- Inspect solder points (if accessible)
This step may require partial housing removal. If unsure, consult a technician.
Troubleshooting Comparison Table
| Symptom | Likely Cause | DIY Safe? |
|---|---|---|
| No light at all | Burned bulb | Yes |
| Flickering | Loose socket | Yes |
| Light works intermittently | Logic board | Maybe |
| Light never activates | Timer disabled | Yes |
| Burn smell | Electrical damage | No |
LED vs Incandescent: Which Is Better?
LED Advantages
- Longer lifespan (15,000–25,000 hours)
- Energy efficient
- Less heat
LED Disadvantages
- Some models cause radio interference
- Higher upfront cost
Incandescent Advantages
- Lower cost
- Guaranteed compatibility
Incandescent Disadvantages
- Shorter lifespan
- Sensitive to vibration
For most homeowners, vibration-rated LED bulbs are the best long-term solution.
How Much Does Repair Cost?
| Repair Type | Average Cost |
|---|---|
| Bulb replacement | $5–$15 |
| Socket repair | $50–$100 |
| Logic board replacement | $120–$250 |
| Full opener replacement | $300–$800 |
If the opener is over 15 years old, replacement may be more cost-effective.
When Should You Call a Professional?
Call for service if:
- You see burn damage
- The circuit board smells burnt
- Wiring appears melted
- Multiple electronic functions fail
Electrical repairs require caution.
FAQ Section
Why does my garage door opener work but the light doesn’t?
Most likely a burned-out bulb or damaged socket. Door movement and lighting circuits are separate systems.
Can I use any LED bulb in my garage door opener?
Not always. Use bulbs labeled garage-door-compatible to avoid radio interference.
How long should a garage opener light bulb last?
Standard bulbs last 1–2 years in high-vibration environments. LED versions may last 5+ years.
Is a faulty opener light dangerous?
Usually not immediately dangerous. However, burn marks or melted plastic indicate electrical risk.
Can I replace the light socket myself?
If comfortable with minor electrical work, yes. Always disconnect power first.
Does resetting the opener fix lighting problems?
Sometimes. A reset can restore light timer functions or clear minor electronic glitches.
Conclusion
If you’re dealing with My Garage Door Opener Light Will Not Turn On, start simple. Check the bulb. Inspect the socket. Reset the system.
Most cases are minor and inexpensive to fix. Only a small percentage require logic board replacement.
Addressing the issue early prevents bigger electrical problems later.
If this guide helped you restore light to your garage, share it with someone facing the same issue—or save it for future troubleshooting.

Leave a Reply