If your garage door opener has started making slapping noises, jerking during operation, or failing to open smoothly, you may be wondering How To Tighten Belt On Chamberlain Garage Door Opener. This is a very common issue, especially on belt-drive models that have been in service for several years.
The good news is that tightening the belt is usually simple, safe, and inexpensive. In this detailed guide, you’ll learn exactly how to do it step by step, how tight the belt should be, what mistakes to avoid, and when tightening is no longer enough and replacement is needed.
What Is a Belt-Drive Chamberlain Garage Door Opener?
A belt-drive garage door opener uses a reinforced rubber or polyurethane belt to move the garage door along the rail. Chamberlain belt-drive models are popular because they are quieter and smoother than chain-drive systems, making them ideal for attached garages.
Read too: Why Are My Garage Doors Opening By Themselves? Troubleshooting Guide
Chamberlain openers are manufactured by the Chamberlain Group and are widely used in residential homes across the U.S.
For general background on how garage door openers work, you can also reference:
https://en.wikipedia.org/wiki/Garage_door_opener
Why Does the Belt Become Loose Over Time?
Understanding the cause helps you prevent future problems.
Common reasons belt tension decreases:
- Normal wear and stretching
- Temperature changes (heat causes expansion)
- Frequent daily use
- Improper initial tension
- Vibration from repeated cycles
Industry note: Most belt-drive openers experience noticeable belt stretch within the first 2–5 years of use.
Signs the Belt Needs Tightening
Before adjusting anything, confirm that belt tension is the real issue.
Common symptoms include:
- Slapping or flapping noise from the rail
- Door hesitates or jerks when starting
- Opener runs but door moves inconsistently
- Belt visibly sags along the rail
- Increased vibration during operation
If you see excessive slack in the belt, tightening is usually the solution.
Is It Safe to Tighten the Belt Yourself?
Yes—this is one of the safest garage door opener maintenance tasks for homeowners.
Why it’s relatively safe:
- No high-tension springs involved
- No need to remove the motor
- Adjustment is external and mechanical
That said, basic safety steps must still be followed.
Safety Precautions Before You Start
Never skip safety, even for a simple adjustment.
Do this first:
- Unplug the garage door opener from the outlet
- Close the garage door fully
- Pull the red emergency release cord
- Use a stable ladder
Important: Never adjust the belt while the opener is powered.
Tools You’ll Need
Most homeowners already have what’s required.
Basic tools:
- 7/16” or 1/2” wrench (model dependent)
- Adjustable wrench (optional)
- Step ladder
- Flashlight
No power tools are needed.
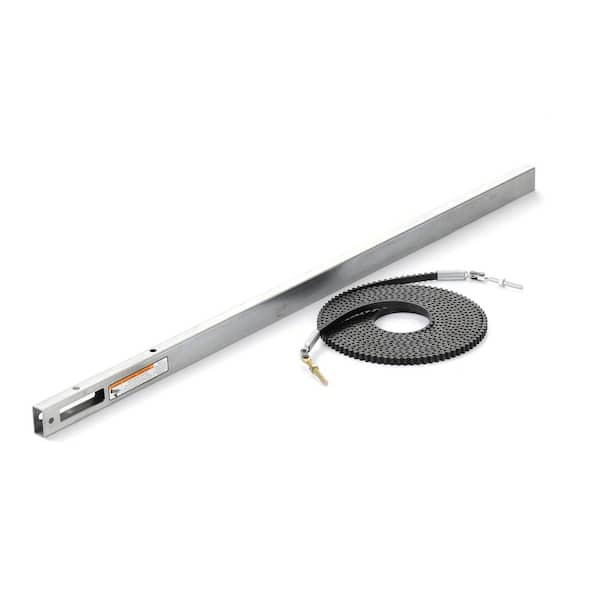
Step 1: Locate the Belt Tension Assembly
The belt tension adjustment is usually found near the motor unit, not on the door end.
Look for:
- A threaded tension rod
- A locking nut
- A spring or trolley assembly
This assembly controls how tight the belt sits along the rail.
Step 2: Identify the Correct Adjustment Nut
Most Chamberlain belt-drive models use:
- One adjustment nut to tighten or loosen
- One locking nut to hold tension in place
Tip:
The adjustment nut is usually closer to the trolley, while the locking nut sits behind it.


4
Step 3: Tighten the Belt Gradually
Now comes the actual adjustment.
How to tighten properly:
- Hold the tension rod steady if required
- Turn the adjustment nut clockwise
- Tighten in ¼-turn increments
- Stop and visually check belt tension
Do not overtighten. More tension is not better.
How Tight Should the Belt Be?
This is one of the most important questions.
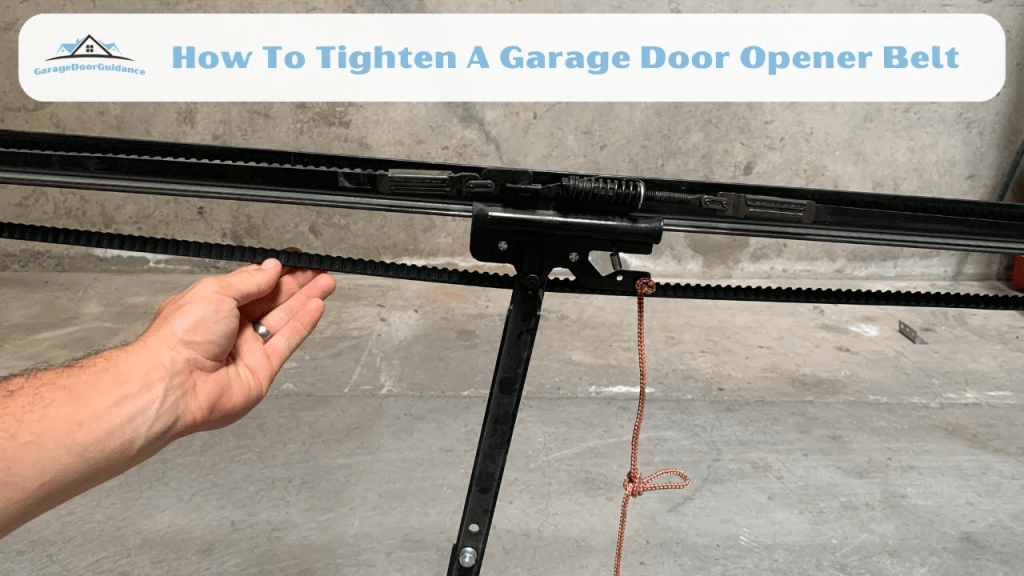
Correct belt tension:
- The belt should be taut but flexible
- No visible sag along the rail
- You should be able to press the belt slightly with your finger
- It should not look stretched like a guitar string
Rule of thumb: If the belt is too tight, it can damage the motor bearings and shorten opener lifespan.
Step 4: Secure the Locking Nut
Once proper tension is reached:
- Hold the adjustment nut in place
- Tighten the locking nut against it
- Ensure both nuts are snug—not forced
This prevents the belt from loosening again due to vibration.
Step 5: Reconnect the Door and Restore Power
Now it’s time to test your work.
Testing steps:
- Re-engage the trolley (pull release cord toward opener)
- Plug the opener back in
- Run the opener without the door first (listen)
- Run a full open/close cycle with the door
Watch and listen carefully.
What to Listen and Look For During Testing
Good signs:
- Smooth, quiet movement
- No slapping or rattling noise
- Even door travel
- No jerking or hesitation
Warning signs:
- High-pitched whining (too tight)
- Motor strain
- Jerky movement
If you notice warning signs, loosen the belt slightly.
Common Mistakes to Avoid
Many DIY problems come from overcorrection.
Avoid these errors:
- Overtightening the belt
- Skipping the locking nut
- Adjusting with power connected
- Using power tools
- Ignoring unusual motor sounds
Slow and gradual adjustment always works best.
How Often Should You Check Belt Tension?
Belt tension doesn’t need constant adjustment.
Recommended schedule:
- Inspect every 6–12 months
- Check after major temperature changes
- Inspect if noise suddenly increases
Regular inspection prevents premature belt failure.
When Tightening Is NOT Enough
Sometimes tightening won’t solve the problem.
Belt replacement may be needed if:
- Belt shows cracks or fraying
- Teeth are missing
- Belt slips even when tight
- Opener is more than 10–12 years old
In these cases, tightening is only a temporary fix.
Belt Drive vs Chain Drive: Tension Comparison
| Feature | Belt Drive | Chain Drive |
|---|---|---|
| Noise level | Very quiet | Noisy |
| Maintenance | Low | Moderate |
| Stretch over time | Yes | Minimal |
| Adjustment ease | Easy | Moderate |
This explains why belt tightening is more common than chain adjustment.
Does Tightening the Belt Improve Opener Lifespan?
Yes—when done correctly.
Benefits include:
- Reduced motor strain
- Smoother operation
- Less vibration
- Lower wear on internal gears
Proper tension protects both the belt and the motor.
Frequently Asked Questions (FAQ)
How To Tighten Belt On Chamberlain Garage Door Opener Safely?
Unplug the opener, locate the tension nut near the motor, tighten in small increments, and test before finalizing.
How Long Does Belt Adjustment Take?
For most homeowners, 10–20 minutes is typical.
Can a Loose Belt Damage the Opener?
Yes. A loose belt can cause jerking, vibration, and premature wear on the motor and drive system.
Is It Bad to Overtighten the Belt?
Absolutely. Overtightening can damage motor bearings and shorten the opener’s lifespan.
How Do I Know If I Need a New Belt Instead?
If the belt is cracked, frayed, missing teeth, or still slips after adjustment, replacement is the better option.
Conclusion
Learning how to tighten belt on Chamberlain garage door opener is a simple but powerful maintenance skill for homeowners. With the right tools, careful adjustments, and proper testing, you can restore quiet operation, reduce strain on the motor, and extend the life of your opener.
Always remember: tight enough is better than too tight. Small, precise adjustments make the biggest difference.
If this guide helped you, share it on social media so other homeowners can keep their garage door openers running smoothly and quietly.
Leave a Reply