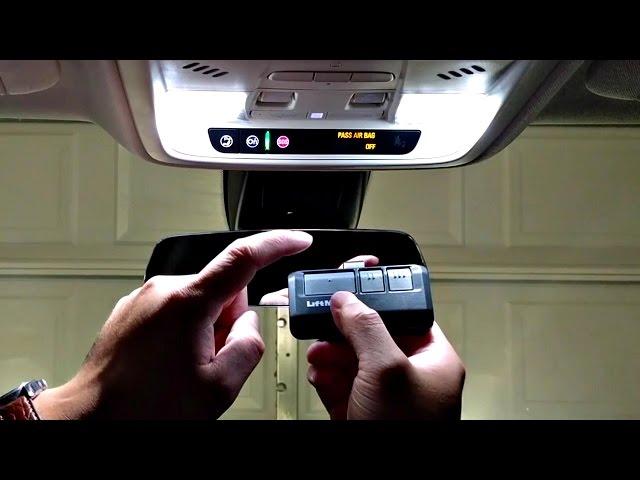
Have you ever pulled into your driveway, pressed the button in your car, and… nothing happened? It is a frustrating experience that many drivers face when their vehicle’s built-in garage door remote loses its connection or needs reprogramming. If you are wondering how to program garage door opener in car LiftMaster, you are not alone. This guide will walk you through the process clearly and safely, ensuring you can open your garage with just a push of a button again.
Why Programming Your Car Remote Matters
Modern vehicles often come equipped with integrated garage door openers, such as HomeLink, VisorClip, or manufacturer-specific systems. These features offer convenience and security by eliminating the need for separate remotes. However, setting them up correctly is crucial. According to a 2023 consumer survey by Consumer Reports, nearly 40% of users struggle with initial setup or reprogramming after battery changes or vehicle updates.
For LiftMaster openers—one of the most popular brands in the US—compatibility is generally high, but the programming steps vary depending on your car’s system and the opener model. Understanding these differences saves time and prevents unnecessary service calls.
Step 1: Identify Your Car’s Built-In System
Before starting, determine which type of integrated remote your car uses. The three most common systems are:
- HomeLink: Found in many Ford, Honda, Toyota, and Chrysler vehicles.
- VisorClip: A universal clip-on remote often used in older models.
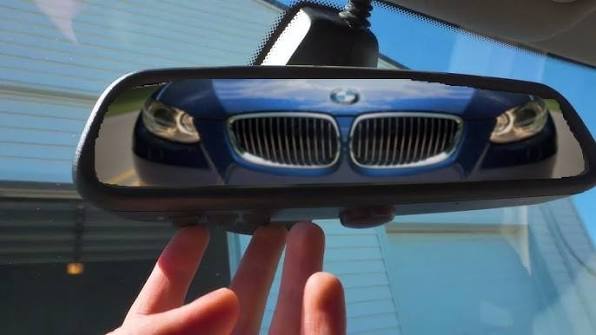
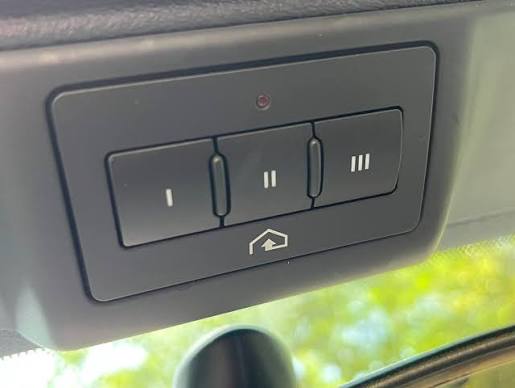
- Manufacturer-Specific Systems: Such as BMW’s Universal Garage Door Opener or Mercedes’ Homelink-compatible system.
Check your vehicle’s owner manual for specific instructions. If unavailable, look for buttons labeled “HomeLink,” “Garage,” or icons resembling a garage door on your visor or overhead console.
Step 2: Locate the Learn Button on Your LiftMaster Opener
Every LiftMaster garage door opener has a “Learn” button (sometimes called “Smart” or “Program”). This button is typically located on the back or side of the motor unit, near the antenna wire. The color of the button varies by model:
| LiftMaster Model Series | Learn Button Color | Frequency |
|---|---|---|
| Security+ 2.0 | Yellow | 315 MHz |
| Security+ | Purple | 390 MHz |
| Older Models | Red/Orange | 315 MHz |
Note: If your opener was manufactured after 2011, it likely uses Security+ 2.0 technology, which offers enhanced encryption and rolling codes for better security.
Pressing this button puts the opener into programming mode, allowing it to recognize your car’s remote signal. For more technical details on rolling code technology, you can refer to Wikipedia’s article on rolling codes.
Step 3: Clear Existing Codes (If Necessary)
If your car previously worked with another garage door opener, or if you are replacing an old remote, clear the existing memory first:
- Press and hold the two outer buttons on your car’s HomeLink system for 10–20 seconds until the indicator light flashes slowly.
- Release the buttons. The slow flash confirms the memory is cleared.
This step ensures no conflicting signals interfere with the new programming.
Step 4: Program the Car Remote to LiftMaster
Follow these precise steps to sync your car with the LiftMaster opener:
- Park your car outside the garage, within 5–10 feet of the opener motor. Keep the engine running or the ignition in “Accessory” mode to maintain power.
- Press the Learn button on the LiftMaster opener. The indicator light will turn on or blink, signaling it is ready to receive a signal.
- Within 30 seconds, press and hold the desired button on your car’s HomeLink system. Hold it for 2–3 seconds, then release. Repeat this press-and-release cycle 2–3 times.
- Observe the opener’s light. It should blink or turn off, indicating successful programming. Test the button by pressing it again—the garage door should activate.
Tip: If the door does not respond, repeat the process. Ensure you are pressing the Learn button first, then the car button within the 30-second window.
Step 5: Test and Troubleshoot
After programming, test the remote from various distances. If it fails:
- Check the batteries in your car key fob (if applicable).
- Ensure no interference from LED lights, Wi-Fi routers, or other electronics near the opener.
- Reprogram using the “dip switch” method if your opener is an older model with physical switches. Match the switch positions on the remote to those on the opener.
Common issues include signal obstruction, outdated firmware, or incompatible frequencies. LiftMaster supports both 315 MHz and 390 MHz frequencies, so verify your car’s remote matches the opener’s frequency.
People Also Ask: Quick Answers
Can I program multiple cars to one LiftMaster opener?
Yes. LiftMaster openers can store up to 8–10 remote codes, including multiple cars. Simply repeat the programming steps for each vehicle.
What if my car doesn’t have a built-in remote?
You can purchase a universal remote like the LiftMaster 890LM or use a VisorClip device. These clip onto your sun visor and program similarly to built-in systems.
Does programming erase other remotes?
No. Programming a new remote does not delete existing ones unless you perform a full reset by holding the Learn button for 10 seconds.
Is it safe to program the remote myself?
Absolutely. The process is designed for DIY users. Just ensure your car is in park and the garage area is clear during testing.
FAQ Section
Q1: How long does it take to program a LiftMaster garage door opener in my car?
A: Typically 2–5 minutes, depending on familiarity with the steps. First-time users may take slightly longer.
Q2: Why won’t my HomeLink button work after programming?
A: Check if the opener’s Learn light blinked during programming. If not, repeat the process. Also, ensure your car is within range and no obstacles block the signal.
Q3: Can I use my phone to program the opener?
A: Not directly. However, LiftMaster offers the MyQ app for smart control via Wi-Fi. This requires a compatible MyQ-enabled opener and internet connection.
Q4: What should I do if the Learn button is missing?
A: Some older models use dip switches instead. Consult your opener’s manual or contact LiftMaster support for model-specific guidance.
Q5: Is there a difference between programming a new vs. existing remote?
A: No. The process is identical. However, clearing old codes is recommended for new setups to avoid conflicts.
Q6: Can weather affect the remote’s performance?
A: Extreme cold or heat may temporarily reduce battery efficiency in key fobs, but built-in car systems are generally resilient. Replace car batteries if issues persist.
Conclusion
Learning how to program garage door opener in car LiftMaster is a straightforward process that enhances daily convenience. By identifying your car’s system, locating the Learn button, and following the step-by-step instructions, you can restore seamless access to your garage. Remember to test thoroughly and troubleshoot common issues like signal interference or outdated codes.
If this guide helped you, share it with friends or family who might be struggling with their garage remotes. A quick share on social media could save someone else from frustration! Drive safely, and enjoy the ease of a perfectly programmed garage door opener.
Leave a Reply