Replacing an aging garage door opener can feel daunting, but it is one of the most rewarding DIY projects for homeowners. If your current unit is noisy, sluggish, or frequently malfunctioning, upgrading to a new model can significantly improve your home’s security and convenience. This guide will walk you through exactly how to replace a chain drive garage door opener with confidence, ensuring you save money on professional installation fees while maintaining safety standards.
Why Consider Replacing Your Chain Drive Opener?
Before diving into the tools and steps, it is essential to understand why replacement might be necessary. Chain drive openers are known for their durability and affordability, but they have a lifespan of approximately 10–15 years. Over time, the chain can stretch, the motor gears can wear down, and the safety sensors may become obsolete.
According to industry data, a malfunctioning garage door is one of the leading causes of home entry vulnerabilities. Upgrading your system not only restores functionality but often adds modern features like Wi-Fi connectivity and battery backups. If you are hearing grinding noises or experiencing intermittent failures, it is time to act.
Tools and Materials You Will Need
Preparation is half the battle. Having the right tools ready before you start will prevent frustration and ensure the job goes smoothly. For a standard residential replacement, gather the following:
- Stepladder: A sturdy 6-foot ladder is ideal for reaching the motor unit.
- Power Drill/Driver: With various bits for removing screws and mounting brackets.
- Wrench Set: Adjustable wrenches or socket sets (typically 7/16″ and 9/16″).
- Pliers: Locking pliers (Vise-Grips) are helpful for holding bolts.
- Helper: Crucial. Garage door springs are under high tension. While we are replacing the opener, not the springs, having a second person to hold the door is a mandatory safety precaution.
- New Garage Door Opener Kit: Ensure it is compatible with your door’s weight and height.
Safety Warning: Never attempt to adjust or remove the torsion springs or extension springs yourself. These components store dangerous amounts of energy. If your spring system looks damaged, call a professional immediately.
Step 1: Disconnect Power and Release the Door
Safety is the paramount concern when learning how to replace a chain drive garage door opener. The first step is to eliminate any risk of electrical shock or accidental movement.
- Unplug the Unit: Locate the power cord plugged into the ceiling outlet and disconnect it. If it is hardwired, turn off the circuit breaker dedicated to the garage door opener.
- Close the Door: Manually lower the garage door completely. Ensure it is seated evenly on the floor.
- Engage the Emergency Release: Pull the red emergency release cord (usually hanging from the trolley). This disengages the opener from the door, allowing you to move the door manually.
- Secure the Door: Once disconnected, lift the door slightly to ensure it stays in place due to the spring tension. If it feels heavy or slams down, do not proceed—your springs may need professional adjustment.
Step 2: Remove the Old Opener Unit
With the power off and the door secured, you can begin dismantling the old system. Take photos with your smartphone at each stage; these will be invaluable references if you get confused during reassembly.
- Detach the Rail: Unscrew the brackets connecting the rail (the long metal track) to the ceiling joists. Have your helper support the rail so it doesn’t fall.
- Remove the Motor Unit: Unbolt the motor housing from its mounting bracket. This is often the heaviest part, so lift carefully.
- Take Down the Rail: Lower the rail and set it aside.
- Remove the Header Bracket: Unscrew the bracket attached to the wall above the garage door. Inspect this bracket for rust or damage. If it is compromised, replace it with the new one provided in your kit.
For more technical details on garage door mechanics and safety standards, you can refer to the general overview on Wikipedia’s Garage Door page.
Step 3: Assemble the New Chain Drive Opener
Most new openers come partially assembled, but you will need to attach the rail to the motor head. Follow the manufacturer’s manual closely, as designs vary between brands like LiftMaster, Chamberlain, and Genie.
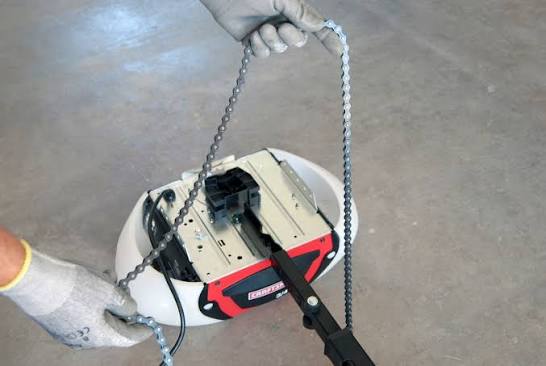
- Attach the Rail: Slide the rail onto the motor shaft and secure it with the provided bolts. Ensure the chain is properly seated on the sprocket.
- Install the Trolley: Place the trolley (the moving part that connects to the door) onto the rail.
- Check Chain Tension: The chain should have a slight slack—about 1/4 inch of play. Too tight, and it will wear out quickly; too loose, and it may slip. Refer to your manual for specific tensioning instructions.
Step 4: Install the Mounting Brackets
Proper alignment is critical for smooth operation. Misaligned brackets cause excessive wear on the chain and motor.
- Header Bracket: Install the new header bracket on the wall above the door. Use a level to ensure it is perfectly horizontal. Secure it into the wood framing, not just the drywall.
- Opener Mounting Bracket: Attach the L-shaped bracket to the ceiling joist directly above where the motor will hang. Use lag screws for maximum hold.
- Hang the Motor: Lift the motor unit and hook it onto the ceiling bracket. Do not fully tighten the bolts yet; you may need to adjust the angle slightly.
Step 5: Connect the Rail to the Door
This step reconnects the mechanical link between your motor and the garage door.
- Extend the Rail: Stretch the rail out toward the header bracket on the wall.
- Secure the Front End: Bolt the front of the rail to the header bracket.
- Attach the Door Bracket: Install the J-bracket or straight bracket onto the top section of the garage door. Ensure it is centered.
- Connect the Arm: Attach the curved arm from the trolley to the door bracket. Use the clevis pin and cotter pin provided. Tighten securely but allow for slight movement.
Step 6: Wiring and Safety Sensors
Modern openers require precise sensor alignment to meet federal safety regulations.
- Install Sensors: Mount the safety eyes on both sides of the garage door track, no higher than 6 inches from the floor. They must face each other directly.
- Run the Wires: Staple the low-voltage wires along the wall trim to keep them neat and protected. Connect them to the back of the motor unit.
- Wire the Wall Console: Install the push-button console near the entry door. Connect the wires to the designated terminals.
- Plug In: Restore power to the unit.
Step 7: Programming and Limit Adjustment
The final mechanical step is telling the opener how far to travel.
- Set Travel Limits: Most modern units have automatic limit setting. Press the “Program” or “Learn” button as instructed. The door will close and then open automatically to measure the distance.
- Adjust Force Settings: Test the door by placing a 2×4 piece of wood on the floor under the center of the door. Close the door. It should reverse immediately upon hitting the wood. If it does not, increase the force sensitivity slightly. If it reverses too easily, decrease it.
- Sync Remotes: Follow the manual to program your remote controls and keypad.
Common Troubleshooting Tips
Even with careful installation, issues can arise. Here are quick fixes for common problems:
| Issue | Possible Cause | Solution |
|---|---|---|
| Door won’t close | Misaligned sensors | Check if the LED lights on sensors are solid. Clean lenses and realign. |
| Noisy operation | Loose hardware | Tighten all bolts on the rail and brackets. Lubricate the chain. |
| Remote not working | Battery or sync issue | Replace remote batteries. Re-sync using the “Learn” button. |
| Door reverses early | Force limit too low | Increase the close force setting via the motor unit dials. |
FAQ Section
1. How long does it take to replace a chain drive garage door opener?
For a DIYer with basic tools and a helper, the process typically takes 3 to 5 hours. First-time installers may take longer, especially during the alignment and programming phases.
2. Can I replace the opener myself if I have a torsion spring system?
Yes, you can replace the opener yourself. However, you must never touch the torsion springs. As long as the door is balanced and moves smoothly by hand, you can safely disconnect the old opener and install the new one without adjusting the springs.
3. Is a chain drive opener louder than a belt drive?
Yes, chain drive openers are generally louder due to metal-on-metal contact. However, they are more durable and cost-effective. If noise is a major concern and your garage is attached to living spaces, consider a belt drive model next time. For detached garages, chain drives are an excellent choice.
4. What size opener do I need for my garage door?
Most standard single-car garage doors require a 1/2 HP motor. Double-car doors or heavy wooden doors typically require a 3/4 HP or 1 HP motor. Check your door’s weight and consult the opener’s specifications chart.
5. Do I need a permit to replace my garage door opener?
In most US jurisdictions, replacing an existing garage door opener with a similar model does not require a building permit. However, local codes vary. It is always wise to check with your local city or county building department if you are unsure.
6. How often should I maintain my new chain drive opener?
To ensure longevity, lubricate the chain every 6 months with a specialized garage door lubricant (not WD-40). Also, test the safety sensors monthly and inspect the cables for fraying annually.
Conclusion
Learning how to replace a chain drive garage door opener empowers you to take control of your home maintenance while saving significant costs. By following this step-by-step guide, prioritizing safety, and ensuring proper alignment, you can enjoy a smooth-operating door for years to come. Remember, patience and precision are key—rushing the installation can lead to premature wear or safety hazards.
If you found this guide helpful, please share it with your neighbors or on social media to help others tackle their DIY projects safely. Have you replaced your opener recently? Share your experience in the comments below!



Leave a Reply