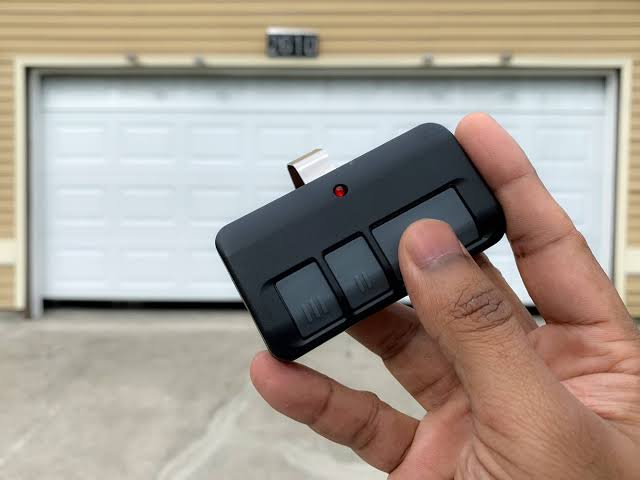
Standing in your driveway with an unresponsive car remote is incredibly frustrating, especially when the weather is bad or you are in a hurry. If you are currently searching for exactly how to program Liftmaster remote to garage door opener, you have come to the perfect place. Whether you bought a replacement remote or just moved into a new house, we will help you sync your device quickly and safely.
Drawing from years of experience in home automation and hardware troubleshooting, we have simplified this process so that anyone—from complete beginners to seasoned DIYers—can master it without calling an expensive technician.
Safety Precautions Before You Start
Working with electrical appliances and heavy moving parts requires caution. Before you grab your ladder to reach the motor unit, please review these vital safety rules to ensure a smooth programming experience:
- Clear the Area: Ensure no children, pets, or vehicles are near the garage door tracks.
- Check the Emergency Release: If the manual release cord (usually red with a handle) was pulled recently, ensure the trolley is properly re-engaged with the motor carriage.
- Ladder Safety: Use a sturdy fiberglass or wooden A-frame ladder. Metal ladders can occasionally slip and may even interfere with the radio frequency signals during your testing phase.
- Mind the Springs: Never attempt to adjust the torsion springs or cables yourself. These components hold extreme tension and should only be handled by certified professionals.
How To Program Liftmaster Remote To Garage Door Opener
This is the core of our guide. Before we start, make sure you have a sturdy stepladder and a fresh 3-volt CR2032 coin battery for your remote. A weak battery is the number one cause of programming failure.
Step 1: Locate the Motor Unit and the Learn Button
Safely climb your ladder to inspect the main garage door opener motor unit hanging from your ceiling. Look for the “Learn” button. It is typically located on the back or the left side panel of the unit, often near the hanging antenna wire. You may need to pull back the light lens cover to see it on some newer models.
Step 2: Identify the Learn Button Color
Liftmaster (a brand of the Chamberlain Group) uses color-coded buttons to indicate the frequency and security protocol of the opener. Identifying this color helps you buy the correct replacement remote in the future.
- Yellow: Security+ 2.0 (Highly encrypted)
- Red/Orange: Security+ (Older standard)
- Purple: Security+ (Alternative frequency)
- Green: Older models (Dip Switch era)
Step 3: Initiate the Programming Mode
Press and release the Learn button quickly. An LED indicator light next to the button will turn on and stay illuminated. You now have exactly 30 seconds to complete the next step, so have your remote ready in your hand.
Step 4: Sync Your Remote
Press and hold the specific button on your remote that you want to use for this door. Hold it firmly for 2 to 3 seconds, release it, and watch the motor unit. The LED light should flash, or you will hear two distinct mechanical clicks from the motor. This confirms the rolling code has been successfully received.
Step 5: Test the Connection
Step down from the ladder, move at least 5 feet away from the motor, and press the programmed button on your remote. The garage door should activate smoothly. If it does not, repeat Step 3 and Step 4.
Understanding the Technology Behind Your Garage Door
When you ask how to program a remote, it helps to understand the underlying technology. Modern systems do not just use a simple radio frequency; they use advanced encryption to protect your home from burglars using “code grabbers.”
According to Wikipedia, modern openers utilize rolling code (or hopping code) technology. This means the access password changes every single time the remote is used. Even if someone intercepts your signal today, that exact code will be useless tomorrow because the opener and the remote will have already synchronized to a new, mathematically generated sequence.
Liftmaster Learn Button Colors: A Quick Comparison
Here is a handy text infographic table to help you identify your system at a glance. Knowing your button color is crucial for buying compatible universal or OEM remotes.
| Learn Button Color | Technology Protocol | Typical Frequency | Compatible Remote Types |
|---|---|---|---|
| Yellow | Security+ 2.0 | 310, 315, 390 MHz | 891LM, 893LM, 895CL |
| Red / Orange | Security+ | 390 MHz | 971LM, 973LM, 371LM |
| Purple | Security+ | 315 MHz | 971LM, 973LM |
| Green | Fixed Code / DIP | 390 MHz | 81LM, 82LM (Older models) |
How To Clear the Memory of Your Liftmaster Opener
When you buy a new home, the previous owners might still have remotes hidden in their cars that can open your garage. This is a major security risk that you must address immediately.
- Press and hold the “Learn” button on the motor unit for 10 full seconds.
- The LED light will turn on, and then eventually turn off. Once the light goes out, all previously programmed remotes and keypads have been entirely erased from the system’s memory.
- You must now reprogram every remote you wish to use from scratch using the steps outlined above.
How To Program a Liftmaster Keyless Entry Pad
A keyless entry pad mounted outside your garage is incredibly convenient, especially for kids coming home from school or letting a dog walker in without giving them your physical car remote.
- Press and release the Learn button on the motor unit.
- Within 30 seconds, type your desired 4-digit PIN on the outside keypad.
- Press and hold the “Enter” button on the keypad.
- Wait for the motor unit lights to flash or click. Your custom PIN is now active!
OEM vs. Universal Remotes: Which Should You Choose?
Many homeowners wonder whether they should buy an original equipment manufacturer (OEM) Liftmaster remote or a cheaper universal remote found at big-box hardware stores.
OEM Liftmaster Remotes
- Pros: Guaranteed compatibility, seamless integration with MyQ smart home systems, and highly reliable Security+ 2.0 rolling codes.
- Cons: Slightly more expensive, usually ranging from $30 to $50.
Universal Remotes
- Pros: Much cheaper (often under $20), can control multiple brands (Chamberlain, Genie, Craftsman), and work with older DIP-switch models.
- Cons: Programming can be more tedious, and they might lack the advanced encryption of newer OEM models.
Troubleshooting Common Programming Issues
Even when you follow the steps perfectly, things can occasionally go wrong. Here is how to solve the most frequent issues we see in the field.
1. The Remote Won’t Sync at All
- Check the Battery: A weak CR2032 battery is the culprit in 80% of failed syncs. Replace it with a brand-new, high-quality battery.
- Check the Range: If you are too close (under 2 feet) or too far (over 15 feet) during programming, the signal might bounce or fade. Stand about 5 to 8 feet away.
- LED Interference: Some modern LED lightbulbs installed in the garage opener emit radio frequency interference. If you have cheap LED bulbs, try unscrewing them temporarily and reprogramming.
2. The Door Opens, But the Lights Keep Flashing
This usually indicates an issue with the safety reversing sensors (photo-eyes) located near the floor on both sides of the door track. Ensure the lenses are clean, perfectly aligned (both should show a solid green or amber light), and that no tools or boxes are blocking the invisible infrared beam.
3. The Remote Works Inside, But Not Outside in the Car
This is a classic range issue. The antenna wire hanging from the motor unit might be tucked inside the metal casing or cut too short. Carefully pull the antenna wire down so it hangs freely. If the range is still poor, you may need to install a universal antenna extension kit.
Maintenance Tips to Keep Your System Running Smoothly
Programming your remote is just the beginning. To ensure your Liftmaster system lasts for its average lifespan of 10 to 15 years, regular maintenance is crucial.
- Lubricate Moving Parts: Every six months, apply a lithium-based garage door lubricant to the rollers, hinges, and tracks. Never use WD-40, as it attracts dust and grime, which can damage the system over time.
- Test the Auto-Reverse Feature: Place a 2×4 piece of wood flat on the ground under the door. Close the door using your remote. The moment the door touches the wood, it must immediately reverse. If it doesn’t, adjust the force settings on the motor unit.
- Secure Your Network: If your Liftmaster opener has built-in Wi-Fi (MyQ technology), ensure your home Wi-Fi password is strong and that you have updated the firmware via the mobile app to protect against digital intrusions.
Frequently Asked Questions (FAQ)
Q1: How do I know if my Liftmaster remote is compatible with my opener? Check the color of the “Learn” button on your motor unit and the manufacturing date on the back of the remote. Most Liftmaster remotes manufactured after 1997 are cross-compatible as long as the Learn button colors match the frequency protocol. You can also check the model number on the motor unit and search the official Liftmaster compatibility chart online.
Q2: Can I program multiple Liftmaster remotes to the same garage door opener? Absolutely. A standard Liftmaster garage door opener can store up to 32 different remote controls and keyless entry pads in its memory. Simply repeat the exact same step-by-step programming process outlined above for each additional remote or keypad you wish to add.
Q3: Why did my Liftmaster remote stop working suddenly? Sudden failure is almost always caused by a dead battery. If replacing the 3V CR2032 battery does not fix the issue, the remote may have lost its programming due to a power surge or a cleared memory on the main motor unit. You will need to reprogram it using the Learn button.
Q4: What is the difference between the yellow, red, and purple Learn buttons? The colors dictate the radio frequency and the rolling code security protocol used by the opener. Yellow is the newest Security+ 2.0 system (highly encrypted), while Red/Orange and Purple are older Security+ systems. You must use a remote designed for your specific button color to ensure successful syncing.
Q5: Do I need a ladder to program the remote? Yes, you need access to the main motor unit where the Learn button is located. If your ceiling is exceptionally high, you might want to use a long stick or a specialized “learn button presser” tool to avoid climbing a ladder, though safely using an A-frame ladder is the standard method.
Conclusion
Mastering how to program Liftmaster remote to garage door opener is an essential DIY skill that saves you both time and expensive service call fees. By understanding your system’s Learn button color, following the precise 30-second programming window, and maintaining your hardware, you guarantee secure and reliable access to your home for years to come.
Did this guide help you get your garage door working perfectly again? Please share this article on your favorite social media platforms like Facebook, Twitter, or Pinterest! Helping a friend or neighbor fix their stuck garage door is a great way to be the hero of the block. Got questions or unique troubleshooting tips of your own? Drop a comment below and let our community know!



Leave a Reply