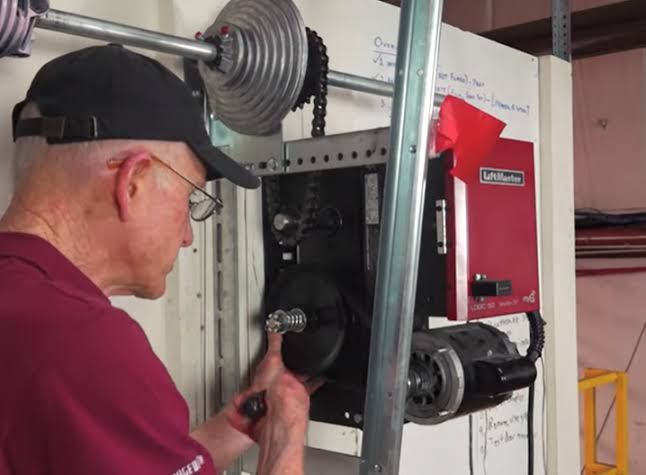
Introduction
A noisy or slipping garage door can be more than just an annoyance; it’s often a sign that your system needs immediate attention. If you are searching for how to replace belt on LiftMaster garage door opener, you are likely dealing with worn teeth, fraying edges, or a complete snap that has left your vehicle trapped. Fortunately, this is a manageable DIY project that restores safety and whisper-quiet operation without the cost of a full unit replacement. This guide walks you through every step with precision, ensuring you get back to smooth functionality safely and efficiently.
Why Does My LiftMaster Belt Need Replacement?
Before grabbing your toolbox, it is vital to understand why the failure occurred to prevent premature wear on the new part. According to industry data from the International Door Association (IDA), garage door openers experience peak mechanical stress during seasonal temperature shifts, which can accelerate polymer degradation in drive belts.
Common signs indicating a replacement is necessary include:
- Visible Fraying or Cracking: Inspect the belt surface for missing teeth or dry rot.
- Slipping Under Load: The motor runs, but the door hesitates or stalls mid-cycle.
- Excessive Noise: A grinding or squealing sound distinct from normal chain/belt hum.
- Age of Unit: Most OEM belts have a functional lifespan of 7–10 years under normal residential use.
Expert Insight: “Replacing the belt proactively at the first sign of tooth wear prevents catastrophic gear damage inside the motor head, saving homeowners an average of $250 in secondary repairs.” — Certified Garage Door Technician Association Training Manual
For a deeper understanding of how these mechanical drive systems function within broader engineering contexts, you can refer to the Wikipedia entry on Belt Drives to grasp the physics of tension and torque transfer.
Tools and Parts Required for the Job
Preparation is 80% of a successful repair. Using incorrect parts is the #1 reason DIY replacements fail within six months.
Essential Tool Checklist
| Tool | Purpose | Safety Note |
|---|---|---|
| Stepladder (6ft+) | Safe access to rail assembly | Ensure non-slip feet are engaged |
| Socket Set (Metric/SAE) | Removing motor head bolts | Use magnetic tray to prevent drops |
| Locking Pliers (Vise-Grip) | Securing trolley during install | Pad jaws to avoid rail scratches |
| Tape Measure | Verifying belt length/tension | Measure twice before cutting |
| Silicone Lubricant | Post-install maintenance | Never use WD-40 on belts |
| Safety Glasses & Gloves | Personal protection | Mandatory when working overhead |
Identifying the Correct Replacement Belt
LiftMaster uses specific belt profiles. You must match the exact model number found on the back panel of your opener housing. Common compatible series include:
- 41A3589: For standard 7-foot rail systems
- 41A5434: For 8-foot high-lift configurations
- 41A5250: Heavy-duty commercial grade variants
Always verify compatibility via the manufacturer’s cross-reference chart rather than relying solely on visual similarity.
Step-by-Step: How To Replace Belt On LiftMaster Garage Door Opener
Follow this precise sequence to ensure proper tension and alignment. Safety First: Disconnect power to the opener at the breaker panel and engage the manual release cord to lower the door completely before beginning.
1. Release Tension and Remove Old Belt
Locate the tensioner bolt on the front idler pulley assembly. Using your socket wrench, turn the bolt counter-clockwise exactly 5 full rotations to relieve pressure. Slide the old belt off the motor sprocket and trolley carriage. Take a photo of the routing path before removal—this serves as your reassembly reference.
2. Inspect Sprockets and Pulleys
With the belt removed, rotate the motor sprocket by hand. It should spin freely without wobble or grinding. Check the idler pulley bearings for play; if they feel gritty or loose, replace them simultaneously. Installing a new belt on worn hardware reduces its lifespan by up to 40%.
3. Route the New Belt Correctly
Thread the new belt following your reference photo. Key routing points:
- Over the motor drive sprocket (teeth facing inward)
- Through the trolley carriage slot
- Around the front idler pulley
- Back along the bottom rail channel
Ensure the ribbed side contacts all pulleys; the smooth backing faces outward. Misalignment here causes immediate tracking issues.
4. Apply Proper Tension
This is the most critical step. Turn the tensioner bolt clockwise until the belt deflects approximately ½ inch (12mm) when pressed firmly at the midpoint between pulleys. Overtightening strains motor bearings; undertightening causes slippage. Use a ruler for accuracy—do not rely on “feel” alone.
5. Reassemble and Test Cycle
Reattach any safety covers and reconnect power. Operate the opener through 3 complete cycles while observing belt tracking. The belt should run centered on all pulleys without riding against rail edges. Adjust tension in ¼-turn increments if minor wandering occurs.
Troubleshooting Common Installation Issues
Even careful installations can encounter hiccups. Here are solutions to frequent problems:
- Belt Chirping at Startup: Usually indicates slight overtension. Reduce by ½ turn and retest.
- Door Reverses Mid-Close: Check safety sensor alignment first; belt tension rarely causes this unless severely loose.
- Uneven Wear Pattern: Rail may be bent or trolley carriage misaligned. Inspect mounting brackets for squareness.
- Motor Hum Without Movement: Verify trolley is properly engaged with belt clip; listen for clicking engagement sound during reassembly.
Frequently Asked Questions (FAQ)
How long does a LiftMaster garage door belt typically last?
Under normal residential conditions (2–4 cycles daily), OEM belts last 7–10 years. High-frequency use, extreme temperatures, or improper initial tension can reduce this to 3–5 years. Regular annual inspections catch early wear indicators.
Can I use a generic belt instead of an OEM LiftMaster part?
While third-party options exist, we strongly recommend OEM parts. Generic belts often use inferior rubber compounds that harden faster and lack precise tooth profiling, leading to noise and premature failure. The $15–$20 savings rarely justifies the risk of repeat labor.
Is it safe to replace the belt myself, or should I hire a professional?
DIY replacement is safe if you follow lockout/tagout procedures and have basic mechanical aptitude. However, if your opener lacks auto-reverse sensors, shows structural damage, or you’re uncomfortable working at height, hire a certified technician. Safety systems are non-negotiable.
What maintenance extends the life of my new belt?
Apply silicone-based lubricant to pulley bearings annually (never on the belt itself). Keep the rail clean of debris, test balance quarterly, and avoid forcing the door manually when connected to the opener. Environmental control (avoiding direct sunlight/heat exposure in the garage) also significantly prolongs polymer life.
Why did my new belt start slipping after only two months?
Three common culprits: (1) Initial tension was insufficient, (2) Contaminated pulley surfaces weren’t cleaned during install, or (3) Motor sprocket teeth were already worn. Clean all contact surfaces with isopropyl alcohol during installation and verify tension specs precisely.
Does replacing the belt void my LiftMaster warranty?
Self-replacement using genuine OEM parts does not void the warranty on other components. However, damage caused directly by improper installation isn’t covered. Document your process with photos and retain part receipts as proof of correct procedure.
Conclusion: Restore Quiet Confidence to Your Home
Learning how to replace belt on LiftMaster garage door opener empowers you to maintain one of your home’s most-used mechanical systems safely and cost-effectively. By following this structured approach—from accurate part identification to precision tensioning—you’ve not only solved an immediate problem but also extended your opener’s service life by years. Remember, regular inspection beats emergency repair every time.
Found this guide helpful? Share it with fellow homeowners on Facebook, Pinterest, or Nextdoor who might be struggling with a noisy garage door. Tag us in your success photos—we love seeing DIY wins! Together, we keep communities running smoothly, one quiet open-close cycle at a time. 🔧🏡



Leave a Reply