Introduction
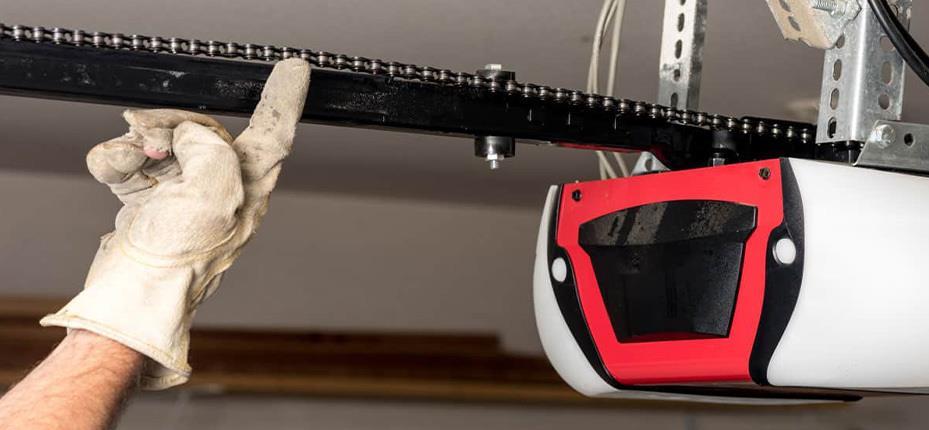
Is the grinding noise of your current garage door opener waking up the household or disrupting your peace? You are not alone; many homeowners seek a quieter solution, and learning how to replace chain garage door opener with belt systems is the most effective remedy. This guide provides a safe, step-by-step pathway to upgrading your system, ensuring you achieve professional-level silence without compromising on lifting power or safety.
Why Upgrade from Chain to Belt Drive?
Before picking up a wrench, it is vital to understand why this conversion matters. While chain drives are durable and cost-effective, they operate with metal-on-metal friction that generates significant decibel levels. According to industry standards, belt drive systems utilize steel-reinforced rubber belts that reduce operational noise by up to 50% compared to traditional chains.
This upgrade is particularly valuable for homes with living spaces above or adjacent to the garage. The reduction in vibration also reduces wear on door hardware over time. For a deeper technical understanding of the mechanical differences between these drive mechanisms, you can refer to the Garage Door Opener entry on Wikipedia.org, which outlines the historical and mechanical evolution of these systems.
Pros and Cons: Belt vs. Chain Drive
| Feature | Chain Drive | Belt Drive |
|---|---|---|
| Noise Level | High (65–75 dB) | Low (45–55 dB) |
| Durability | Excellent (20+ years) | Very Good (15–20 years) |
| Maintenance | Requires regular lubrication | Minimal maintenance |
| Cost | $150–$250 | $250–$400 |
| Best For | Detached garages | Attached garages/bedrooms above |
Can I Convert My Existing Opener or Do I Need a New Unit?
A common question in the “People Also Ask” section is whether a direct conversion kit exists. In 95% of cases, you cannot simply swap the chain for a belt on an existing chain-drive motor. Chain sprockets and belt pulleys have different tooth profiles and tension requirements. Attempting to force a belt onto a chain sprocket will destroy the belt and potentially burn out the motor.
Therefore, when researching how to replace chain garage door opener with belt, you are essentially planning a full unit replacement. However, you can often reuse your existing rails, sensors, and wall controls if they are compatible with the new belt-drive model. Always check the manufacturer’s compatibility chart before purchasing.
Tools and Materials Needed for Installation
Preparation prevents frustration. Gather these items before starting:
- New Belt-Drive Garage Door Opener Kit (ensure it matches your door weight)
- Adjustable wrench set and socket set
- Phillips and flathead screwdrivers
- Stepladder (6-foot minimum)
- Safety glasses and work gloves
- Locking pliers (Vise-Grips)
- Tape measure
- Helper (garage doors are heavy; never work alone)
⚠️ Critical Safety Warning: Garage door springs store immense kinetic energy. Do NOT attempt to adjust, loosen, or remove torsion springs yourself. Spring adjustment should only be performed by certified professionals. This guide covers opener replacement only, assuming your springs are already correctly balanced.
Step-by-Step: How To Replace Chain Garage Door Opener With Belt
Follow these concrete steps for a successful installation. Allocate 3–4 hours for this project.
Step 1: Disconnect Power and Secure the Door
Unplug the existing opener from the electrical outlet. Pull the emergency release cord to disengage the trolley from the rail. Manually lower the door until it rests fully on the floor. Use locking pliers on the track below the bottom roller to prevent accidental movement during removal.
Step 2: Remove the Old Chain-Drive Unit
Detach the opener from the ceiling brackets using your socket set. Support the unit’s weight as you unbolt it—these units typically weigh 25–35 pounds. Disconnect the wiring harness and remove the old rail assembly. Label all wires with masking tape if you plan to reuse the wall console or safety sensors.
Step 3: Assemble the New Belt-Drive Rail
Lay out the new belt-drive rail sections on a clean floor. Connect them per the manufacturer’s diagram, ensuring the belt is properly seated in the pulley groove before final tightening. Most modern belt systems use a one-piece rail design that eliminates alignment issues common in older multi-piece rails.
Step 4: Install the Header Bracket and Hang the Unit
Mount the header bracket above the garage door opening at the exact height specified in the manual (typically 2–4 inches above the door’s highest travel point). Lift the assembled rail into position and secure it to the header bracket. Attach the rear mounting bracket to the ceiling joists using lag screws. Verify the rail is perfectly level; even a ¼-inch variance causes premature belt wear.
Step 5: Connect the Trolley and Adjust Belt Tension
Attach the trolley arm to the top door bracket. Thread the belt through the trolley carriage and connect both ends to the trolley plate. Tighten the tension nut until the belt has approximately ½ inch of deflection when pressed midway between the pulleys. Over-tightening stretches the belt; under-tightening causes slippage.
Step 6: Reconnect Wiring and Test Safety Features
Reattach the safety sensors, wall console, and power cord. Plug in the unit and program the travel limits according to the manual. Test the auto-reverse feature immediately: place a 2×4 board flat on the floor under the door’s center. Close the door; it must reverse within 2 seconds of contacting the board. If it doesn’t, adjust the force sensitivity settings before regular use.
Frequently Asked Questions (FAQ)
Q1: How long does it take to replace a chain opener with a belt drive?
For a DIYer with basic tools, expect 3–4 hours including removal, installation, and testing. Professional installers typically complete the job in 1.5–2 hours due to experience and specialized equipment.
Q2: Will a belt drive lift my heavy wooden garage door?
Yes, provided you select the correct horsepower. Standard residential belt drives come in ¾ HP and 1¼ HP variants. A ¾ HP unit handles doors up to 350 lbs, while 1¼ HP models manage doors up to 500 lbs. Always verify your door’s weight before purchasing.
Q3: Do belt drives require less maintenance than chain drives?
Absolutely. Belt drives eliminate the need for quarterly chain lubrication. Your primary maintenance task is an annual visual inspection for belt fraying and a check of pulley alignment. Most manufacturers recommend belt replacement every 10–15 years depending on usage cycles.
Q4: Is it worth spending extra on a belt drive if my garage is detached?
If noise isn’t a concern, a chain drive remains a cost-effective choice. However, belt drives still offer smoother operation and reduced vibration, which extends the lifespan of rollers, hinges, and tracks. Consider it an investment in overall system longevity, not just quietness.
Q5: Can I reuse my old remote controls with a new belt-drive opener?
Compatibility depends on frequency and rolling code technology. Openers manufactured after 2011 typically use Security+ 2.0 or similar proprietary protocols. Check the new unit’s specifications against your remote’s FCC ID. Universal remotes are available for $15–$25 if originals are incompatible.
Q6: What warranty should I expect on a belt-drive conversion?
Reputable brands offer lifetime warranties on the belt and motor, with 5-year coverage on parts and 1-year labor. Always register your product online within 30 days of installation to activate full warranty benefits. Keep your receipt and installation photos as documentation.
Conclusion
Learning how to replace chain garage door opener with belt systems transforms your daily routine from noisy disruption to seamless silence. Beyond acoustic comfort, you gain smoother operation, reduced maintenance, and extended hardware life. While the upfront cost is higher, the quality-of-life improvement and long-term reliability make this upgrade one of the highest-ROI home improvements for attached-garage homeowners.
Ready to enjoy a quieter home? Share this guide with fellow DIY enthusiasts on Facebook, Pinterest, or your neighborhood Nextdoor group. Tag us in your installation photos—we’d love to celebrate your success and answer any questions that arise during your project. Happy building! 🛠️



Leave a Reply