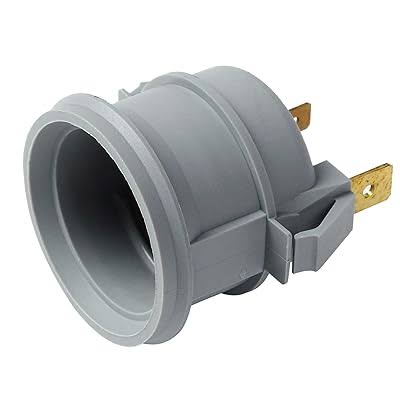
Dealing with a dark garage because your opener’s light won’t turn on can be frustrating and unsafe. If changing the bulb didn’t work, you might be wondering how to replace light socket in garage door opener to restore visibility. Don’t worry, this common issue is easier to fix than you think, and we are here to guide you through it safely!
How To Replace Light Socket In Garage Door Opener: Step-by-Step
Before diving into the physical repair, safety is your top priority. Garage door openers are either hardwired or plugged into high-voltage ceiling outlets. According to the Electrical Safety Foundation International (ESFI), hundreds of DIY electrical injuries happen at home yearly due to improper precautions. Always prioritize caution and verify the power is completely off before touching any components.
Here is your comprehensive, beginner-friendly guide to getting the job done right.
Step 1: Disconnect the Power Supply
Never attempt electrical repairs with the power on. Locate the power cord of your garage door opener and unplug it from the ceiling outlet. If your unit is hardwired, go to your main electrical panel and flip the breaker dedicated to the garage door opener. Wait 5 minutes for internal capacitors to discharge, then use a non-contact voltage tester to confirm there is zero electrical current running to the unit.
Step 2: Remove the Light Lens Cover
Most modern openers (like Chamberlain, LiftMaster, or Genie) feature a polycarbonate light lens. Depending on your model, you will either need to press the release tabs on the sides of the lens or unscrew the small retaining screws at the top. Gently pull the lens down and set it aside on a soft towel to prevent cracking or scratching.
Step 3: Remove the Old, Faulty Socket
Once the lens is off, you will see the light socket mounted to the opener’s chassis or the logic board panel. Look for the small mounting screws securing the socket bracket and unscrew them carefully. You will notice two wires (usually a black “hot” wire and a white “neutral” wire). Depending on your model, these may connect to a wire harness or plug directly into the logic board via spade connectors. Take a quick photo with your smartphone for reference before gently pulling the connectors straight out. Never yank the wires themselves, as this can damage the delicate circuit board.
Step 4: Connect the New Socket
Take your OEM replacement light socket (ensure it matches your opener’s brand and model number). If the new socket’s wires aren’t pre-crimped, strip exactly 1/4 inch of insulation using wire strippers. Attach the white neutral wire to the silver terminal or the corresponding white wire in the harness. Connect the black hot wire to the brass terminal or the black harness wire. Secure wire nuts tightly and wrap them with electrical tape for added safety and vibration resistance.
Step 5: Reassemble and Test the System
Screw the new socket bracket securely back into the motor housing. Insert a new, compatible light bulb—never reuse an old bulb that may have caused the short. Snap the light lens cover back into place. Restore power at the breaker or plug the unit back in. Trigger the light using your wall control panel or remote. If it illuminates steadily without flickering, congratulations, you successfully completed the repair!
Why Does My Garage Door Opener Light Keep Going Out?
Many homeowners face this issue, and the root cause isn’t always the socket itself. Garage door openers endure heavy vibrations every time the motor runs. Over time, these constant tremors can loosen the internal brass contacts inside the light socket, leading to arcing, flickering, or complete failure.
Furthermore, if your garage door springs are unbalanced or the tracks are misaligned, the motor has to work much harder. This excessive strain creates violent shaking that destroys standard light bulbs and damages the socket’s internal wiring over time.
How to Test if the Socket is Actually Bad
Before ordering a new part, you should verify that the socket is the true culprit. Sometimes, the issue lies within the opener’s logic board or the wall console.
- The Brass Tab Trick: Unplug the opener. Take a small flathead screwdriver and gently pry the little brass tab at the bottom center of the socket upward. This tab sometimes gets pushed down too far and loses contact with the bulb’s tip.
- Multimeter Continuity Test: Set your digital multimeter to the continuity setting. Touch one probe to the socket’s center brass tab and the other to the corresponding wire terminal. If the multimeter beeps or reads near zero ohms, the socket has continuity and is likely fine. If it reads “OL” (Open Loop), the socket is dead and must be replaced.
- Check the Wall Console: Sometimes the light button on your wall control panel gets physically stuck or shorted out, sending irregular signals to the socket.
Quick Troubleshooting Text Infographic:
- Blinking Light? ➔ Check the safety sensor alignment on the floor.
- Light Stays On? ➔ Wall control panel button might be stuck.
- Light Won’t Turn On? ➔ Test bulb ➔ Test Socket ➔ Check Logic Board Relay.
Essential Tools and Materials for the Job
To ensure a smooth repair process, gather the following items before heading up the stepladder. Having the right gear saves time and prevents mid-project trips to the hardware store.
- OEM Replacement Light Socket: Check your opener’s manual for the exact part number (e.g., LiftMaster 41A7577 or Genie 36688S).
- Non-Contact Voltage Tester: Crucial for confirming the power is completely off.
- Insulated Screwdrivers: Both Phillips (#2) and flathead (3/16″) sizes.
- Wire Strippers/Cutters: For precise wire preparation.
- Compatible Bulb: A 40W to 60W maximum rough-service bulb or an opener-rated LED.
- Stepladder: Ensure it is stable and tall enough to reach the ceiling unit safely.
OEM vs. Universal Light Sockets: Pros and Cons
When shopping for a replacement, you will encounter Original Equipment Manufacturer (OEM) parts and cheaper universal alternatives. Here is a quick comparison to help you decide.
| Feature | OEM Replacement Socket | Universal / Aftermarket Socket |
|---|---|---|
| Fitment Guarantee | Perfect match for your specific model. | May require wire splicing or bracket modification. |
| Warranty Coverage | Usually backed by a 1-year manufacturer warranty. | Rarely includes a reliable warranty. |
| Material Quality | High-heat resistant plastics and thick brass contacts. | Cheaper plastics that may melt or crack under heat. |
| Installation Time | 10 to 15 minutes (Plug-and-play). | 30+ minutes (Requires rewiring). |
| Price | $12 to $25 | $5 to $10 |
Verdict: While universal sockets save a few dollars upfront, the OEM part guarantees a safe, hassle-free installation that won’t void your opener’s main warranty.
Expert Tips for Long-Lasting Garage Lighting
According to certified electricians, the lifespan of a garage door opener light socket is typically between 7 to 10 years. However, environmental factors like extreme attic heat (if your garage ceiling is uninsulated) and humidity can degrade the socket’s internal wiring prematurely.
To maximize the lifespan of your new socket, avoid over-wattage. Installing a 100-watt bulb in a socket rated for 60 watts will melt the plastic housing and fry the opener’s internal relay. Understanding basic electrical wiring principles helps homeowners recognize why adhering to voltage and wattage limits is critical for fire prevention.
Additionally, keep the light lens clean. Dust buildup acts as an insulator, trapping heat around the bulb and socket, which accelerates wear and tear. Wipe the lens with a damp microfiber cloth every six months to ensure proper heat dissipation.
Frequently Asked Questions (FAQ)
Q1: Can I use a regular LED bulb in my garage door opener after replacing the socket? Answer: It is highly discouraged to use standard household LED bulbs. Many cheap LEDs emit electromagnetic interference (EMI) that blocks the radio frequencies used by your garage door remote. This can severely reduce your remote’s range. Always buy an LED specifically labeled as “Garage Door Opener Compatible” or “RF Interference Free.”
Q2: What should I do if the new socket doesn’t work after installation? Answer: If the new socket and a known-good bulb still don’t light up, the issue likely lies deeper in the system. Check the wiring harness for pinched wires. If the wiring is intact, the light relay on the opener’s main logic board may have failed. Logic board replacements are more complex and may require professional assistance.
Q3: How much does a professional charge to replace a garage door opener light socket? Answer: If you hire a garage door technician, expect to pay between $85 and $150 for a service call. This fee usually covers the technician’s travel time, labor, and the cost of the replacement socket. Doing it yourself costs less than $25 and takes under 20 minutes.
Q4: Is it safe to bypass the light socket and wire a separate LED shop light? Answer: While technically possible for advanced DIYers, bypassing the factory socket and hardwiring external lights violates most local building codes and instantly voids your garage door opener’s warranty. It also creates a potential fire hazard if the external lights draw more current than the opener’s internal relay can handle. Stick to the factory-designed lighting system.
Q5: Why does my light bulb blow out every time the garage door opens? Answer: This is almost always caused by extreme vibration. When the heavy motor starts and stops, it shakes the entire ceiling unit. Standard bulbs have fragile filaments that snap under this stress. Switch to a “Rough Service” bulb, which features heavy-duty support wires around the filament to absorb the shocks.
Conclusion
Restoring illumination to your workspace is crucial for safety, security, and convenience. Learning how to replace light socket in garage door opener empowers you to tackle a highly common household issue without spending hundreds of dollars on professional service calls. By following the safety protocols, using the right OEM parts, and choosing vibration-resistant bulbs, you ensure your garage remains bright and functional for years to come.
Did you find this DIY tutorial helpful? Share this guide on your favorite social media platforms like Facebook, Pinterest, or X (Twitter) to help a friend fix their dark garage today! Let’s keep our homes safe and well-lit together.



Leave a Reply