Introduction
There are few things more frustrating than pulling into your garage only to be greeted by darkness because the opener’s light won’t turn on. If you have already tried changing the bulb and confirmed the outlet has power, you are likely dealing with a burnt-out fixture, which brings us to the essential question: how to replace light socket on garage door opener units safely and effectively? This guide will walk you through the entire process with empathy and precision, ensuring you restore illumination without risking electrical shock or voiding your warranty.
Replacing this component is a manageable weekend project that saves you the cost of a service call, provided you follow safety protocols strictly. Below, we break down everything from identifying compatible parts to testing your repair, ensuring your garage remains a safe, well-lit workspace.
Why Does My Garage Door Opener Light Socket Fail?
Before grabbing a screwdriver, it helps to understand why the failure occurred. According to general electrical maintenance principles outlined in resources like Wikipedia’s entry on Electrical Wiring, thermal cycling and vibration are the primary enemies of garage fixtures.
Garage door openers create significant vibration every time the motor runs. Over years of use, this constant shaking can loosen internal connections within the socket or cause the metal contacts to fatigue. Additionally, using bulbs with wattages exceeding the manufacturer’s rating generates excess heat, melting the plastic housing or carbonizing the brass contacts.
Common Signs of Socket Failure
- Flickering Lights: Often indicates a loose connection rather than a bad bulb.
- Burnt Smell: A distinct acrid odor suggests melted insulation or arcing.
- Visible Discoloration: Brown or black scorch marks around the socket base.
- Bulb Base Stuck: Corrosion or heat fusion preventing bulb removal.
Expert Insight: “Always assume the socket is live until proven otherwise. Even if the wall switch is off, back-fed voltage from capacitor discharge or faulty wiring can present a shock hazard.” — Certified Residential Electrician Best Practice
Safety First: Essential Precautions Before Starting
Electrical repairs demand respect. Never skip these preparatory steps when learning how to replace light socket on garage door opener assemblies.
- Disconnect Power Completely: Unplug the opener unit from the ceiling outlet. If it is hardwired, turn off the dedicated circuit breaker at the main panel.
- Verify Zero Voltage: Use a non-contact voltage tester (NCVT) on the socket terminals before touching anything.
- Secure Your Ladder: Ensure your stepladder is stable and positioned directly under the work area to prevent overreaching.
- Discharge Capacitors: Wait at least 5 minutes after unplugging to allow internal capacitors to dissipate stored energy.
- Wear PPE: Safety glasses protect against falling debris; insulated gloves add a layer of protection against accidental contact.
Tools and Materials You Will Need
Gathering the right supplies prevents mid-project trips to the hardware store. Here is a comprehensive checklist:
| Tool/Material | Purpose | Notes |
|---|---|---|
| Replacement Socket | Direct fitment | Match brand/model exactly |
| Phillips Screwdriver (#2) | Removing housing screws | Magnetic tip recommended |
| Needle-Nose Pliers | Bending wire loops | Insulated handles preferred |
| Wire Strippers/Cutters | Preparing new connections | Only if rewiring needed |
| Non-Contact Voltage Tester | Safety verification | Test before AND after repair |
| Dielectric Grease | Preventing corrosion | Apply sparingly to terminals |
| LED Bulb (60W equiv.) | Post-repair testing | Lower heat = longer life |
Note on Compatibility: Most major brands (Chamberlain, LiftMaster, Craftsman) use proprietary sockets. Do not attempt to retrofit a standard household ceramic socket unless explicitly approved by the manufacturer, as mounting points and terminal configurations differ significantly.
Step-by-Step: How To Replace Light Socket On Garage Door Opener
Follow this detailed tutorial to ensure a professional-grade repair. Take photos at each disassembly stage to aid reassembly.
Step 1: Access the Light Assembly
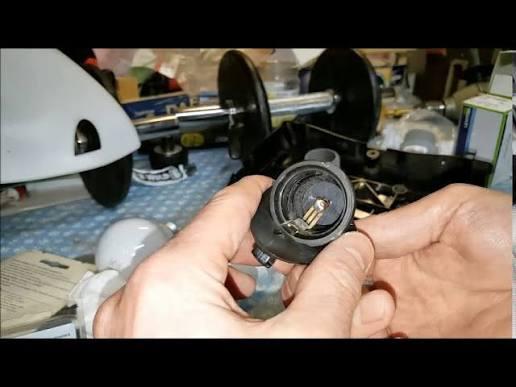
Remove the plastic lens cover by pressing the release tabs or removing retaining screws, depending on your model. Set the lens aside in a safe location where it won’t crack. Next, remove the old bulb carefully. If the glass separates from the base, use needle-nose pliers to extract the remaining metal base—only after confirming zero voltage.
Step 2: Remove the Faulty Socket
Locate the two or three screws securing the socket assembly to the opener housing. Support the socket with one hand while unscrewing to prevent it from dangling by its wires. Gently pull the socket downward to expose the wire connections.
Step 3: Document and Disconnect Wiring
Critical: Photograph the existing wiring configuration before disconnecting anything. Most sockets have two wires (typically white/neutral and black/hot), but some models include additional wires for logic board signaling.
- Loosen terminal screws and slide out wire ends.
- If wires are push-in connectors, press the release tab while pulling.
- Inspect wire ends for brittleness or charring; trim and re-strip if necessary (expose exactly 3/8 inch of copper).
Step 4: Install the New Socket
Route the new socket’s wires through the same path as the original. Connect wires matching your reference photo:
- White wire → Neutral terminal (usually silver-colored screw)
- Black wire → Hot terminal (usually brass-colored screw)
Form proper J-hooks around screw terminals clockwise so tightening pulls the wire tighter, not looser. Torque screws snugly but avoid overtightening, which can strip soft brass threads.
Step 5: Reassemble and Test
Tuck excess wire neatly into the housing cavity, ensuring no pinching occurs. Secure the socket with its mounting screws. Reinstall the lens cover and insert an LED bulb rated for garage door openers (vibration-resistant). Restore power and activate the light via wall button or remote.
Success Indicator: The light should illuminate instantly without flicker, hum, or delay. If it fails, re-check connections and verify bulb compatibility before assuming the new socket is defective.
Troubleshooting: What If the New Socket Doesn’t Work?
Even perfect installations can encounter issues. Use this diagnostic table:
| Symptom | Likely Cause | Solution |
|---|---|---|
| No light at all | Loose wire connection or tripped GFCI | Re-check terminals; reset nearby GFCI outlets |
| Flickering intermittently | Vibration-loosened terminal or bad bulb | Tighten screws; try known-good LED bulb |
| Light stays on continuously | Failed logic board relay | Requires board-level repair or professional service |
| Dim/glowing light | Incompatible bulb type or shared neutral issue | Verify LED is “opener compatible”; check wiring |
| Burning smell immediately | Short circuit or wrong voltage socket | STOP. Disconnect power; verify part number match |
Frequently Asked Questions (FAQ)
Can I use any standard light socket as a replacement?
No. Garage door opener sockets are engineered for specific mounting patterns, terminal layouts, and vibration resistance. Using a generic household socket risks poor fitment, electrical shorts, and voided warranties. Always purchase OEM or certified-compatible replacements matched to your exact opener model number.
Is it safe to bypass the socket and wire a bulb directly?
Absolutely not. The socket provides critical insulation, strain relief, and heat management. Direct-wiring creates fire hazards, exposes live conductors to vibration damage, and violates electrical codes. If the socket mount is damaged beyond repair, consult a licensed technician for housing replacement.
Why does my new socket burn out bulbs quickly?
Premature bulb failure typically stems from excessive vibration or incompatible bulb types. Ensure you’re using LEDs specifically labeled “garage door opener compatible” or “rough service.” These feature reinforced filaments/drivers designed to withstand motor vibration. Also verify the socket isn’t receiving higher-than-rated voltage due to a home wiring issue.
Do I need to hire an electrician for this repair?
Most homeowners with basic DIY skills and proper safety awareness can complete this repair independently. However, if your opener is hardwired (no plug), shows signs of broader electrical damage (melted housing, buzzing sounds), or if you lack confidence working with electricity, hiring a licensed electrician or certified garage door technician is strongly recommended for safety and code compliance.
How long should a replacement socket last?
A quality OEM socket installed correctly should last 7–10 years under normal use. Longevity depends heavily on bulb choice (LEDs generate far less heat than incandescents), frequency of door cycles, and environmental conditions (humidity accelerates corrosion). Regular visual inspections during annual maintenance can catch early wear signs.
Can moisture in the garage cause socket failure?
Yes. Unconditioned garages experience humidity swings that promote oxidation on metal contacts. Applying a thin layer of dielectric grease to terminals during installation significantly extends lifespan by blocking moisture ingress. Consider installing a dehumidifier if condensation regularly forms on surfaces.
Conclusion: Restore Light and Confidence
Learning how to replace light socket on garage door opener systems empowers you to maintain a safer, more functional home environment. By following this structured approach—prioritizing safety, using correct parts, and verifying connections—you’ve not only fixed a light but also built valuable DIY confidence. Remember, proper illumination deters intruders, prevents trips and falls, and makes vehicle maintenance infinitely easier.
Found this guide helpful? Share it with fellow homeowners on Facebook, Pinterest, or your neighborhood Nextdoor group! Someone else is probably staring at a dark garage right now hoping for exactly this solution. Tag us in your repair photos—we love celebrating successful DIY wins! 💡🔧
Disclaimer: This article is for informational purposes only. Electrical work carries inherent risks. Always prioritize personal safety, adhere to local building codes, and consult qualified professionals when uncertain. The author assumes no liability for injuries or damages resulting from following this guide.



Leave a Reply