Introduction
There are few things more frustrating than pulling into your driveway during a rainstorm, only to realize you cannot get the garage door to open because your vehicle’s built-in system isn’t synced. If you have been searching for how to program your car to garage door opener systems without calling an expensive technician, you are in exactly the right place. This guide provides empathetic, step-by-step support to help you regain seamless access to your home, regardless of your technical experience level.
Understanding Your Vehicle’s Transmitter System
Before pressing any buttons, it is vital to understand that not all in-car transmitters work the same way. Most modern vehicles use a system called HomeLink, while some older or specific brands may use Car2U or proprietary universal transmitters. Knowing which system you have dictates the programming sequence.
According to automotive industry standards, HomeLink is installed in over 80% of new vehicles sold in the United States. However, compatibility varies based on the age of both the car and the garage door motor.
Key Differences in Transmitter Types
| Feature | HomeLink (Standard) | Car2U / Older Systems | Smart Button / Wi-Fi |
|---|---|---|---|
| Frequency | 288–390 MHz | Fixed Frequency | App-Based / Cloud |
| Compatibility | Rolling Code & Fixed | Fixed Code Only | Specific Brands |
| Programming Steps | 3-Step Process | Dip Switch Matching | QR/App Scan |
| LED Indicator | Solid/Flashing Light | No Light / Blink | Screen Display |
| Reset Required? | Yes, before new setup | Rarely | Via App Settings |
Note: Always consult your vehicle owner’s manual first. Manufacturers often update programming logic between model years.
Safety First: Pre-Programming Checklist
Safety and preparation prevent damage to your garage door motor or vehicle electronics. Before you begin learning how to program your car to garage door opener, complete these checks:
- Clear the Area: Ensure no people, pets, or objects are near the garage door path. The door will cycle multiple times during programming.
- Check Battery Health: Weak batteries in your handheld remote can cause sync failures. Replace them if they are older than 12 months.
- Identify the “Learn” Button: Locate the learn button on your garage door motor unit. It is typically yellow, orange, purple, or red and found on the back or side panel.
- Erase Old Codes: If this is a used vehicle, clear previous programming to avoid interference. Hold the two outer HomeLink buttons for 10–20 seconds until the LED flashes rapidly.
Expert Insight: “The most common reason for programming failure isn’t user error; it’s attempting to sync a rolling-code car transmitter to a fixed-code opener manufactured before 1996 without a compatibility bridge.” — Certified Garage Door Technician Association Guidelines
For a deeper understanding of frequency protocols and security standards, refer to the Garage Door Opener entry on Wikipedia.org, which details the evolution from dip switches to rolling code encryption.
Step-by-Step: Programming HomeLink to a Rolling Code Opener
Most US homes built after 1996 use rolling code technology for security. Follow these precise steps to sync successfully.
Step 1: Initiate Vehicle Learning Mode
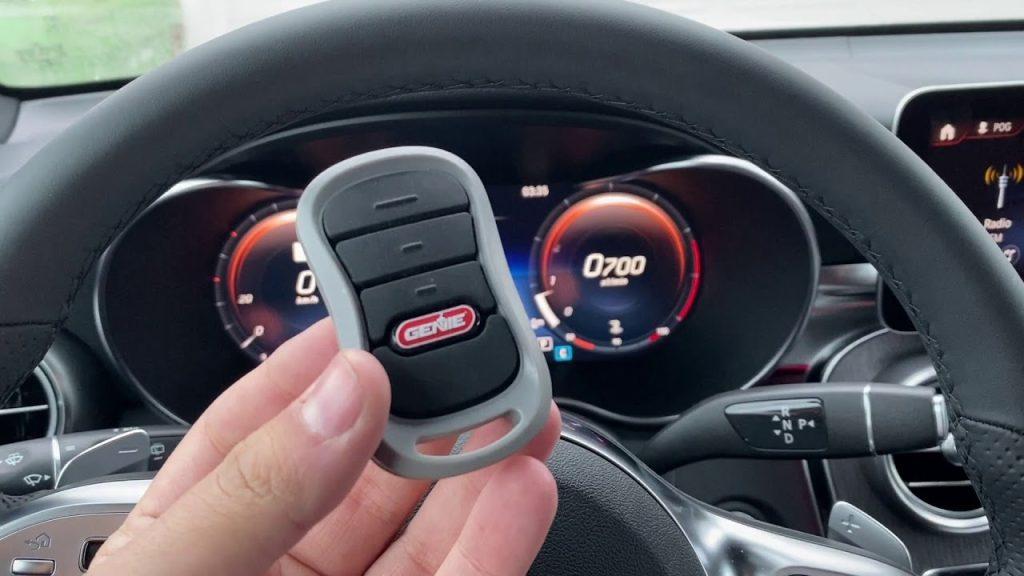
Sit in the driver’s seat with the ignition in the “ON” or “ACCESSORY” position (engine running is recommended to prevent battery drain). Press and hold the desired HomeLink button and your handheld remote simultaneously. Position the handheld remote 1–3 inches from the HomeLink buttons. Watch the HomeLink LED; it should transition from a slow blink to a rapid flash. This confirms the vehicle has captured the signal. Release both buttons.
Step 2: Activate the Garage Door Motor’s Learn Mode
Exit the vehicle and go to the garage door motor unit. Press and release the “Learn” or “Smart” button. You typically have 30 seconds to complete the next step before the motor exits learning mode. The indicator light on the motor will usually illuminate or begin blinking.
Step 3: Complete the Handshake
Return to your vehicle within the 30-second window. Firmly press and hold the programmed HomeLink button for 2 seconds, then release. Repeat this press-hold-release cycle up to 3 times. On the third press, the garage door should activate, confirming successful synchronization.
Troubleshooting the Sync
If the door does not move after three attempts:
- Verify you pressed the motor’s Learn button before returning to the car.
- Ensure you are holding the HomeLink button for a full 2 seconds each time.
- Check if the motor’s LED changed color or turned off, indicating it accepted the code.
What If My Car Has Car2U or Fixed-Code Technology?
Older vehicles or specific European models may use fixed-frequency transmitters. These do not use the rolling code handshake described above.
- Locate Dip Switches: Open your handheld remote and identify the tiny dip switch pattern (e.g., up-down-up-down).
- Match the Pattern: Use a small tool to set your vehicle’s transmitter switches to match the remote exactly. Some vehicles have electronic dip switch emulation via button combinations.
- Test Immediately: Fixed-code systems do not require the motor’s Learn button. Test the door immediately after matching switches.
Warning: Fixed-code systems are less secure. Consider upgrading your garage door opener to a rolling-code model if yours predates 1996.
Common Issues and Expert Solutions
Even when following instructions perfectly, technology can be finicky. Here are solutions to frequent problems encountered when figuring out how to program your car to garage door opener:
- LED Flashes but Door Won’t Move: The vehicle learned the signal, but the motor didn’t accept it. Re-do Step 2 and Step 3, ensuring you act within the 30-second window.
- Works Intermittently: This often indicates RF interference. LED bulbs in garage fixtures can emit radio frequencies that block signals. Swap to garage-door-safe LED bulbs rated for opener compatibility.
- Programmed Successfully but Stops Working After Days: Your vehicle’s memory may be corrupted, or the motor’s capacitor is failing. Try reprogramming; if it fails again, test the motor’s capacitor with a multimeter.
- New Opener, Old Car: You may need a HomeLink Compatibility Bridge. This small device plugs into the motor and translates old car signals to new opener protocols. Available at most hardware retailers for $25–$40.
Frequently Asked Questions (FAQ)
Q1: Can I program my car to garage door opener without the original remote?
Yes, but only if your garage door motor has a functioning “Learn” button. Press the Learn button on the motor, then follow the vehicle’s programming steps using only the in-car transmitter. If the motor lacks a Learn button and you have no remote, you must purchase a compatible universal remote first to establish the initial code.
Q2: Why does my HomeLink work for the gate but not the garage door?
Each HomeLink button operates independently. You may have programmed the correct frequency for the gate but selected the wrong button for the garage. Reprogram the specific button intended for the garage door, ensuring you complete the full rolling-code handshake with the garage motor’s Learn button.
Q3: Is it safe to program my car myself, or should I hire a professional?
It is completely safe for homeowners to program their own transmitters. The process involves only low-voltage signals and poses no electrical risk. However, if your garage door exhibits mechanical issues (grinding noises, uneven movement, reversed safety sensors), consult a certified technician before programming to avoid safety hazards.
Q4: How many devices can I program to my HomeLink system?
Most HomeLink systems support 3 to 7 programmable buttons, depending on the vehicle make and year. Each button can store one unique code. You can program multiple garage doors, gates, lights, or even smart home devices to different buttons within the same vehicle.
Q5: Will programming my car erase my existing garage door remotes?
No. Adding a vehicle transmitter does not delete previously programmed handheld remotes or keypads. The garage door motor stores multiple codes simultaneously. However, performing a factory reset on the motor (usually by holding the Learn button for 10+ seconds) will erase all devices. Avoid resetting unless necessary.
Q6: My car has a touchscreen interface instead of physical buttons. How do I program it?
Vehicles with digital HomeLink interfaces (common in Tesla, Rivian, and newer luxury models) guide you through programming via the infotainment screen. Navigate to Controls > Garage Door > Add Device, then follow the on-screen prompts. The underlying technology is identical; only the user interface differs. Consult your vehicle’s digital manual for exact menu paths.
Conclusion
Mastering how to program your car to garage door opener transforms daily convenience and eliminates unnecessary stress. By understanding your transmitter type, following precise safety protocols, and executing the correct programming sequence, you can achieve reliable, secure access in under 10 minutes. Remember: patience during the 30-second learning window and proper LED bulb selection solve the majority of issues.
You now have the knowledge to take control of your home automation. Did this guide help you successfully sync your vehicle? Share this article on Facebook, X (Twitter), or Pinterest to help friends and neighbors avoid costly service calls. Your share could save someone a rainy-day headache! 🚗🏠



Leave a Reply