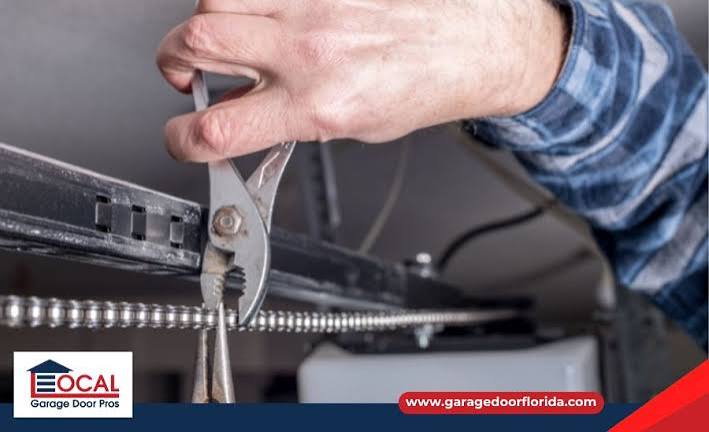
Have you ever walked into your garage only to hear a loud rattling noise or notice your garage door struggling to open smoothly? A loose chain is one of the most common issues homeowners face with Liftmaster openers, but ignoring it can lead to premature wear or even motor failure. If you are wondering how to tighten chain on Liftmaster garage door opener, you are in the right place. This guide will walk you through the process safely and effectively, ensuring your garage door operates quietly and reliably for years to come.
Why Does My Liftmaster Chain Become Loose?
Before diving into the fix, it is helpful to understand why this happens. Over time, the constant movement of opening and closing the garage door causes natural wear and tear on the chain links. Additionally, temperature fluctuations can cause metal components to expand and contract, slightly altering the tension.
According to general mechanical principles, a chain that is too tight puts excessive strain on the motor and gears, while a chain that is too loose can slip off the sprocket or create noisy vibrations. The goal is not to make the chain rigid like a guitar string, but to achieve the perfect “Goldilocks” tension—just right.
Tools You Will Need
You do not need an expensive toolkit to perform this maintenance. Most of these items are likely already in your home drawer:
- Stepladder: To safely reach the motor unit.
- Adjustable Wrench or Socket Set: Typically 7/16-inch or 1/2-inch, depending on your model.
- Screwdriver: Flathead or Phillips, if your model uses screw-based tensioners.
- Tape Measure: To check the exact slack distance.
- Safety Glasses: To protect your eyes from debris or grease.
- Garage Door Lubricant: Silicone-based or lithium grease (avoid WD-40 as it attracts dust).
Step-by-Step Guide: How To Tighten Chain On Liftmaster Garage Door Opener
Follow these steps carefully. Safety is paramount when working with garage door openers due to the high tension involved.
Step 1: Ensure Safety First
Disconnect the power to your garage door opener. You can do this by unplugging the unit from the wall outlet or turning off the circuit breaker. This prevents the motor from accidentally activating while you are working on the chain.
Pro Tip: If your opener has a battery backup, ensure it is also disconnected or disabled to prevent any unexpected movement.
Step 2: Locate the Tensioning Bolt
On most Liftmaster models, the chain tension is adjusted via a bolt located at the end of the rail, near the motor unit. Look for a long threaded rod with a nut on it. This is the tensioning mechanism.
- Chain Drive Models: The bolt is usually visible on the left side of the motor housing (when facing the garage door from inside).
- Belt Drive Models: Note that this guide is specifically for chain drives. Belt drives have different adjustment mechanisms and should not be tightened using this method.
Step 3: Measure the Current Slack
Before adjusting, measure how much slack exists. The general rule of thumb recommended by manufacturers is that the chain should hang about 1/4 inch to 1/2 inch below the base of the rail at its lowest point.
- Place your tape measure against the bottom of the rail.
- Measure the distance to the bottom of the chain.
- If it is more than 1/2 inch, it needs tightening. If it is less than 1/4 inch, it may be too tight.
Step 4: Adjust the Tensioning Nut
Using your adjustable wrench, locate the large nut on the tensioning bolt.
- To Tighten: Turn the nut clockwise. This pulls the trolley closer to the motor, reducing slack.
- To Loosen: Turn the nut counter-clockwise.
Turn the nut in small increments—about a quarter turn at a time. After each adjustment, re-measure the slack. Do not overtighten! A chain that is too tight will cause the motor to work harder, leading to overheating and premature gear wear.
Expert Insight: Many professional technicians suggest that a slight amount of sag is better than excessive tension. The chain should have a gentle curve, not a straight line.
Step 5: Check Alignment
Ensure the chain is centered on the sprocket and runs smoothly along the rail. If the chain is rubbing against the side of the rail, you may need to adjust the alignment brackets. Misalignment can cause uneven wear and noisy operation.
Step 6: Lubricate the Chain
Once the tension is correct, apply a small amount of garage door lubricant to the chain. Focus on the links and the sprocket teeth.
- Do: Use silicone-based spray or white lithium grease.
- Don’t: Use heavy oil or WD-40, which can attract dirt and gum up the mechanism.
Wipe away any excess lubricant to prevent dripping onto your car or floor.
Step 7: Test the Operation
Reconnect the power to the opener. Stand clear of the door and use the wall button to operate the garage door. Listen for any unusual noises. The chain should move smoothly without rattling or jerking.
If the noise persists, double-check the tension and alignment. Sometimes, worn rollers or hinges on the door itself can mimic chain noise.
Common Mistakes to Avoid
| Mistake | Consequence | Solution |
|---|---|---|
| Overtightening | Motor strain, gear damage, noisy operation | Keep 1/4–1/2 inch slack |
| Ignoring Lubrication | Increased friction, rust, premature wear | Lubricate every 6 months |
| Adjusting While Powered | Risk of injury, accidental activation | Always disconnect power first |
| Using Wrong Lubricant | Dirt buildup, gummed-up chain | Use silicone or lithium grease |
When to Call a Professional
While tightening the chain is a manageable DIY task, there are situations where professional help is recommended:
- The chain is damaged: If you see stretched links, rust, or cracks, replace the chain entirely.
- The motor makes grinding noises: This could indicate internal gear failure, not just chain tension.
- The door is unbalanced: If the door does not stay in place when manually lifted halfway, the springs may need adjustment. Never attempt to adjust garage door springs yourself; they are under extreme tension and can cause serious injury.
For more information on garage door safety standards, you can refer to Wikipedia’s page on Garage Door Openers, which provides a comprehensive overview of the technology and safety features involved.
FAQ Section
Q1: How often should I tighten my Liftmaster chain?
A: You should check the chain tension every 6 months during routine maintenance. However, if you notice increased noise or visible sagging, inspect it immediately. Regular lubrication can help maintain proper tension longer.
Q2: Can I tighten the chain too much?
A: Yes, overtightening is a common mistake. A chain that is too tight puts excessive load on the motor and gears, leading to premature failure. Always maintain a slight slack of 1/4 to 1/2 inch.
Q3: My chain is still noisy after tightening. What should I do?
A: Noise can come from various sources. Check if the rollers need lubrication, if the hinges are loose, or if the track is misaligned. If the chain itself is dry, apply a suitable lubricant. If the noise persists, the chain may be worn out and need replacement.
Q4: Is it safe to adjust the chain while the door is closed?
A: It is safer to adjust the chain when the door is closed and the power is disconnected. This ensures the trolley is in a stable position. Never put your hands near the chain or sprocket while the motor is powered.
Q5: What type of lubricant is best for Liftmaster chains?
A: Use a silicone-based spray or white lithium grease. These lubricants are designed for metal-on-metal contact and do not attract dust and dirt like petroleum-based oils (e.g., WD-40) do.
Q6: My Liftmaster has a belt drive, not a chain. Can I use this method?
A: No. Belt drive openers use a rubber or reinforced belt, which requires different adjustment procedures. Refer to your specific model’s manual for belt tensioning instructions. Attempting to tighten a belt like a chain can damage the system.
Conclusion
Learning how to tighten chain on Liftmaster garage door opener is a valuable skill that can save you money on repairs and extend the life of your opener. By maintaining the correct tension—typically 1/4 to 1/2 inch of slack—and keeping the chain well-lubricated, you ensure quiet, smooth, and reliable operation.
Remember, safety first: always disconnect the power before working on your opener, and never attempt to adjust the high-tension springs yourself. If you found this guide helpful, please share it with friends or neighbors who might be dealing with a noisy garage door. A well-maintained garage door is a happy garage door!
Disclaimer: This article is for informational purposes only. Always refer to your specific Liftmaster model’s user manual for detailed instructions and safety warnings. If you are unsure about any step, consult a certified garage door technician.



Leave a Reply