Have you ever found yourself stuck with a garage door that won’t budge due to a broken spring? Fear not! In this comprehensive guide, we will delve into the essential steps and techniques on “How To Raise Garage Door With Broken Spring.” Unlock the secrets to safely and effectively handle this common issue, empowering you to regain control over your garage access with confidence.
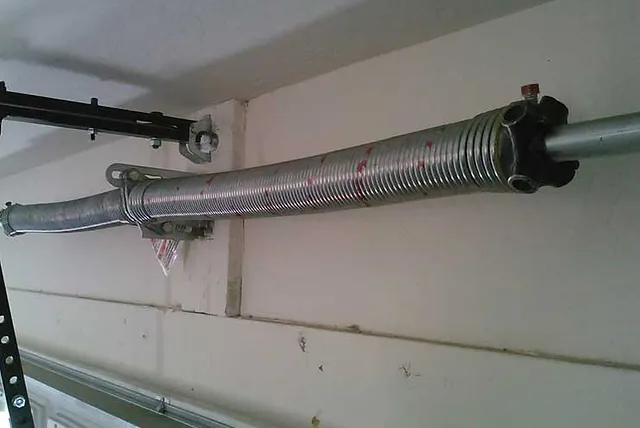
Understanding the Challenge: How To Raise Garage Door With Broken Spring
Why Do Garage Door Springs Break?
Before we dive into the solution, let’s briefly explore why garage door springs break. These springs play a crucial role in counterbalancing the weight of the door, making it easy to open and close. Over time, wear and tear, rust, and general usage can lead to the inevitable breakage of these springs. Recognizing the signs of a broken spring, such as the door feeling unusually heavy or hearing loud snapping sounds, is the first step in addressing the issue.
How To Raise Garage Door With Broken Spring: A Step-by-Step Guide
Step 1: Assess the Situation
When confronted with a garage door that won’t open due to a broken spring, take a moment to assess the situation. Look for any visible signs of damage to the spring, and ensure the area around the garage door is clear of any obstructions.
Step 2: Disconnect the Garage Door Opener
To prevent any further strain on the garage door opener, disconnect it from the power source. This step is crucial to avoid causing additional damage to the opener mechanism.
Step 3: Locate the Emergency Release Cord
Most garage doors are equipped with an emergency release cord. Find this cord, usually hanging from the opener rail, and pull it down. This action disengages the door from the opener carriage, allowing you to operate it manually.
Step 4: Lift the Door with Caution
With the door disengaged from the opener, carefully lift it manually. Be mindful of the weight, as it may be heavier without the support of the springs. If needed, enlist the help of another person to make the process safer and more manageable.
Step 5: Secure the Door in the Open Position
After successfully lifting the garage door, secure it in the open position using a sturdy object. This step is essential for your safety and prevents the door from unexpectedly closing while you are inside the garage.
Step 6: Seek Professional Repair
While the above steps provide a temporary solution to open your garage door with a broken spring, it’s crucial to seek professional repair. Attempting to replace the spring without the necessary expertise can lead to further damage or injury. Contact a reputable garage door repair service to assess the extent of the damage and provide a permanent solution.
Tips for Handling a Garage Door With a Broken Spring
Avoiding DIY Spring Replacement
Attempting to replace a broken garage door spring as a DIY project is not recommended. These springs are under high tension and can cause serious injury if not handled correctly. Professional expertise ensures a safe and effective resolution.
Regular Spring Maintenance
Preventive measures can go a long way in avoiding sudden spring breaks. Regularly inspect your garage door springs for signs of wear, rust, or damage. If any issues are detected, address them promptly to extend the lifespan of your springs.
Conclusion: Empowering Homeowners in Garage Door Emergencies
Encountering a broken garage door spring can be a stressful situation, but with the right knowledge, you can navigate it with confidence. “How To Raise Garage Door With Broken Spring” provides you with the essential steps to handle this common issue safely and effectively. Remember, while temporary solutions are valuable, seeking professional repair ensures a long-term fix and prevents future complications. Stay informed, stay safe, and take charge of your garage door even when faced with a broken spring.



Leave a Reply