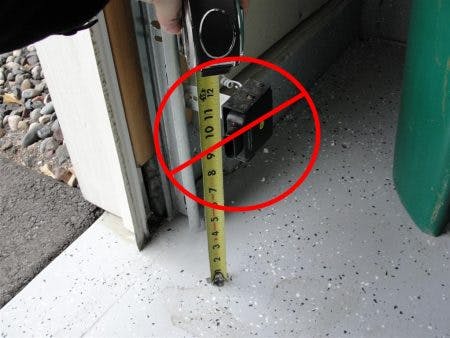
Are you frustrated with your garage door opener sensors not working properly? Don’t worry; you’re not alone. In this troubleshooting guide, we’ll explore common reasons why garage door opener sensors may malfunction and provide practical solutions to help you resolve the issue and get your garage door working smoothly again.

Understanding Garage Door Opener Sensors Not Working
Garage door opener sensors play a crucial role in ensuring the safety and proper functioning of your garage door system. When these sensors fail to work correctly, it can lead to various issues, including the door not closing or opening properly, or even refusing to operate altogether.
Common Causes of Garage Door Opener Sensors Not Working
- Misalignment: One of the most common reasons for garage door opener sensors not working is misalignment. If the sensors are not properly aligned with each other, they may fail to detect each other’s signals, preventing the door from closing.
- Obstruction: Another common issue is the presence of obstacles or debris blocking the sensors’ line of sight. Even small objects such as leaves, cobwebs, or dirt can interfere with the sensors’ operation and cause them to malfunction.
- Wiring Problems: Faulty or damaged wiring can also prevent the sensors from working correctly. Loose connections, frayed wires, or damaged insulation can disrupt the flow of electrical signals and inhibit the sensors’ ability to communicate with the opener.
- Sunlight Interference: Garage door opener sensors rely on infrared light beams to detect obstacles in the door’s path. Direct sunlight or bright indoor lighting can interfere with these infrared signals, causing the sensors to malfunction, especially during the daytime.
Troubleshooting Garage Door Opener Sensors Not Working
Now that we understand some common causes of garage door opener sensors not working let’s explore some troubleshooting steps to help you diagnose and fix the issue:
1. Check Sensor Alignment
Start by inspecting the alignment of the sensors. Ensure that both sensors are facing each other directly and are perfectly aligned. Use a level to verify that they are positioned at the same height and angle.
2. Remove Obstacles
Clear any obstacles or debris that may be blocking the sensors’ line of sight. Thoroughly clean the sensor lenses and the surrounding area to ensure optimal visibility. Avoid placing objects near the sensors that could obstruct their operation.
Read too: Why Your Liftmaster Garage Door Won’t Stay Closed and How to Fix It? Troubleshooting Tips
3. Inspect Wiring Connections
Carefully inspect the wiring connections between the sensors and the garage door opener. Tighten any loose connections and replace any damaged or frayed wires. Ensure that the wiring is securely attached and properly insulated to prevent electrical issues.
4. Shield Sensors from Sunlight
If sunlight is interfering with the sensors’ operation, consider installing sun shields or shades to block direct sunlight from reaching the sensors. Alternatively, adjust the angle of the sensors or install them in a location where they are less likely to be affected by sunlight.
5. Test and Adjust
Once you’ve completed the troubleshooting steps, test the garage door opener to see if the sensor are working correctly. If the issue persists, repeat the troubleshooting process and consider seeking professional assistance if necessary.
Conclusion
Dealing with garage door opener sensor not working can be frustrating, but with the right troubleshooting techniques, you can diagnose and fix the issue effectively. By checking sensor alignment, removing obstacles, inspecting wiring connections, shielding sensors from sunlight, and testing and adjusting as needed, you can restore the functionality of your garage door and ensure safe and reliable operation.


Leave a Reply