Your garage door opener is a modern convenience that provides ease and security when entering and leaving your home. However, like all electronic devices, it relies on power, and the battery in your garage door opener is crucial to its operation. So, if you’re wondering how to change the battery in a garage door opener, you’ve come to the right place. In this guide, we’ll walk you through the process of safely and effectively replacing the battery in your garage door opener.
The Significance of a Functional Garage Door Opener Battery
Before we delve into the steps of changing the battery, it’s essential to understand the importance of a properly functioning battery in your garage door opener:
- Reliability: A functional battery ensures that your garage door opener responds promptly every time you press the remote or keypad, saving you time and frustration.
- Security: A working battery provides a reliable security system. In case of a power outage or an emergency, your garage door opener can still be operated.
- Convenience: A properly powered garage door opener offers the convenience of accessing your garage without manual effort, especially in adverse weather conditions.
- Safety: A well-maintained battery ensures that your garage door opener’s safety features, like the auto-reverse mechanism, continue to work effectively, preventing accidents.
Read too: What Do You Need To Repair A Garage Door Rust
Steps to Change the Battery in a Garage Door Opener
Changing the battery in your garage door opener is a straightforward process. Here’s how to do it:
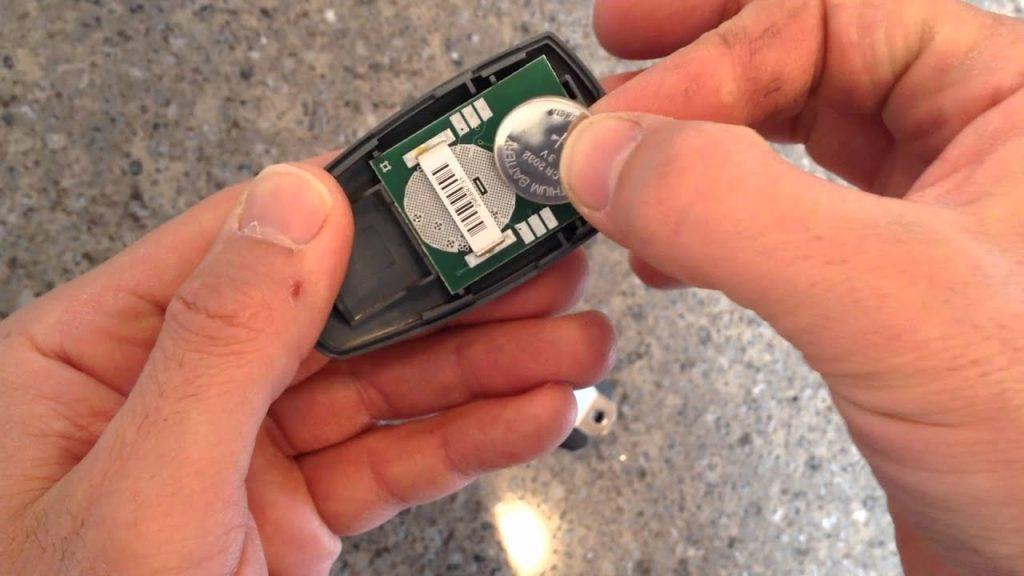
1. Identify the Type of Battery:
The first step is to identify the type of battery your garage door opener uses. Typically, garage door openers use a 3-volt lithium coin-cell battery, such as a CR2032 or CR2025. Check your garage door opener’s manual for specific details or look for a label on the battery compartment.
2. Safety Precautions:
Ensure the garage door is fully closed before starting the process. This prevents the door from moving while you’re working on the opener. Also, disconnect the garage door opener from the power source, either by unplugging it or turning off the circuit breaker.
3. Locate the Battery Compartment:
Look for the battery compartment on your garage door opener. It is usually on the back or bottom of the device. Use a ladder if needed to reach the compartment safely.
4. Remove the Old Battery:
Open the battery compartment, and you will see the old battery. Carefully remove it, taking note of its orientation. Most coin-cell batteries have a positive (+) and negative (-) side indicated. Make sure you remember which way the old battery is placed.
5. Insert the New Battery:
Take the new battery of the same type and insert it into the battery compartment with the same orientation as the old one. Press it firmly but gently into place.
6. Close the Battery Compartment:
Securely close the battery compartment, making sure it latches or locks in place.
7. Reconnect the Power:
After changing the battery, reconnect the garage door opener to the power source. This can be done by plugging it back in or turning on the circuit breaker.
8. Test the Garage Door Opener:
Test your garage door opener by pressing the remote control or keypad. It should operate smoothly without any issues. If it doesn’t, double-check the battery’s placement and make sure it’s correctly installed.
Conclusion
Changing the battery in a garage door opener is a simple task that ensures the continued reliability, security, and convenience of your garage door system. Regularly inspect and replace the battery when needed to avoid any unexpected issues. Remember to follow safety precautions, such as disconnecting the power, and refer to your garage door opener’s manual for specific instructions. With a fresh battery, you can confidently rely on your garage door opener for smooth and trouble-free operation.


Leave a Reply