If your wall control is malfunctioning, outdated, or you’re upgrading to a smart panel, learning how to remove LiftMaster garage door opener wall button is a simple but essential task. Many homeowners worry about wiring or electrical risks, but the process is low-voltage and very manageable. This guide explains everything clearly so you can remove the wall button safely and confidently.
What Is a LiftMaster Garage Door Opener Wall Button?
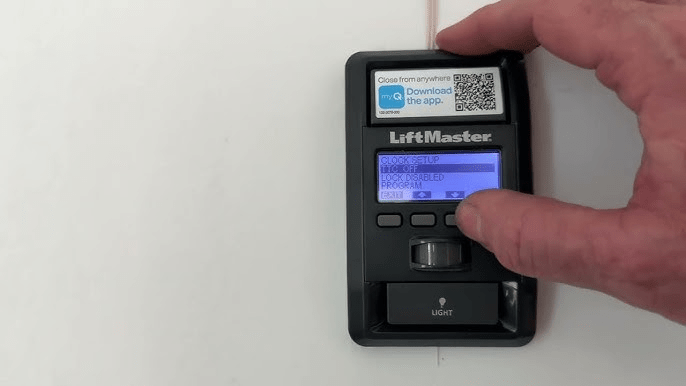
The wall button (also called a wall control) is the indoor switch that sends open/close commands to your garage door opener.
Read too: How To Replace Garage Door Roller Like a Pro? Step-by-Step Guide
What the wall button controls:
- Open and close function
- Light activation
- Lock/vacation mode (on newer models)
- Smart or Wi-Fi features (select models)
The wall button connects to the opener using low-voltage wiring, making it safe to handle when proper steps are followed.
About LiftMaster Wall Controls
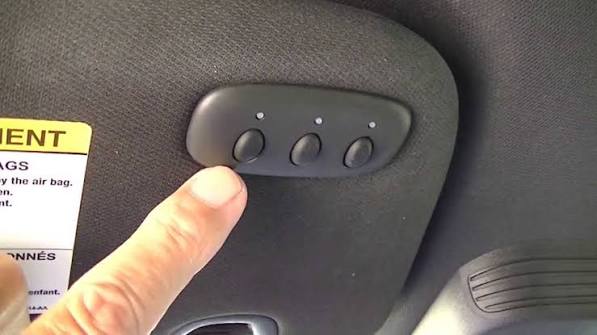
LiftMaster wall buttons come in several styles:
- Basic push-button controls
- Multi-function wall panels
- Smart wall controls with LCD displays
- Motion-detecting wall consoles
Despite design differences, removal steps are nearly identical across models.
Is It Safe to Remove the Wall Button Yourself?
Yes. Removing a LiftMaster wall button is considered low-risk DIY work.
Safe when:
- You disconnect power to the opener
- You handle only low-voltage wires
- You avoid pulling or damaging wiring
Call a professional if:
- Wires are damaged inside the wall
- The button is part of a custom smart-home system
No high-voltage electricity runs through the wall button itself.
Tools You’ll Need
Prepare these basic tools:
- Flat-head screwdriver
- Phillips screwdriver
- Small container for screws
- Electrical tape or wire labels
- Voltage tester (optional, for peace of mind)
Most wall buttons require no power tools.
Step-by-Step: How To Remove LiftMaster Garage Door Opener Wall Button
Step 1: Disconnect Power to the Opener
Even though the wall button is low-voltage, always start safely.
- Unplug the garage door opener from the outlet
- Or turn off the breaker controlling the garage
- Wait 30 seconds
This prevents accidental door movement.
Step 2: Remove the Wall Button Faceplate
Most LiftMaster wall buttons have a snap-on or screw-mounted faceplate.
- Gently pry off the faceplate using a flat-head screwdriver
- Or remove the single screw holding the front cover
Set the faceplate aside carefully.
Step 3: Unscrew the Wall Button From the Wall
Once exposed:
- Locate the mounting screws (usually 2)
- Use a Phillips screwdriver to remove them
- Pull the wall button gently away from the wall
Do not yank—it’s still connected by wires.
Step 4: Identify and Label the Wires
LiftMaster wall buttons typically use two low-voltage wires.
- Colors are often white and red, but may vary
- Take a photo or label each wire before removal
This makes reinstallation or replacement much easier.
Step 5: Disconnect the Wires
Using a screwdriver if needed:
- Loosen the terminal screws
- Slide wires out gently
- Do not cut wires unless replacing the system
Wrap exposed wire ends with electrical tape for safety.
Step 6: Remove the Wall Button Completely
With wires disconnected:
- Lift the wall button away from the wall
- Store it if reusing or discard if replacing
You’ve now successfully removed the LiftMaster wall button.
What to Do After Removing the Wall Button
Depending on your goal, you can now:
- Install a new LiftMaster wall control
- Upgrade to a smart wall panel
- Relocate the wall button
- Patch and repaint the wall
Always verify wire placement before reconnecting.
How to Install a New LiftMaster Wall Button (Quick Overview)
Installation is essentially the reverse process.
- Strip wire ends (¼ inch if needed)
- Insert wires into matching terminals
- Mount the new wall button
- Snap on faceplate
- Restore power and test
Most replacements take 10–15 minutes total.
Common Problems and Easy Fixes
Wall Button Won’t Come Off
- Hidden screw under the faceplate
- Paint sealing the edges—score gently
Wires Slip Back Into the Wall
- Tape them temporarily to the wall
- Use needle-nose pliers to retrieve
Door Opens When Wires Touch
- Normal behavior
- Keep wires separated during work
Differences Between Old and New LiftMaster Wall Buttons
| Feature | Older Button | New Smart Button |
|---|---|---|
| Wiring | 2-wire | 2-wire |
| Features | Basic open/close | Lock, light, Wi-Fi |
| Removal difficulty | Easy | Easy |
| Compatibility | Limited | Model-specific |
Always match the replacement button to your opener model.
Why Homeowners Remove LiftMaster Wall Buttons
Common reasons include:
- Button stopped responding
- Intermittent door operation
- Upgrade to smart features
- Remodeling or relocation
- Cosmetic updates
Replacing a faulty wall button often fixes door issues without replacing the opener.
Helpful Technical Insight
Garage door wall controls operate using low-voltage signaling to the opener’s logic board. For a general explanation of garage door opener systems, you can reference Wikipedia:
https://en.wikipedia.org/wiki/Garage_door_opener
FAQ: How To Remove LiftMaster Garage Door Opener Wall Button
Q1: Is there electricity running through the wall button?
Only low-voltage signal current—no household voltage.
Q2: Can I remove the wall button without unplugging the opener?
It’s possible, but unplugging is strongly recommended for safety.
Q3: How long does it take to remove a LiftMaster wall button?
Usually 5–10 minutes.
Q4: Can I reuse the same wires with a new wall button?
Yes, as long as the wires are in good condition.
Q5: Will removing the wall button affect my remotes?
No. Remotes work independently of the wall control.
Conclusion
Knowing how to remove LiftMaster garage door opener wall button gives you control over repairs, upgrades, and troubleshooting without needing a service call. With basic tools, low-voltage wiring, and careful steps, this task is safe and beginner-friendly.
If this guide helped you, share it on social media so other homeowners can confidently handle simple garage door fixes. 🚪🔧

Leave a Reply