Is your Liftmaster garage door refusing to close with a persistent yellow light? Dive into our comprehensive guide on “Liftmaster Garage Door Won’t Close Yellow Light” to unravel the causes, troubleshooting steps, and effective solutions for restoring the seamless operation of your garage door.
Introduction: Navigating the Challenge of a Yellow Light on a Refusing Liftmaster Garage Door
Encountering a yellow light on your Liftmaster garage door opener when attempting to close it can be perplexing. In this detailed guide, we delve into the intricacies of the issue, providing valuable insights into why your Liftmaster garage door won’t close and what steps you can take to address the problem.
Common Causes of Liftmaster Garage Door Won’t Close Yellow Light
1. Sensor Misalignment or Obstruction
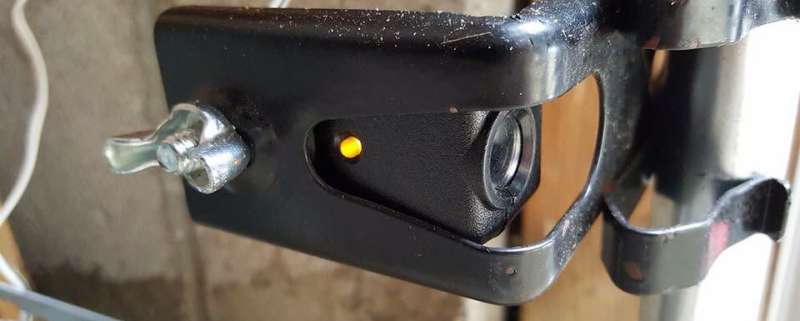
Misaligned or obstructed safety sensors are a prevalent cause of the yellow light issue. These sensors, located near the garage door’s base, communicate with each other to ensure there are no obstructions in the door’s path. If misaligned or blocked, the sensors trigger the yellow light, preventing the door from closing.
2. Wiring or Electrical Issues
Faulty wiring or electrical issues within the garage door opener system can also result in a yellow light. Check for loose or damaged wiring connections, and inspect the power source to ensure a stable electrical supply to the Liftmaster opener. Addressing wiring issues can often resolve the yellow light problem.
3. Incorrect Sensor Alignment or Settings*
Even a slight misalignment of the sensors or incorrect settings can lead to the yellow light indicating a door closure problem. Consult the Liftmaster user manual for guidance on sensor alignment and configuration. Properly aligning and configuring the sensors can restore normal operation.
Liftmaster Garage Door Won’t Close Yellow Light: Troubleshooting Steps
1. Sensor Alignment and Obstruction Check*
Begin troubleshooting by inspecting the alignment of the safety sensors. Ensure that they are facing each other and are not obstructed by debris, dust, or any other objects. Clean the sensor lenses and make adjustments to their positioning to eliminate misalignment or obstructions.
2. Wiring Inspection and Electrical Checks*
Examine the wiring connections within the garage door opener system. Tighten any loose connections and replace damaged wiring. Verify the stability of the power source by checking the outlet and ensuring proper voltage. If electrical issues persist, consult a professional electrician for further inspection and repairs.
3. Sensor Calibration and Adjustment*
Refer to the Liftmaster user manual for instructions on calibrating and adjusting the sensors. Follow the recommended procedures to configure the sensors correctly. This may involve tweaking the alignment or modifying settings to ensure they communicate effectively and eliminate the yellow light issue.
Read too: Why Is My Chamberlain Garage Door Opener Opening By Itself? Decoding the Mystery
Preventive Measures and Maintenance Tips for Liftmaster Garage Door Opener
1. Regular Sensor Checks and Cleaning*
Incorporate regular checks of the garage door sensors into your maintenance routine. Clean the sensor lenses to prevent dust and debris accumulation, ensuring their optimal performance. Addressing potential issues proactively can prevent the recurrence of the yellow light problem.
2. Scheduled Professional Inspections*
Consider scheduling periodic professional inspections of your Liftmaster garage door opener system. A trained technician can identify and address potential issues before they escalate, ensuring the reliable and safe operation of your garage door.
Conclusion: Regaining Control Over Your Liftmaster Garage Door
As we conclude our exploration of “Liftmaster Garage Door Won’t Close Yellow Light,” it’s evident that understanding the causes and implementing effective troubleshooting steps are crucial for restoring normal operation. By following the comprehensive guide and incorporating preventive measures, homeowners can regain control over their Liftmaster garage doors and enjoy uninterrupted functionality.
Remember, the yellow light is a communication from your Liftmaster garage door opener. Use this guide as your resource to decipher the signals and take proactive steps to ensure a smoothly operating garage door.
Leave a Reply