Before installing a garage door, it’s essential to prepare the rough opening correctly. The rough opening is the framework that supports the garage door and allows it to operate smoothly. For a 9×7 garage door, precise measurements and careful framing are crucial. In this guide, we’ll walk you through the steps to create the perfect rough opening for a 9×7 garage door.
Measuring for the Right Fit
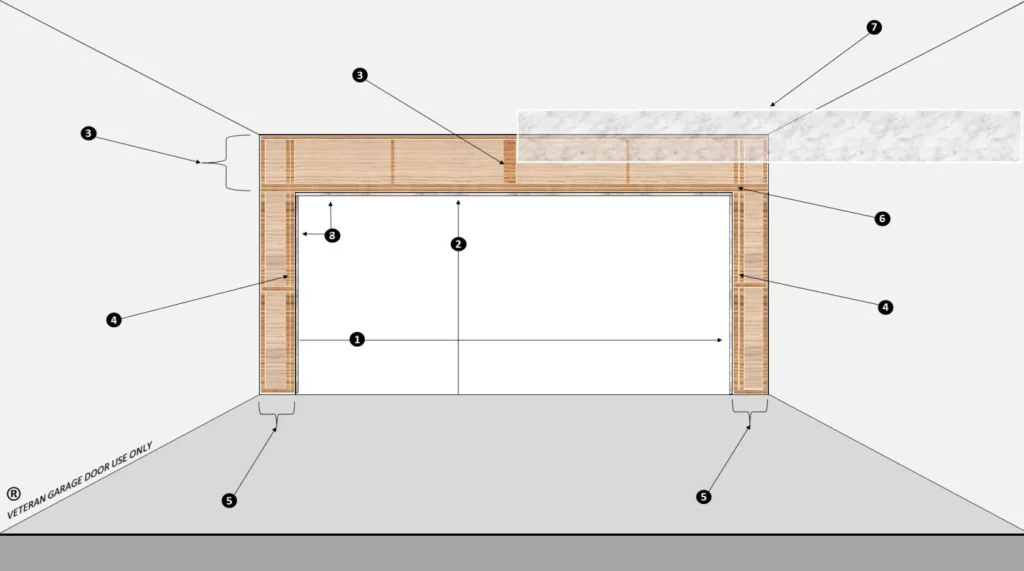
Step 1: Measure the Width
Start by measuring the width of your garage door opening. For a 9×7 garage door, you’ll need an opening that’s 9 feet wide. Measure from the inside edge of one side to the inside edge of the other. Make sure to measure in multiple places to ensure accuracy, as garage openings are not always perfectly uniform.
Step 2: Measure the Height
Next, measure the height of the opening. For a 9×7 door, the opening should be 7 feet tall. Again, measure from the inside edge of the opening’s floor to the inside edge of the header above. Like with width, take multiple measurements to confirm consistency.
Framing the Rough Opening
Step 3: Frame the Width
To frame the width of the rough opening, you’ll need to install two vertical studs or jambs on either side of the opening. These studs should be the same height as the garage door plus 1.5 inches to account for the space between the door and the floor.
Step 4: Frame the Header
The header is a horizontal beam that supports the weight of the wall above the garage door. For a 9×7 garage door, a double 2×8 or 2×10 header is typically used. This provides adequate support for the door and any additional loads.
Step 5: Add King and Trimmer Studs
King studs run from the bottom plate to the top plate on each side of the rough opening and provide additional support for the header. Trim or cripple studs are installed between the header and the top plate to ensure that the framing is flush.
Ensuring Level and Plumb
Step 6: Check for Level
Using a level, ensure that the vertical studs (jambs) are plumb and that the header is level. Proper alignment is crucial to prevent issues with the door’s operation.
Step 7: Install Bracing
To maintain the structural integrity of the rough opening, diagonal bracing can be added. This prevents the frame from twisting or shifting over time.
Preparing for Garage Door Installation
Step 8: Weatherproofing
Before installing the garage door, it’s essential to apply weatherproofing measures. This typically includes installing a weather seal on the bottom of the door to keep out drafts and moisture.
Step 9: Hardware Installation
Follow the manufacturer’s instructions for installing the garage door hardware, including tracks, rollers, and springs. Proper installation is vital for the door’s safe and smooth operation.
Final Thoughts
Creating the perfect rough opening for a 9×7 garage door is a crucial step in the installation process. A well-framed opening ensures that the door operates smoothly, seals out the elements, and provides the necessary support for the door’s weight. If you’re unsure about any aspect of the installation, it’s always a good idea to consult with a professional garage door installer. With the right preparation and attention to detail, your 9×7 garage door will serve you well for years to come.


Leave a Reply