Are you experiencing issues with your garage door opener? Discover how to tighten the chain on your garage door opener with our comprehensive guide. Follow step-by-step instructions and expert tips to ensure smooth and reliable operation of your garage door.
Understanding the Importance of a Properly Tightened Chain
The chain on your garage door opener plays a crucial role in the smooth operation of the system. Here’s why it’s essential to ensure the chain is properly tightened:
- Smooth Operation: A properly tightened chain helps the garage door opener operate smoothly and quietly.
- Prevention of Damage: A loose chain can cause excessive wear and tear on the opener components, leading to costly repairs.
- Safety: A securely tightened chain reduces the risk of the garage door malfunctioning or becoming jammed during operation.
Tighten Chain On Garage Door Opener: Step-by-Step Guide
Follow these steps to tighten the chain on your garage door opener:
1. Disconnect Power
Before starting any work on your garage door opener, disconnect power to the unit to prevent accidents or injuries.
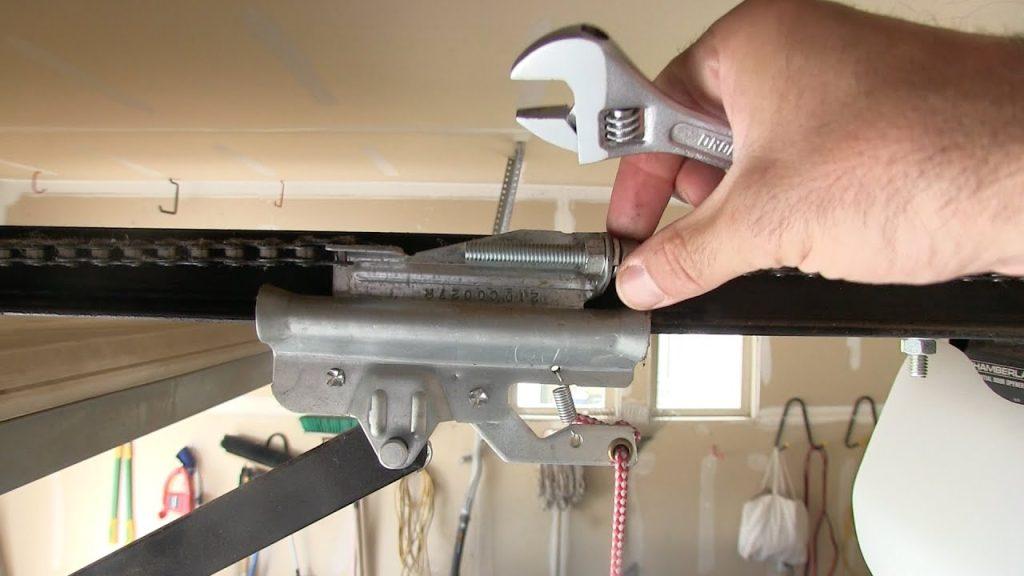
2. Locate the Chain Adjustment Mechanism
Identify the chain adjustment mechanism on your garage door opener. This is typically located near the motor unit and may require the use of a wrench or socket wrench to adjust.
3. Loosen the Lock Nuts
Using a wrench, loosen the lock nuts on the chain adjustment mechanism. This will allow you to adjust the tension of the chain.
4. Adjust the Chain Tension
Turn the adjustment bolt clockwise to tighten the chain or counterclockwise to loosen it. Make small adjustments at a time and test the tension frequently.
5. Check the Tension
Once you’ve achieved the desired tension, tighten the lock nuts to secure the adjustment in place. Double-check the tension to ensure it’s consistent along the length of the chain.
6. Reconnect Power
After tightening the chain, reconnect power to the garage door opener and test its operation. Listen for any unusual noises or vibrations that may indicate an issue with the chain tension.
Read too: No Power to Genie Garage Door Opener – Resolving the Issue with Ease: Troubleshooting Guide
Expert Tips for Effective Chain Tightening
- Regularly inspect the chain tension and adjust as needed to prevent excessive wear.
- Use a lubricant specifically designed for garage door opener chains to keep the chain operating smoothly.
- If you’re unsure about adjusting the chain tension, consult the owner’s manual or contact a professional technician for assistance.
Conclusion
Tightening the chain on your garage door opener is a simple yet essential maintenance task that can help prolong the life of your opener and ensure smooth operation. By following the step-by-step guide and expert tips provided in this article, you can effectively Tighten Chain On Garage Door Opener and enjoy reliable performance for years to come.


Leave a Reply