How To Set Up Remote Control For Garage Door Opener? Garage door openers provide a high level of convenience and security for homeowners, allowing you to open and close your garage door with the simple push of a button. One of the most important aspects of this convenience is the remote control for your garage door opener. However, setting up your remote can sometimes be tricky, especially if you’re doing it for the first time or if you’ve recently replaced your remote or opener.
In this detailed guide, we’ll walk you through everything you need to know about how to set up remote control for garage door opener, including step-by-step instructions, troubleshooting tips, and some helpful insights to make the process as smooth as possible.
Why You Need to Set Up Your Remote Control for Garage Door Opener
Before diving into the steps, it’s essential to understand why setting up your garage door remote control is necessary. Whether you’ve bought a new garage door opener, replaced an old remote, or are simply troubleshooting, the setup process is vital to ensure proper communication between your remote and the garage door opener.
Read too: Door and Garage Door Companies: Choosing the Right Partner for Your Needs
Here are a few common scenarios where you may need to set up or reprogram your remote control:
- New Garage Door Opener Installation: If you’ve just installed a new opener, you’ll need to program the remote so it can control the door.
- Lost or Broken Remote: If your previous remote is lost or damaged, setting up a new remote becomes essential.
- Multiple Remote Controls: If you have more than one remote for your garage, you might need to set up each one to work with the opener.
- Battery Changes: After changing the batteries in your remote control, it may need to be reprogrammed.
How to Set Up Remote Control for Garage Door Opener: Step-by-Step Guide
Setting up a remote control for a garage door opener is typically a straightforward process. However, it’s essential to follow the correct steps to avoid any frustration or technical issues. Here’s how to set up your garage door remote control in a few simple steps.
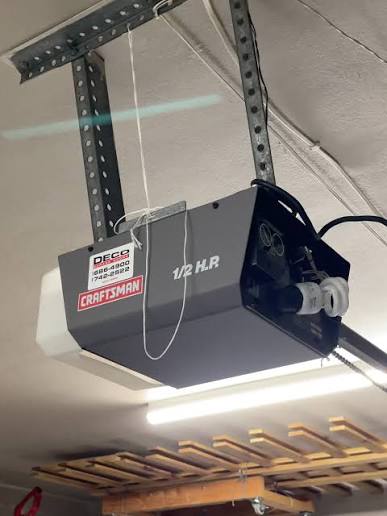
Step 1: Identify the Type of Garage Door Opener You Have
Before setting up the remote control, you need to know which type of garage door opener system you are working with. Common types of openers include:
- Chain Drive Openers
- Belt Drive Openers
- Screw Drive Openers
- Smart Garage Door Openers (which can be connected to Wi-Fi)
The type of opener you have will influence the specific method for setting up the remote control. Check the user manual of your opener for more details, or refer to the manufacturer’s website for specific instructions.
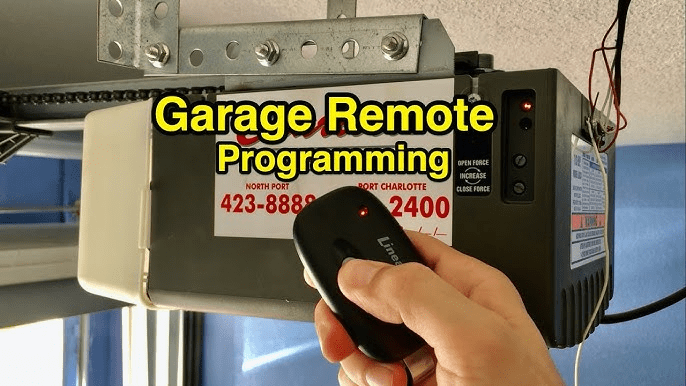
Step 2: Locate the “Learn” Button on the Garage Door Opener
Most garage door openers, especially newer models, feature a “Learn” button that you’ll need to press during the remote setup process. This button allows your opener to recognize and sync with the remote control.
Here’s how to find the “Learn” button:
- Location: The “Learn” button is usually located on the back or side of the opener motor unit.
- Color: The button may be a different color depending on the brand (e.g., red, green, or yellow).
- Indicator Light: There may be a small light next to the button, which will help indicate the status of the programming process.
Step 3: Clear the Memory (Optional)
If you’ve had the garage door opener for a while and need to clear previous remote codes (perhaps because you’ve lost a remote or are giving away an old one), follow these steps before setting up the new remote:
- Press and hold the Learn button until the indicator light turns off (about 6 seconds).
- This action will erase all stored remote codes from the opener’s memory, so make sure to reprogram all remotes that need access to the opener.
Step 4: Program the Remote Control
Now that the opener is ready to sync with your remote, follow these steps to program the remote control for your garage door opener:
- Press the Learn Button: Press the Learn button on the opener until the indicator light turns on. This indicates that the opener is in programming mode and ready to accept signals from the remote.
- Press the Remote Button: Within 30 seconds of pressing the Learn button, press and hold the button on the remote that you want to program. Keep holding the button for about 2 seconds until the opener’s indicator light flashes or turns off.
- Test the Remote: After the indicator light turns off or blinks, test the remote by pressing the programmed button. The garage door should respond by opening or closing, depending on its current position.
Step 5: Additional Remote Programming (if needed)
If you have more than one remote to program, repeat the process for each one. Simply press the Learn button again, followed by the remote’s button. Each remote must be programmed individually.
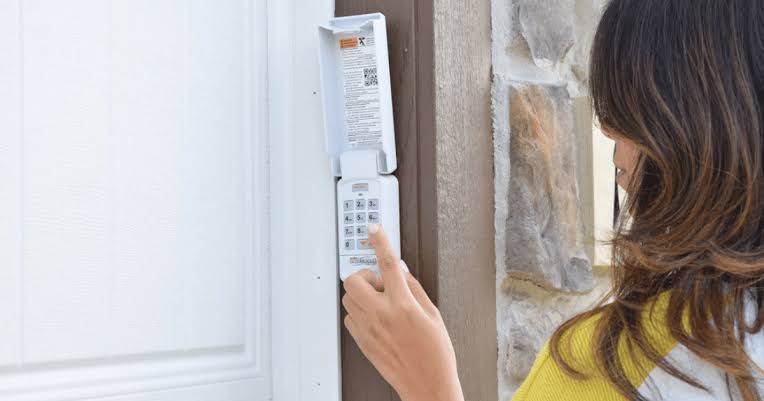
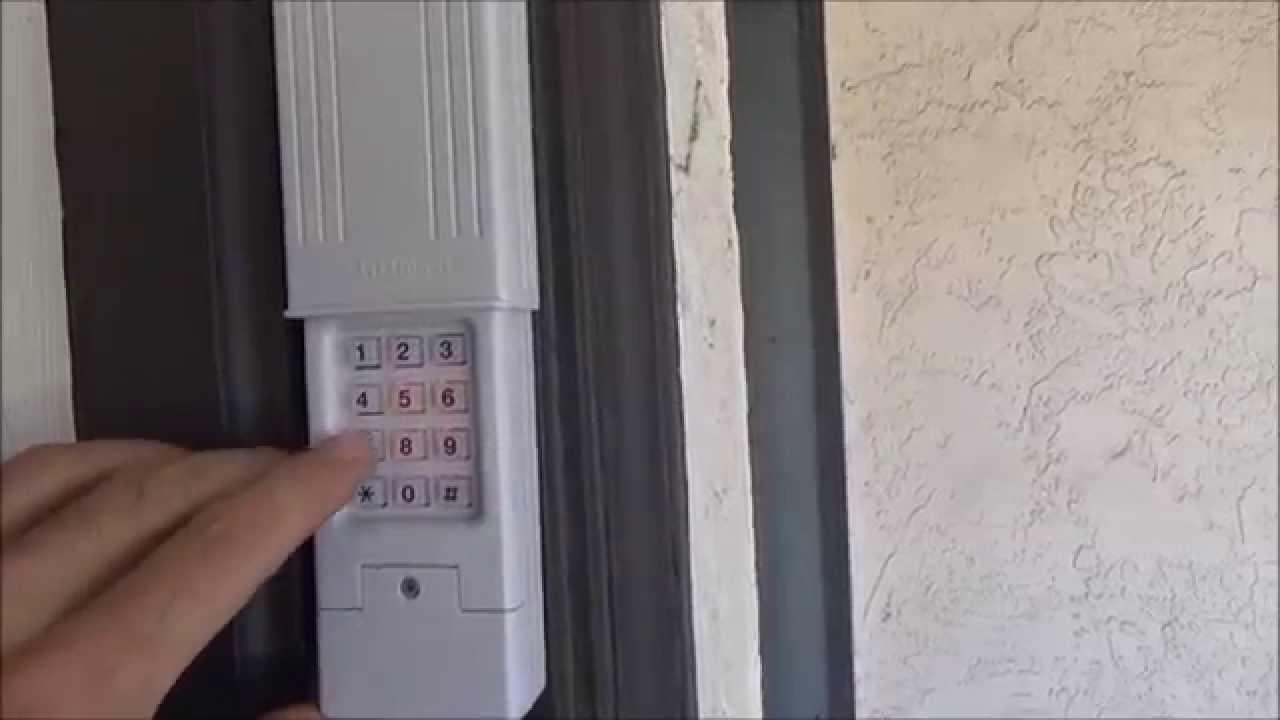
If you’re using a keypad or a smartphone app in conjunction with the remote, make sure to follow the device-specific instructions for programming.
Troubleshooting: What to Do If Your Garage Door Remote Isn’t Working
Although setting up your remote control for garage door opener is relatively simple, issues may arise during the process. Here are some common troubleshooting tips if things aren’t working as expected:
1. The Remote Doesn’t Sync with the Opener
- Ensure the Learn button was pressed correctly: Make sure you’re pressing the Learn button on the opener for the correct amount of time, and be sure to press the remote button within the 30-second window.
- Check the Remote Batteries: If your remote isn’t working at all, the batteries may be dead. Replace them and try reprogramming the remote.
- Clear the Memory: If the opener isn’t recognizing the remote, try clearing the memory and resetting the remote connection by following the instructions mentioned earlier.
2. The Remote Works Intermittently
If the remote control works sometimes but not all the time, consider the following:
- Check for Interference: Other electronic devices in your home could be interfering with the signal from the remote.
- Weak Batteries: If the remote’s batteries are low, the signal may be weak and unreliable. Replace the batteries and try again.
- Out of Range: Make sure you’re within the recommended range of the opener when using the remote. If the range is too far, the remote might not be able to communicate with the opener.
3. The Remote Works, But the Door Doesn’t Respond
If the remote is working, but the garage door isn’t responding, check the following:
- Sensors: Ensure the safety sensors are aligned and free of obstructions. If they are misaligned, the door may not open or close as expected.
- Power Supply: Check that the opener is plugged in and receiving power.
- Force Adjustment: Adjust the force settings on your opener to ensure the door can move smoothly. If the door is too heavy or the opener isn’t providing enough power, the door may not operate correctly.
Conclusion: Setting Up Your Garage Door Remote Control with Ease
Knowing how to set up remote control for garage door opener is an essential skill for every homeowner with an automatic garage door. By following the step-by-step guide provided in this article, you should be able to program your remote easily and efficiently, ensuring that you can operate your garage door with ease and convenience.
If you’re still experiencing issues after resetting or reprogramming your remote, consider consulting the owner’s manual or contacting a professional technician for assistance. With a little patience and the right approach, you’ll have your garage door opener up and running smoothly in no time.
Leave a Reply