If you’re seeing LiftMaster Garage Door Opener Sensor One Green One Yellow, your garage door likely won’t close—and it’s doing that on purpose for safety. This light pattern is a diagnostic signal from the safety photo-eyes telling you the infrared beam is not aligned. In this guide, you’ll learn what the colors mean and the exact steps to fix the issue in minutes.
LiftMaster Garage Door Opener Sensor One Green One Yellow — What Does It Mean?
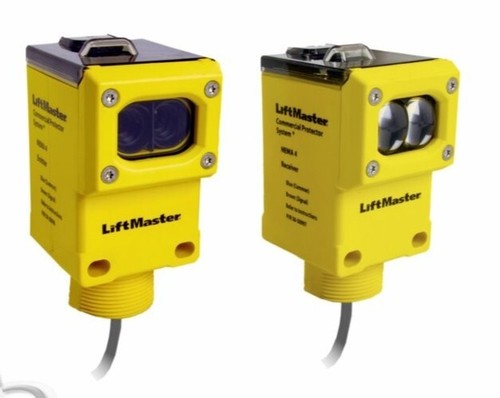
On systems from LiftMaster, the two safety sensors (photo-eyes) communicate with LEDs:
- Green light (sending sensor) → has power and is transmitting
- Yellow/amber light (receiving sensor) → should be solid when beam is received
If one is green and the other yellow but not solid, the beam is not completing the circuit. The opener blocks closing to prevent injury or damage.
Read too: The Complete Guide to Tighten Chain On Garage Door Opener for Smooth Operation
For background on how these safety systems became standard, see the overview on Wikipedia:
https://en.wikipedia.org/wiki/Garage_door_opener
How the Photo-Eye Sensors Work


4
- The green unit sends an invisible infrared beam
- The yellow unit receives it
- When aligned, both LEDs are solid
- If misaligned, the yellow flickers or turns off
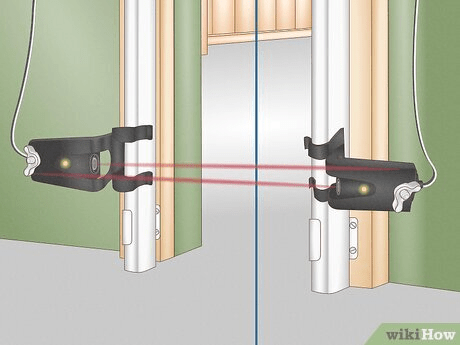
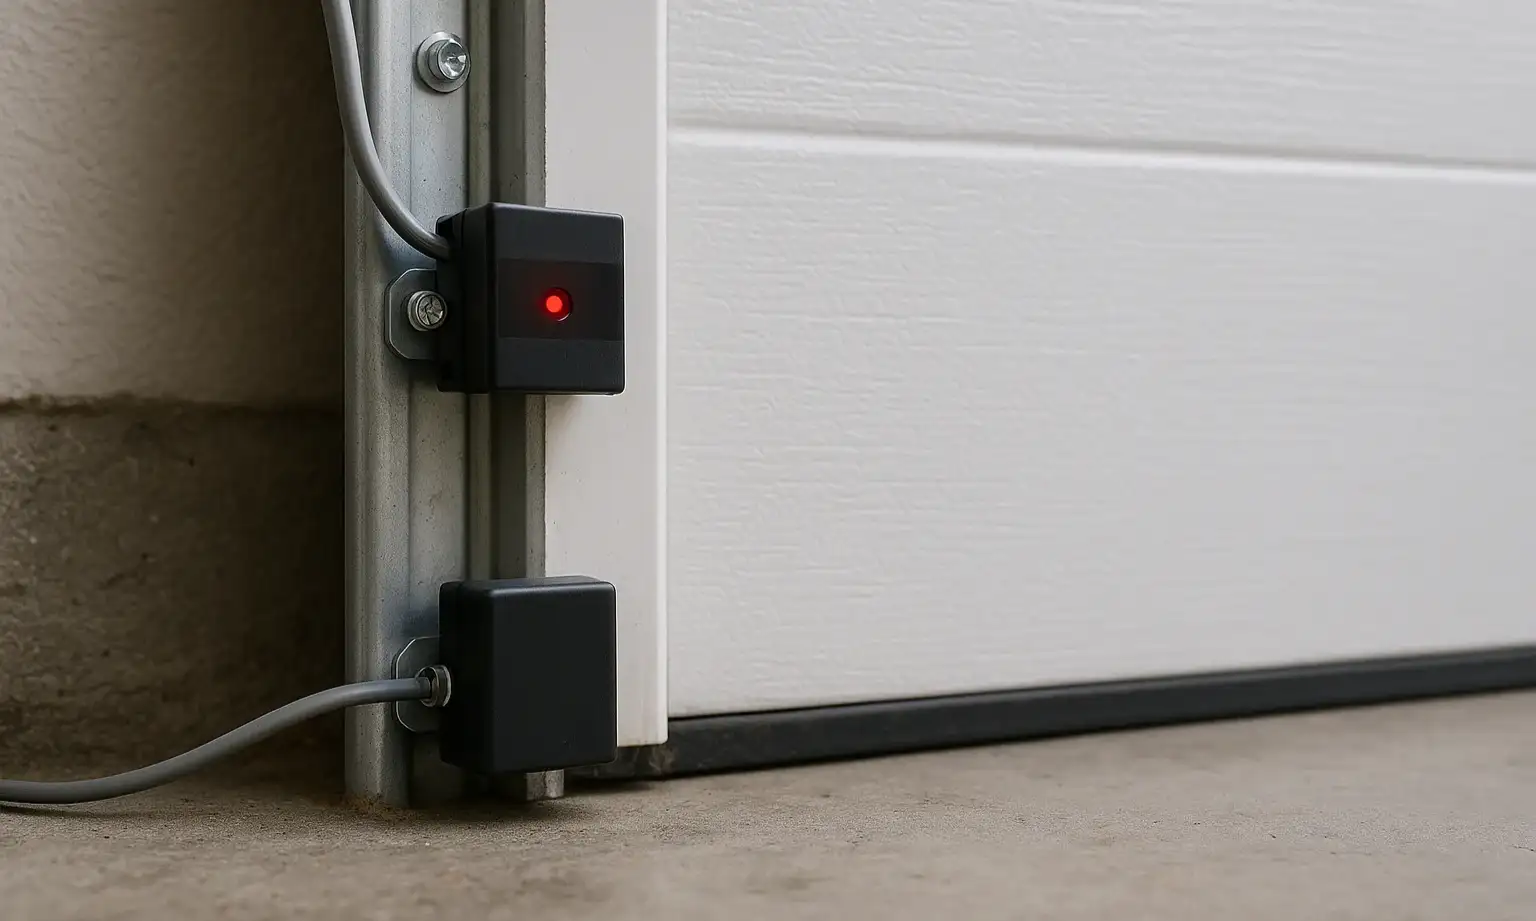
Sensors are mounted about 6 inches above the floor on each side of the door track.
Top Reasons This Happens (Most to Least Common)
| Cause | Frequency | Fix Time | Difficulty |
|---|---|---|---|
| Misaligned brackets | Very high | 3 min | Easy |
| Dirty lenses | Very high | 1 min | Easy |
| Object blocking beam | High | 1 min | Easy |
| Loose wire at terminal | Medium | 10 min | Medium |
| Sunlight glare | Medium | 2 min | Easy |
| Faulty sensor | Low | 20 min | Medium |
Installers report over half of service calls for openers are sensor-related rather than motor issues.
Step-by-Step Fix (Follow in Order)
Step 1 — Remove Obstructions
Check for:
- Storage bins
- Tools
- Trash cans
- Leaves or debris
Try closing the door after clearing the path.
Step 2 — Clean the Lenses
Use a microfiber cloth. Avoid harsh chemicals. Dust and spider webs can scatter the beam.
Step 3 — Realign the Sensors (Critical Step)

- Loosen the wing nut on the yellow sensor
- Slowly pivot it left/right until the LED becomes solid
- Tighten the nut carefully
Pro tip: Tie a string from one sensor to the other to create a perfect line.
Step 4 — Check the Wiring
Look for:
- Staples piercing wires
- Loose terminal screws on the opener
- Frayed insulation
Wires are usually white and white with black stripe.
Step 5 — Check for Sunlight Interference
Late afternoon sun can overwhelm the receiver.
Fix: Shade the sensor with cardboard or angle it slightly inward.
Step 6 — Perform the Safety Test
Place a 1.5-inch wood block under the door and close it.
- Door must reverse on contact
- If not, realign again
LED Status Meaning
| Green LED | Yellow LED | Meaning |
|---|---|---|
| Solid | Solid | Normal |
| Solid | Flicker | Misaligned |
| Solid | Off | Not receiving beam |
| Off | Off | No power |
Why Alignment Fails Over Time
Garage environments cause gradual shifts:
- Vibration loosens brackets
- Temperature changes expand metal
- Items get bumped into sensors
- Dust buildup is constant
Even a 2–3 mm shift can break the beam.
When to Replace the Sensors
Replace if:
- LEDs never go solid after alignment
- Lens is cracked or cloudy
- Unit is older than 10 years
- Wires test fine but problem persists
Replacement sensors are inexpensive and plug into existing wiring.
Pros vs Cons of Sensitive Sensors
Pros
- Prevents injury and damage
- Required by safety law
- Easy to fix without tools
Cons
- Sensitive to small movements
- Affected by dirt and sunlight
- Common homeowner frustration
FAQ — LiftMaster Garage Door Opener Sensor One Green One Yellow
Q1: Why does my door open but not close?
Because the beam is broken. Opening is allowed; closing is blocked for safety.
Q2: How high should sensors be installed?
About 6 inches above the floor.
Q3: Can I bypass the sensors?
You can hold the wall button to close for testing, but never bypass permanently.
Q4: Why does this happen after I clean my garage?
Items may have bumped the brackets out of alignment.
Q5: Why is the problem worse in the afternoon?
Sunlight glare can interfere with the receiver.
Q6: Do I need a technician?
Most homeowners fix this in under 10 minutes.
Conclusion
Seeing LiftMaster Garage Door Opener Sensor One Green One Yellow is a clear, helpful warning—not a failure. With simple cleaning, alignment, and inspection, you can restore normal operation quickly without a service call.
If this guide saved you time and frustration, share it on social media to help other homeowners keep their garage doors safe and working properly.


Leave a Reply