Introduction
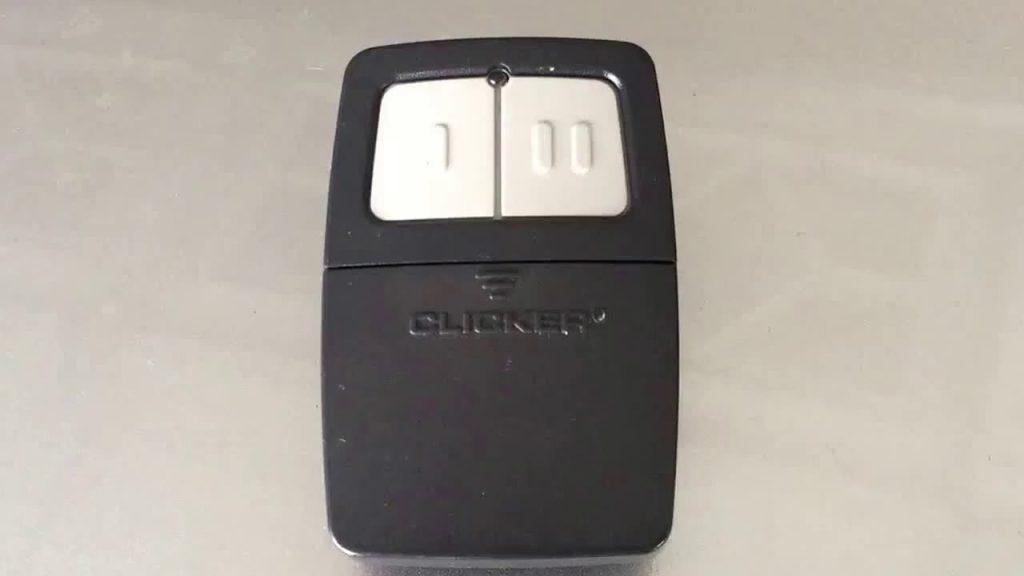
There are few things more frustrating than standing in the rain, pressing a garage door remote that refuses to respond because the original unit is lost, broken, or incompatible with your new vehicle. If you have recently purchased a replacement unit and are wondering how to set up a universal garage door opener, you are not alone; this is one of the most common weekend DIY projects for homeowners across the United States. The good news is that modern universal openers are designed for broad compatibility, and with the right guidance, you can restore secure access to your home in under an hour without hiring a professional.
What Is a Universal Garage Door Opener and How Does It Work?
Before diving into installation, it is helpful to understand what makes these devices “universal.” Unlike proprietary remotes tied to a specific manufacturer, universal garage door openers utilize multi-frequency technology and rolling code algorithms to communicate with various receiver units installed on your garage ceiling.
According to industry standards, most universal systems operate on frequencies between 300 MHz and 390 MHz, covering major brands like LiftMaster, Chamberlain, Genie, and Craftsman. For a deeper technical understanding of radio frequency communication in access control, you can refer to the Radio Control entry on Wikipedia, which explains the foundational principles behind these wireless signals.
Key Compatibility Factors
- Frequency Matching: Your universal remote must support the specific MHz frequency of your existing motor unit.
- Code Type: Determine if your system uses DIP switches (older), Learn Buttons (newer), or Rolling Codes (modern security).
- Brand Cross-Reference: Always check the manufacturer’s compatibility chart before purchasing.
Safety First: Essential Precautions Before Setup
Garage doors are heavy mechanical systems under high tension. Before you attempt to learn how to set up a universal garage door opener, prioritize safety to prevent injury or property damage.
- Disconnect Power: Unplug the garage door opener or turn off the circuit breaker to prevent accidental activation during setup.
- Clear the Area: Ensure no people, pets, or objects are in the path of the door.
- Check Spring Tension: Never attempt to adjust torsion springs yourself; this requires specialized tools and training.
- Test Safety Sensors: Verify that the photo-eye sensors at the floor level are clean and aligned before re-engaging power.
Expert Tip: According to the U.S. Consumer Product Safety Commission (CPSC), garage door-related injuries account for thousands of emergency room visits annually. Always test the auto-reverse feature immediately after programming any new device.
Step-by-Step: How To Set Up A Universal Garage Door Opener
Follow this detailed tutorial to program your new device accurately. Most universal remotes follow a similar logic, but always defer to your specific product manual if steps differ.
Step 1: Identify Your Existing Opener’s Learn Button
Locate the motor unit mounted on your garage ceiling. Find the “Learn” or “Smart” button, typically found on the back or side panel near the antenna wire. The color of this button often indicates the frequency and code type:
- Yellow: Security+ 2.0 (LiftMaster/Chamberlain)
- Purple: Security+ (2006–2014 models)
- Red/Orange: Older DIP switch or fixed code systems
- Green: Genie Intellicode
Step 2: Clear Previous Codes (Recommended)
To avoid signal conflicts, reset the universal remote before programming.
- Press and hold the “Program” or “Set” button on the universal remote for 5–10 seconds.
- Wait for the LED indicator to flash or turn solid, indicating memory has been cleared.
- Release the button.
Step 3: Activate the Motor Unit’s Learning Mode
- Restore power to the garage door opener.
- Press and release the Learn Button on the motor unit. An LED will illuminate or begin blinking, signaling it is ready to receive a new code. You typically have 30 seconds to complete the next step.
Step 4: Program the Universal Remote
- On the universal remote, press and hold the button you wish to assign.
- While holding the remote button, watch the motor unit’s LED. It should flash or click when it successfully receives the signal.
- Release the remote button once confirmation occurs.
- Test by pressing the programmed button once; the door should activate.
Step 5: Sync Additional Features (Optional)
Many universal openers include visor clips, keypads, or smart home integration. Repeat Steps 3–4 for each additional button or accessory, ensuring you use distinct buttons for different functions (e.g., main door vs. gate).
Troubleshooting Common Programming Issues
Even with perfect instructions, hiccups occur. Here are solutions to frequent problems when learning how to set up a universal garage door opener:
| Issue | Likely Cause | Solution |
|---|---|---|
| Remote programs but door doesn’t move | Frequency mismatch or dead batteries | Replace batteries; verify compatibility chart |
| LED never lights during Step 3 | Motor unit not in learn mode | Reset power; ensure Learn button was pressed firmly |
| Door opens partially then reverses | Obstruction or sensor misalignment | Clean photo-eyes; check track for debris |
| Works intermittently | Signal interference or weak battery | Move LED bulbs away from antenna; upgrade to lithium batteries |
| Programs but forgets code after 24hrs | Capacitor failure in motor unit | Professional capacitor replacement may be needed |
Pros and Cons of Universal vs. OEM Openers
Understanding trade-offs helps manage expectations post-setup.
Advantages
- Cost-Effective: Typically $15–$30 versus $40–$80 for brand-specific replacements.
- Multi-Door Control: Single remote can manage multiple garages with different brands.
- Availability: Widely stocked at hardware stores and online retailers.
Disadvantages
- Limited Advanced Features: May not support Wi-Fi, battery backup, or motion detection.
- Setup Complexity: Requires manual frequency matching rather than plug-and-play.
- Warranty Gaps: Some manufacturers void warranties if non-OEM accessories cause electrical issues.
FAQ: Answers to Your Top Questions
Can I use a universal garage door opener with a smart home system?
Most basic universal remotes do not integrate directly with Alexa, Google Home, or Apple HomeKit. However, you can pair them with a smart garage hub (like myQ or Tailwind) that acts as a bridge between the physical opener and your smart ecosystem. Check the hub’s compatibility list before purchasing.
How long does it take to set up a universal garage door opener?
For most homeowners, the entire process takes 15 to 30 minutes, including locating the Learn button, clearing old codes, programming, and testing. If troubleshooting is required, allocate an additional 20–30 minutes. Complex systems with multiple remotes or keypads may extend this to 45 minutes.
Will a universal opener work with my 20-year-old garage door system?
Possibly, but with caveats. Systems manufactured before 2000 often use fixed-code DIP switches, which many modern universal remotes still support. However, if your system predates 1993, it may lack mandatory safety sensors. We strongly recommend upgrading the entire opener unit for safety compliance rather than just replacing the remote.
Do I need to reprogram my universal remote after changing batteries?
Generally, no. Universal remotes store codes in non-volatile memory that persists through battery changes. However, if you experience signal loss after replacement, perform a quick re-sync using Steps 3–4 above. Using high-quality alkaline or lithium batteries prevents voltage drops that mimic programming failures.
Is it safe to buy a used universal garage door opener?
We advise against used openers due to potential internal wear, outdated security protocols, and unknown compatibility history. New universal remotes are inexpensive enough that the risk outweighs savings. If budget is critical, opt for certified refurbished units with warranty coverage.
Why does my universal remote work outside but not inside the car?
This is typically caused by RF interference from tinted windows, dashcams, or charging cables. Modern windshields with metallic UV coatings can block signals. Try repositioning the remote, using a visor clip instead of dashboard storage, or installing an external antenna extender compatible with your universal model.
Conclusion
Learning how to set up a universal garage door opener empowers you to solve access problems quickly, save money, and maintain home security without waiting for service appointments. By following safety protocols, verifying compatibility, and methodically working through programming steps, even beginners can achieve reliable results. Remember that patience during setup prevents future headaches, and regular testing ensures ongoing safety for your household.
If this guide helped you get your garage door working again, we’d love for you to share it with friends, family, or neighbors who might be struggling with the same issue. Tag us on social media or forward this article to someone who needs a hassle-free solution—your small act could save someone else hours of frustration! Happy opening! 🚪✨



Leave a Reply