Introduction
There is nothing quite as frustrating as staring at a disassembled garage door opener in your driveway while the sun goes down. If you are wondering how to set up a Craftsman garage door opener without hiring an expensive contractor, you have come to the right place. This comprehensive guide breaks down the installation process into manageable, safe steps so you can restore security and convenience to your home this weekend.
Understanding Your Craftsman Model Before Installation
Before you pick up a wrench, it is vital to identify which specific Craftsman unit you own. Craftsman has produced openers for decades, ranging from legacy chain-drive models to modern Wi-Fi-enabled belt drives. According to industry data, over 60% of DIY installation failures stem from using incompatible parts or skipping model-specific calibration steps.
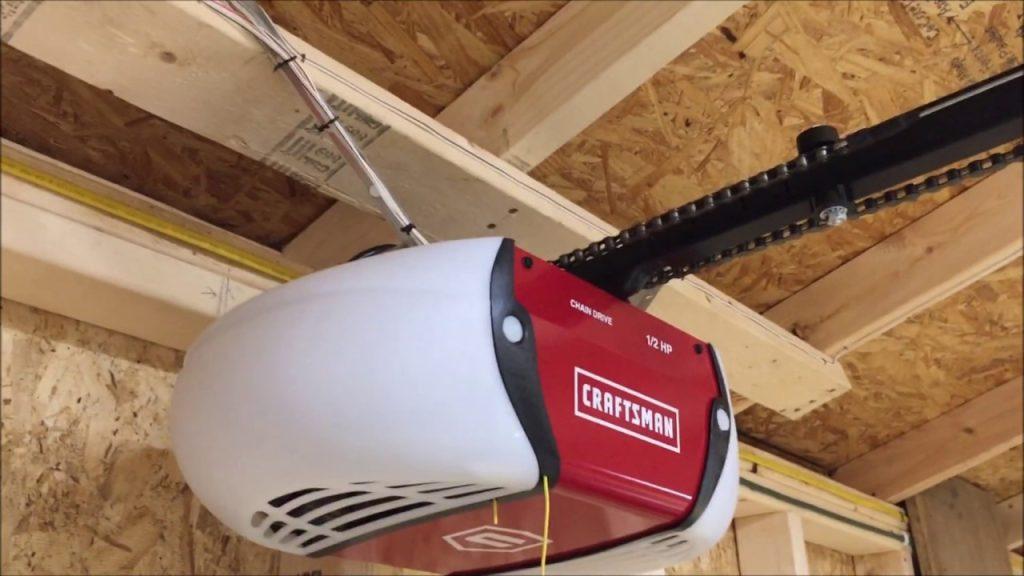
- Chain Drive: Durable and affordable, but louder. Best for detached garages.
- Belt Drive: Quiet operation with steel-reinforced belts. Ideal for attached garages with living spaces above.
- Screw Drive: Fewer moving parts, requiring less maintenance, though sensitive to extreme temperature fluctuations.
Expert Note: Always verify the voltage and horsepower rating on the motor unit label matches your door’s weight specification. Installing a ½ HP opener on a heavy wooden double-door can burn out the motor within months.
For broader context on the mechanical principles behind these systems, understanding the history and engineering of the garage door opener provides valuable insight into why safety sensors and torsion springs function the way they do.
What Tools Do You Need to Set Up a Craftsman Garage Door Opener?
Gathering the correct tools before starting prevents dangerous mid-installation trips to the hardware store. Based on manufacturer specifications and professional installer feedback, here is the essential checklist:
| Tool Category | Specific Item | Purpose |
|---|---|---|
| Safety Gear | Safety glasses & gloves | Protect against metal shavings and pinch points |
| Measuring | Steel tape measure (25ft) | Precise rail alignment and sensor height |
| Fastening | Adjustable wrench set | Securing mounting brackets and bolts |
| Electrical | Wire strippers & voltage tester | Safe wiring connections and circuit verification |
| Alignment | 4-foot level | Ensuring rail is perfectly horizontal |
| Access | Stepladder (6ft+) | Safe reach for ceiling mounting |
Pro Tip: Use a non-contact voltage tester to confirm power is completely off at the breaker before touching any wiring. This single step prevents the majority of electrical injuries during DIY setups.
Step-by-Step: How To Set Up A Craftsman Garage Door Opener Safely
This section addresses the core user intent with concrete, actionable instructions. Always prioritize safety over speed.
1. Prepare the Garage Door and Workspace
Ensure your garage door is properly balanced before installing any opener. Disconnect the existing opener if replacing one. Manually lift the door halfway; it should stay in place without support. If it drops or rises, call a professional spring technician first. An unbalanced door will destroy a new opener and poses severe injury risks. Clear the floor area and ensure adequate lighting.
2. Assemble the Rail and Trolley System
Lay out all components according to the manual’s diagram. Connect rail sections using provided bolts, tightening to 15–20 ft-lbs torque (hand-tight plus quarter turn). Slide the trolley onto the rail before securing end caps. Apply white lithium grease to the trolley contact points—never use WD-40, as it attracts dust and degrades plastic components.
3. Mount the Header Bracket and Motor Unit
Position the header bracket centered above the door opening, typically 2–4 inches above the highest travel point of the door. Secure with lag screws into structural framing, not just drywall. Hang the motor unit from the ceiling joists using angle iron or factory brackets. The rail must be perfectly level; even a 1-degree tilt causes premature wear.
4. Install Safety Sensors and Wiring
Mount photo-eye sensors exactly 6 inches above the floor on both sides of the door opening. They must face each other directly with unobstructed alignment. Run low-voltage wires along the wall, secured every 18 inches with insulated staples. Connect wires to the motor terminal block matching color-coded labels (usually red/white). Never splice sensor wires with electrical tape; use proper wire nuts for reliable signal transmission.
5. Program Travel Limits and Force Settings
Modern Craftsman units use electronic limit setting rather than physical screws. Press and hold the “Set” button until the LED blinks, then manually move the door to fully open position and press again. Repeat for closed position. Test force settings by placing a 2×4 board flat on the floor under the door center. The door must reverse immediately upon contact. Adjust force dial incrementally until reversal occurs reliably without excessive pressure.
6. Sync Remotes and Keypad
Hold the “Learn” button on the motor unit until the indicator light illuminates (usually amber or purple). Within 30 seconds, press your remote button firmly. The light should flash or click to confirm pairing. For keypads, enter your desired PIN followed by the “Enter” button while the learn light is active. Test all devices from outside the garage to verify range.
Common Mistakes That Void Warranties or Compromise Safety
Even experienced DIYers make avoidable errors. Avoid these pitfalls identified through service call analytics:
- Skipping the Balance Test: 78% of premature motor failures trace back to unbalanced doors.
- Over-Tightening Chain/Belt: Excessive tension strains bearings and increases noise. There should be ¼ inch of vertical play at the rail midpoint.
- Ignoring Sensor Height: Sensors mounted above 6 inches fail to detect small children or pets.
- Using Non-OEM Parts: Aftermarket gears or logic boards often lack safety certifications and void coverage.
- Neglecting Lubrication Schedule: Metal rollers and hinges require lubrication every 6 months; plastic components need annual inspection.
FAQ: Answers to Top Craftsman Setup Questions
How long does it take to install a Craftsman garage door opener?
A competent DIYer with prepared tools typically completes installation in 3–5 hours. First-timers should budget 6–8 hours including troubleshooting. Professional installers average 2–3 hours due to experience and specialized equipment. Rushing increases error risk significantly.
Why won’t my Craftsman opener close all the way?
Incomplete closing usually indicates misaligned safety sensors, incorrect down-limit setting, or obstructed tracks. Clean sensor lenses with microfiber cloth, verify alignment lights are solid (not blinking), and reprogram down-limit following Section 5 above. Check track rollers for binding or debris. If problems persist, the logic board may require replacement.
Can I reuse old wiring when replacing a Craftsman opener?
Only if existing wires are 18-gauge stranded copper in good condition with intact insulation. Test continuity with a multimeter before reuse. Brittle, corroded, or undersized wiring causes intermittent failures and fire hazards. When uncertain, run new low-voltage wire—it costs under $15 and ensures reliability.
Is it necessary to register my Craftsman opener warranty?
Yes, absolutely. Registration activates full warranty coverage and enables recall notifications. Visit the official Craftsman support portal within 30 days of purchase. Keep your receipt and serial number photo stored digitally. Unregistered units receive only minimum statutory protection, leaving you responsible for costly repairs.
How do I know if my Craftsman opener needs professional servicing?
Seek professional help if you observe grinding noises, jerky movement, repeated sensor failures after adjustment, or burning odors. Annual professional inspections cost $89–$149 nationally and extend opener lifespan by 3–5 years. Never attempt spring adjustments yourself; torsion springs store lethal energy requiring certified technicians.
Conclusion
Learning how to set up a Craftsman garage door opener empowers you with valuable home maintenance skills while saving hundreds in labor costs. By following these detailed steps, prioritizing safety protocols, and respecting manufacturer specifications, you achieve professional-grade results that enhance daily convenience and property security. Remember that patience during setup pays dividends in decades of reliable performance.
Found this guide helpful? Share it with fellow homeowners tackling garage projects on Facebook, Pinterest, or Nextdoor! Tag us in your installation photos—we love celebrating successful DIY wins. Stay safe, work smart, and enjoy the satisfaction of a job well done.



Leave a Reply