
Have you ever stood in the rain, frantically pressing a button on your new remote, only to watch your garage door remain stubbornly closed? It is a frustrating experience that many homeowners face after replacing an old unit or buying a new vehicle. Knowing how to program a new Liftmaster garage door opener correctly is essential not just for convenience, but for the security of your home. This guide will walk you through the process clearly and safely, ensuring you get back into your garage without the headache.
Understanding Your Liftmaster Model
Before we dive into the buttons and codes, it is crucial to identify which type of Liftmaster opener you have. Liftmaster has produced several generations of openers, and the programming method varies significantly between them. Using the wrong method can lead to confusion and failed attempts.
Most modern Liftmaster openers fall into two primary categories based on their technology:
- Security+ 2.0 (Yellow Learn Button): These are the most common units installed in the last decade. They use rolling code technology, which changes the access code every time you use the remote. This prevents hackers from intercepting and reusing your signal.
- Older Security+ or DIP Switch Models: These older units may use a series of small switches inside the remote and the motor unit that must match physically. While less common now, they still exist in many older homes.
To find your model number, look for a label on the back or side of the motor unit hanging from your garage ceiling. You can also check the Liftmaster official support page for specific manuals if your label is worn out. Identifying this early saves you time and ensures you follow the correct steps below.
Step-by-Step Guide: Programming a Remote Control
For the vast majority of users with a modern Liftmaster opener (Security+ 2.0), the process is straightforward. You do not need any special tools, just your remote and a ladder if your motor unit is mounted high.
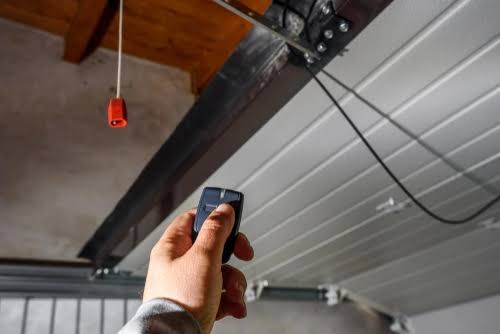
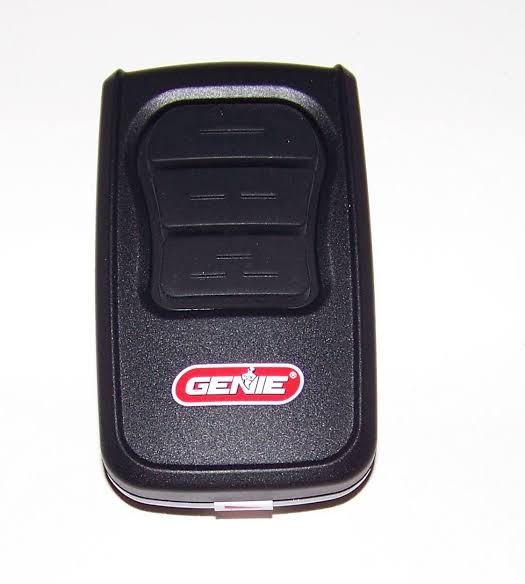
Step 1: Locate the “Learn” Button
Climb up to your garage door opener motor unit. Look for a small square button, usually located on the back panel near the antenna wire. On Security+ 2.0 models, this button is typically yellow. However, it can also be purple, orange, or red depending on the specific frequency. There should be an LED light next to it.
Step 2: Clear Old Codes (Optional but Recommended)
If you are programming a new remote because the old one was lost or stolen, you should clear the memory first. Press and hold the “Learn” button for about 6–10 seconds until the indicator light turns off. This erases all previously paired remotes and keypads. Note: You will need to reprogram all your existing devices after doing this.
Step 3: Initiate Programming Mode
Press and release the “Learn” button once. The indicator LED will turn on and stay solid for about 30 seconds. This means the opener is now listening for a new signal. You must complete the next step within this 30-second window.
Step 4: Sync the Remote
Take your new remote control and press and hold the button you wish to use for opening the door. Hold it down until you see the lights on the remote flash or hear a click from the motor unit. In most cases, the LED on the motor unit will blink or turn off to confirm the code has been accepted.
Step 5: Test the Connection
Step back and press the button on your remote again. The garage door should activate immediately. If it does not, repeat the process, ensuring you are within range and the batteries in the remote are fresh.
Programming a Wireless Keypad
Many homeowners prefer a wireless keypad for entry when they do not have their remote. The process is similar but requires an additional step for security.
- Press the “Learn” button on the motor unit. The LED will light up.
- Within 30 seconds, enter your desired 4-digit PIN on the keypad.
- Immediately press and hold the “Enter” button on the keypad.
- Release the button when the motor unit’s light blinks.
- Test the PIN by entering it again and pressing “Enter.”
For added security, consider choosing a PIN that is not easily guessable, such as your birth year or address number.
Troubleshooting Common Programming Issues
Even with clear instructions, things can go wrong. Here are the most common issues and how to fix them.
| Issue | Possible Cause | Solution |
|---|---|---|
| Remote not responding | Dead batteries | Replace the battery with a fresh CR2032 or similar type. |
| LED doesn’t light up | Power issue | Check if the opener is plugged in and the circuit breaker is on. |
| Code not accepted | Interference | Move closer to the motor unit; ensure no large metal objects are blocking the signal. |
| Door reverses immediately | Sensor misalignment | Check the safety eyes near the floor; ensure they are aligned and clean. |
If you have tried these steps and the remote still does not work, the remote itself may be defective. Liftmaster remotes are generally durable, but electronic components can fail over time.
Why Security Matters in Garage Door Programming
It is easy to view garage door programming as a mere convenience task, but it is a critical component of home security. Older garage door openers used fixed codes, meaning the signal was always the same. Hackers could use simple devices to capture this signal and replay it to open your door.
Modern Liftmaster openers use rolling code technology. This means that every time you press the button, the remote and the opener agree on a new code from a sequence of billions. Once a code is used, it is discarded. This makes it nearly impossible for thieves to intercept and reuse your signal.
When you program a new device, you are essentially syncing it into this secure digital handshake. If you lose a remote, always clear the memory as described in Step 2 above. This ensures that the lost remote can no longer communicate with your opener, keeping your home safe.
Integrating with Smart Home Systems
Many new Liftmaster openers are compatible with smart home ecosystems like MyQ, Amazon Alexa, and Google Home. Programming these features usually requires downloading the MyQ app and creating an account.
Once the app is set up, you can control your garage door from anywhere in the world. You can receive notifications when the door is left open, schedule automatic closing times, and even grant temporary access to guests. While this requires an internet connection and a Wi-Fi hub, it adds a layer of convenience and monitoring that traditional remotes cannot offer.
FAQ Section
Q: Can I program a universal remote to my Liftmaster opener?
A: Yes, most universal remotes are compatible with Liftmaster openers. You will need to follow the specific instructions provided with the universal remote, which usually involve setting dip switches or using a code-search function to find the right frequency.
Q: How do I know if my remote is programmed correctly?
A: The easiest way is to test it. Stand within 10 feet of the door and press the button. If the door activates, it is programmed. Additionally, the LED on the motor unit usually blinks or turns off to confirm successful pairing during the setup process.
Q: What should I do if I lost all my remotes?
A: If you have no working remotes, you can still use the wall-mounted control panel inside your garage to open the door. To add new remotes, you will need to buy new ones and follow the programming steps above. If you cannot access the garage at all, you may need to call a professional technician.
Q: Does programming a new remote erase my old ones?
A: No, pressing the “Learn” button briefly to add a new remote does not erase existing ones. Only holding the “Learn” button for 6–10 seconds will clear the entire memory. Always be careful not to hold it too long unless you intend to reset the system.
Q: Why is my garage door opener blinking?
A: A blinking LED often indicates that the unit is in programming mode or has detected an error. If it blinks continuously without responding, check the safety sensors near the floor. If they are misaligned or blocked, the door will not close for safety reasons.
Conclusion
Learning how to program a new Liftmaster garage door opener is a valuable skill that empowers you to maintain your home’s security and convenience. By identifying your model, following the step-by-step pairing process, and understanding the importance of rolling code technology, you can ensure your garage operates smoothly and safely.
Remember to keep your remotes secure, replace batteries promptly, and clear your memory if a device is lost. If you found this guide helpful, please share it with friends or family who might be struggling with their own garage door setups. A secure home starts with small, informed steps!

Leave a Reply