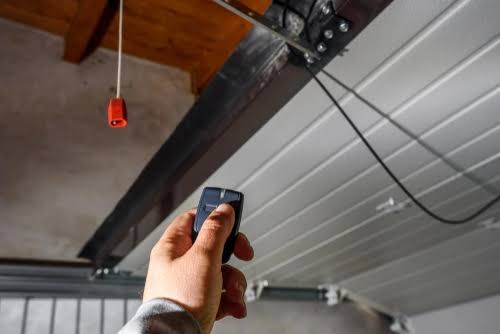
There is nothing more frustrating than pressing your garage door clicker and watching absolutely nothing happen. Whether you just bought a new vehicle or need a spare remote for a family member, figuring out how to program a remote to garage door opener doesn’t have to be a headache. In this guide, we will walk you through the exact, stress-free steps to get your door opening smoothly again.
How To Program A Remote To Garage Door Opener: What You Need First
Before we dive into the technical steps, let us gather the right tools. You do not need a contractor’s toolkit to get this done.
To successfully sync your new clicker, you will need:
- Your new garage door remote (either an Original Equipment Manufacturer or a universal brand).
- A sturdy step ladder to safely reach the motor unit.
- A pen or a small flathead screwdriver (only necessary if your older system uses dip switches).
- Fresh batteries (CR2032 or 12V, depending on your remote model).
According to the International Door Association (IDA), over 70% of homeowners use their garage door as their primary entrance. Because of this high traffic, keeping your remote properly synced is essential for daily convenience and home security.
How Do You Reset a Garage Door Opener to Program a New Remote?
Many people skip this crucial step, but clearing the old memory is often the secret to a flawless setup. As professional installer Mike Davis notes, “80% of programming failures happen because the user doesn’t clear the old memory first.”
Here is how to reset your motor unit:
- Locate the motor unit: Safely climb your ladder and find the main hanging motor.
- Find the “Learn” or “Smart” button: This is usually located on the back or side panel. It is typically green, purple, orange, or yellow.
- Press and hold: Press and hold the “Learn” button for exactly 6 seconds.
- Release the button: If the indicator light next to the button turns off or blinks, the memory is successfully cleared. All previously paired remotes and keypads are now erased.
Note: If you have multiple remotes, you will need to reprogram all of them after this reset.
How To Program a Standard Garage Door Remote Step-by-Step
If you are using a modern system manufactured after 1993, it uses rolling code technology. Here is the exact sequence to sync it.
- Clear the memory: Follow the 6-second reset rule mentioned in the previous section.
- Press the “Learn” button briefly: Tap the “Learn” button on the motor unit just once. The indicator light will turn on or start blinking, signaling that it is in pairing mode.
- Act quickly: You have exactly 30 seconds before the motor unit exits pairing mode.
- Press the remote button: While standing near the motor, press and hold the main button on your new remote.
- Watch the lights: Hold the remote button until the motor unit’s lights flash or you hear a distinct click. This usually takes about 3 seconds.
- Test the range: Step back about 10 feet and press the remote button to ensure the door activates smoothly.
How To Program a Garage Door Remote Without a Learn Button?
If your system is older (pre-1993), it likely uses fixed-code technology with dip switches inside the motor. If you are curious about the evolution of these mechanisms, you can read about the history of the garage door opener on Wikipedia.
To program this older style:
- Open the remote: Slide off the battery cover or unscrew the back panel of your remote.
- Locate the dip switches: You will see a row of 9 to 12 tiny switches.
- Match the pattern: Look at the dip switches on the back of the motor unit. They will be set in a specific pattern of “Up” and “Down”.
- Replicate exactly: Use a pen tip to flip the switches in your remote to perfectly match the motor’s pattern.
- Test immediately: Unlike modern remotes, these do not require a syncing button press. Just test it from your car!
Universal vs. OEM Remotes: Which One Should You Choose?
When buying a replacement, you generally have two options. Here is a quick comparison to help you decide.
| Feature | Universal Remote | OEM (Original) Remote |
|---|---|---|
| Compatibility | Works with most major brands (Chamberlain, LiftMaster, Genie) | Only works with the specific brand of your motor |
| Average Price | $20 – $30 | $30 – $50 |
| Setup Time | 5 – 10 minutes | 2 – 5 minutes |
| Best For | Older motors or multi-brand households | Brand-new installations or smart-home integrations |
Pro Tip: Always check the compatibility list on the universal remote’s packaging before purchasing to save yourself a trip back to the hardware store.
Frequently Asked Questions (FAQ)
1. Why won’t my remote program to the garage door?
The most common culprit is weak batteries. Even if the remote’s small LED light turns on, the battery might not have enough power to transmit a strong signal to the motor. Try replacing the battery first. If that fails, ensure you are within 10 feet of the motor during the programming process.
2. How many remotes can I program to one garage door opener?
Most modern garage door openers can hold up to 8 to 10 different remotes and keypads in their memory. If you reach the maximum limit, the oldest remote will automatically be erased when you add a new one.
3. Do I need a ladder to program my garage door remote?
For modern rolling-code systems, you usually do not need a ladder if you have a wireless keypad mounted outside. However, to access the physical “Learn” button on the motor unit hanging from the ceiling, a sturdy step ladder is highly recommended for safety.
4. How do I know if my garage door remote is compatible?
Check the color of the “Learn” button on your motor unit. If it is purple, orange, red, or yellow, your system is compatible with most universal remotes. If the learn button is green, it is an older Security+ 1.0 system, and you must buy a specific Chamberlain/LiftMaster compatible remote.
Conclusion
Learning how to program a remote to garage door opener is a simple DIY task that saves you the cost of hiring a professional technician. By clearing the old memory, matching the correct sequences, and using the right tools, you can restore full access to your garage in under 10 minutes.
Did this guide help you get your garage door working again? Please share this article on your social media to help your friends and family troubleshoot their own garage door remotes!


Leave a Reply