Introduction
Have you ever arrived home with a second car, only to realize you don’t have a spare key fob? It is a frustrating scenario that many homeowners face. Whether you bought a new vehicle, lost your old remote, or simply want a backup for family members, knowing how to program a second garage door opener remote is an essential DIY skill.
The good news is that you do not need to call a professional technician or spend hundreds of dollars. Most modern garage door openers are designed with user-friendly programming features that allow you to sync additional remotes in under five minutes. In this guide, we will walk you through the exact steps to get your second remote working seamlessly, regardless of your opener brand.
Why You Might Need a Second Remote
Before diving into the technical steps, it is helpful to understand why having a secondary remote is beneficial. According to home security experts, relying on a single point of entry control can be risky. If your primary remote fails due to battery issues or physical damage, you could be locked out of your own garage.
Furthermore, with the rise of multi-car households, sharing access efficiently is crucial. A second remote ensures that every driver has independent access without needing to swap fobs constantly. This convenience adds significant value to your daily routine and enhances household security by reducing the chance of leaving a remote in an unsecured vehicle.
Identifying Your Garage Door Opener Brand
The first step in programming a new remote is identifying the make and model of your garage door opener. The programming process varies significantly between manufacturers. The most common brands in the US market include:
- LiftMaster
- Chamberlain
- Genie
- Craftsman
- Raynor
Look for the label on the motor unit, which is typically mounted on the ceiling of your garage. This label will contain the model number and the frequency (usually 315 MHz or 390 MHz). Knowing this information is critical because it determines whether you need a “Smart” button, a “Learn” button, or dip switches.
Pro Tip: If you cannot find the label, take a photo of your motor unit and search online using image recognition tools, or consult the manufacturer’s website using the serial number found on the back of your existing working remote.
General Steps: How To Program A Second Garage Door Opener Remote
While specific buttons may differ, the general logic for most modern openers (post-1993) follows a similar pattern. Here is the universal method that works for the majority of units.
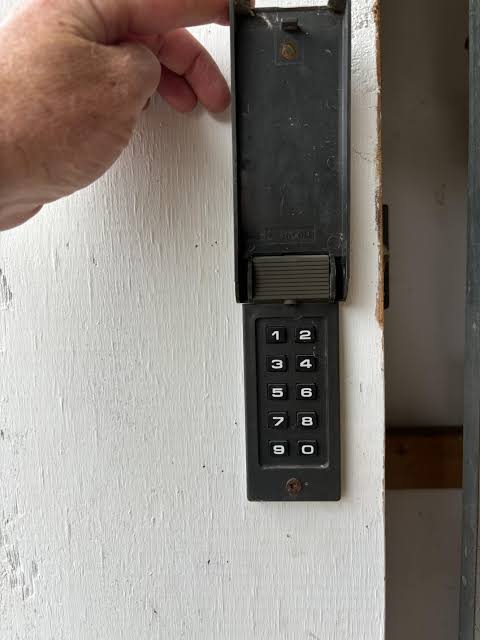
Step 1: Locate the “Learn” Button
Climb up to your garage door motor unit. Look for a small button labeled “Learn,” “Program,” or “Smart.” It is often located near the antenna wire hanging from the unit. The button color is usually yellow, purple, orange, or red.
Step 2: Clear Old Codes (Optional but Recommended)
If you are concerned about security or if previous remotes are lost, press and hold the “Learn” button for about 6–10 seconds until the indicator light blinks or turns off. This erases all previously programmed remotes. Note: You will need to reprogram ALL remotes after doing this.
Step 3: Initiate Programming Mode
Press the “Learn” button once briefly. You will see an LED light turn on or start blinking. This indicates the opener is now in “listening mode” and ready to accept a new signal. You typically have 30 seconds to complete the next step.
Step 4: Sync the New Remote
Take your second remote and press and hold the button you wish to use (usually the main large button). Hold it for 2–3 seconds, then release. You may need to repeat this press-release cycle 2–3 times.
Step 5: Confirm Success
Watch the motor unit. If the LED light blinks rapidly or turns off, and you hear a click from the motor, the programming was successful. Test the remote by pressing the button again to ensure the door opens and closes correctly.
Brand-Specific Instructions
Since nuances exist, here are specific tips for the top brands.
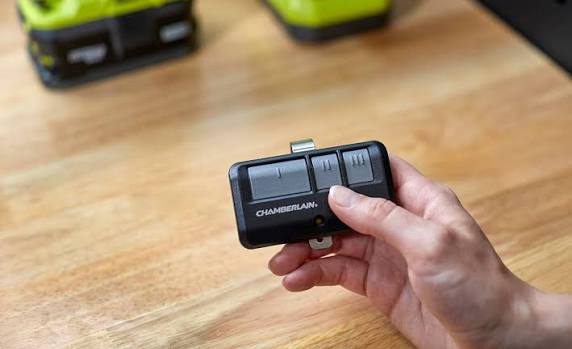
LiftMaster and Chamberlain
These two brands share similar technology. For models with a yellow learn button, simply press the learn button, then press the remote button within 30 seconds. For older models with dip switches (small rows of tiny switches), you must match the switch positions on the remote to exactly match the positions on the motor unit.
Genie Openers
Genie openers often use a “Program” button rather than “Learn.”
- Press and release the “Program” button on the motor head. The blue LED will blink.
- Press and hold the button on the remote until the LED on the motor turns solid blue.
- Press the remote button again to test.
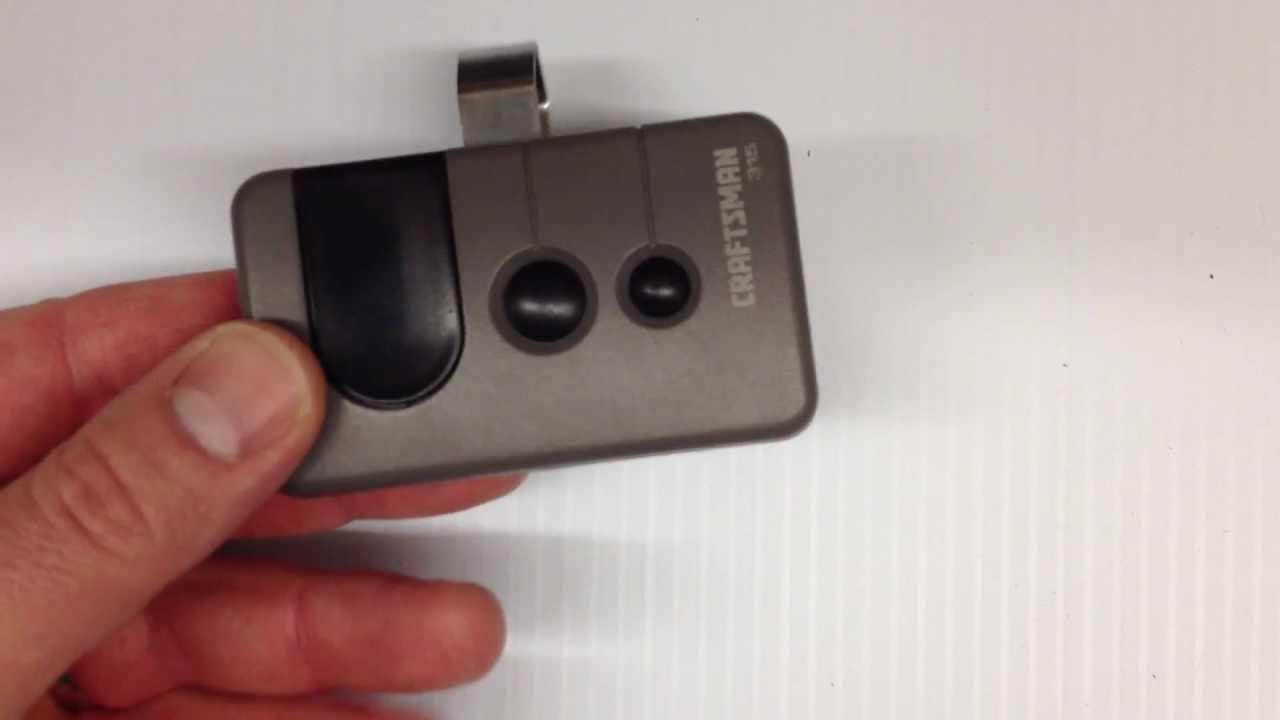
Craftsman
Many Craftsman openers are rebranded LiftMaster units. Follow the LiftMaster instructions above. However, some older Craftsman models use a distinct “Code Dial” system where you set a 4-digit code on both the remote and the motor unit.
Troubleshooting Common Issues
Even with careful following of instructions, things can go wrong. Here is a comparison of common problems and solutions.
| Issue | Possible Cause | Solution |
|---|---|---|
| Remote not responding | Dead batteries | Replace the battery with a fresh CR2032 or AA battery. |
| Light blinks but door doesn’t move | Safety sensors blocked | Check the photo-eye sensors near the floor for dirt or obstruction. |
| Programming fails repeatedly | Interference | Unplug nearby LED bulbs or Wi-Fi routers temporarily; they can cause signal noise. |
| Old remotes stop working | Memory cleared | If you held the Learn button too long, you erased all codes. Reprogram all devices. |
For more detailed technical specifications on radio frequencies used in garage openers, you can refer to this Wikipedia article on Garage Door Openers which provides historical context and technical standards.
Security Best Practices for Garage Remotes
Programming a second remote is convenient, but it introduces another potential entry point for intruders. To maintain high security:
- Use Rolling Code Technology: Ensure your opener uses rolling codes (standard in most units made after 1993). This changes the code every time you press the button, preventing hackers from capturing and replaying the signal.
- Keep Remotes Secure: Do not leave spare remotes in unlocked cars parked on the street.
- Regularly Update Codes: If you lose a remote, immediately clear the memory and reprogram the remaining ones.
FAQ Section
Q1: Can I program a universal remote to my garage door opener?
Yes, most universal remotes are compatible with major brands like LiftMaster, Genie, and Chamberlain. You will need to follow the specific pairing instructions included with the universal remote, which often involve entering a brand-specific code before syncing.
Q2: Why won’t my second remote program even though I followed the steps?
The most common reason is weak batteries in the new remote. Another possibility is that the motor unit’s memory is full (some older units have a limit of 8–10 remotes). Try replacing the battery first, and if that fails, clear the memory and start fresh.
Q3: Do I need a ladder to program the remote?
In most cases, yes. The “Learn” button is located on the motor unit mounted on the ceiling. However, some newer smart hubs or wall-mounted control panels allow you to initiate programming from ground level. Check your manual to see if your model supports this feature.
Q4: Is it safe to program a remote while the door is moving?
No. Always ensure the garage door is fully closed before starting the programming process. This prevents accidental activation during the sync process, which could lead to safety hazards or misalignment of the door tracks.
Q5: How far away can I be when programming the remote?
You should be within 5–10 feet of the motor unit when programming. Being too far away may result in a weak signal that the opener cannot register properly. Once programmed, the operational range will extend to the standard distance (usually 20–50 feet).
Conclusion
Learning how to program a second garage door opener remote is a straightforward task that saves you time and money. By identifying your brand, locating the learn button, and following the simple sync steps, you can have your new remote up and running in minutes.
Remember to prioritize security by using rolling code technology and keeping your spares safe. Now that you have mastered this skill, you can confidently manage access for your entire household.
Did you find this guide helpful? Share it with your friends and family on social media so they can also avoid the hassle of being locked out!
Leave a Reply