Introduction
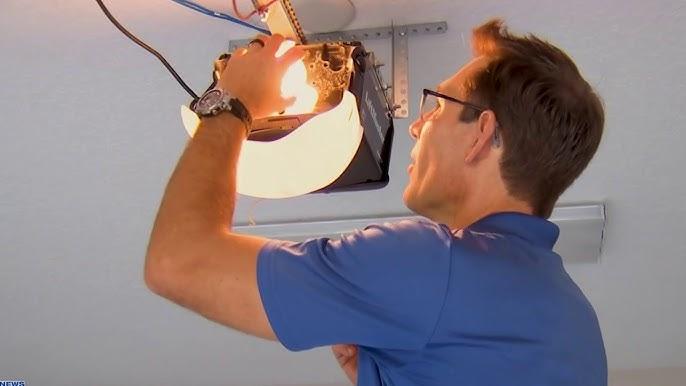
Is your garage plunged into darkness because the bulb burned out, or perhaps the plastic lens has become yellowed and cracked over time? You are not alone; this is one of the most common maintenance issues homeowners face with their automatic door systems. Knowing how to remove light cover Craftsman garage door opener units is essential for quick repairs, ensuring your workspace remains safe and well-lit without needing to call an expensive technician.
In this guide, we will walk you through the exact steps to access, clean, or replace your light lens. We will cover different model types, safety precautions, and troubleshooting tips to ensure you get the job done right the first time.
Why Does the Light Cover Need Removal?
Before diving into the tools, it is helpful to understand why you might need to perform this task. The light cover, often called a “lens” or “diffuser,” serves two main purposes: it protects the bulb from dust and debris, and it disperses the light evenly across the garage.
Over time, three things typically happen:
- Bulb Failure: The most common reason. You cannot reach the socket to change the bulb without removing the cover.
- Yellowing/Brittleness: Plastic degrades under heat and UV exposure. Old covers can crack when touched, necessitating a full replacement.
- Dust Accumulation: Thick layers of dust reduce light output by up to 30%, making your garage feel dimmer than it actually is.
According to general home maintenance standards, checking your garage lighting every six months can prevent larger electrical issues and improve visibility for safety. For more context on garage door components, you can refer to the general overview on Wikipedia.
Tools You Will Need
You do not need a professional toolkit to handle this repair. Most Craftsman models are designed for user-friendly maintenance. Gather these items before you start:
- A sturdy stepladder: Ensure it is tall enough to reach the motor unit comfortably.
- Screwdriver set: Primarily a Phillips head (#2) and a flathead. Some older models may require a nut driver.
- Replacement bulb: Check your manual for wattage limits (usually max 100W incandescent or equivalent LED).
- Microfiber cloth: For cleaning the lens if you plan to reuse it.
- Safety glasses: To protect your eyes from falling dust or broken plastic.
Step-by-Step: How To Remove Light Cover Craftsman Garage Door Opener
Craftsman has produced several generations of garage door openers. While the mechanism varies slightly, the logic remains consistent. Follow these universal steps.
Step 1: Safety First – Disconnect Power
Never work on electrical appliances while they are live. Even though the voltage is low, accidental activation of the motor can cause injury.
- Locate the power cord plugged into the ceiling outlet.
- Unplug the unit entirely.
- If hardwired, switch off the circuit breaker labeled “Garage” or “Opener.”
- Wait at least 60 seconds to allow any residual capacitor charge to dissipate.
Step 2: Identify Your Model Type
The removal method depends heavily on whether you have a Chain/Belt Drive (older/standard models) or a Jackshaft/Wall-Mount (newer, space-saving models).
Type A: Standard Ceiling-Mounted Units (Most Common)
These units hang from the center of the garage ceiling. The light assembly is usually located on the bottom or front of the motor housing.
- Locate the Lens: Look for the plastic cover surrounding the bulb. It is typically rectangular or square.
- Check for Screws: Many Craftsman models (especially those made after 2010) secure the lens with two small screws on the sides or bottom edge.
- Action: Use your Phillips screwdriver to loosen these screws. Do not remove them completely; just loosen them enough to release tension.
- The Snap-Fit Method: If there are no visible screws, the lens is likely held in place by plastic tabs.
- Action: Gently press the top edge of the lens inward while pulling the bottom edge outward. It should “pop” free. Warning: If the plastic is old and brittle, apply minimal force to avoid snapping the tabs.
- Slide and Remove: Once unclipped, slide the lens downward or outward to detach it from the housing.
Type B: Wall-Mounted Jackshaft Openers
These newer models sit on the wall beside the door header. The light configuration is different.
- Locate the Light Module: On many jackshaft models, the light is integrated into the side panel or the bottom casing.
- Remove the Side Panel: You may need to unscrew the entire side cover of the motor unit to access the bulb.
- Unclip the Lens: Similar to ceiling models, look for snap-tabs or small retaining clips holding the plastic diffuser in place.
Step 3: Cleaning or Replacing the Cover
Once the cover is removed, inspect it closely.
- If Reusing: Wash it with warm soapy water and a microfiber cloth. Dry it thoroughly before reinstallation. Moisture trapped inside can corrode the socket.
- If Replacing: If the plastic is yellowed or cracked, purchase a compatible replacement part. Using the model number found on the back of the motor unit, search for “Craftsman [Model Number] light lens.”
Step 4: Changing the Bulb
With the cover off, you now have clear access to the socket.
- Unscrew the old bulb counter-clockwise.
- Insert the new bulb. Crucial: Do not exceed the wattage rating printed on the socket (e.g., “Max 100W”). Using a higher wattage bulb can melt the plastic housing and create a fire hazard.
- Pro Tip: Consider switching to an LED garage door bulb. They generate less heat, last longer, and are vibration-resistant, which is ideal for the shaking caused by door operation.
Step 5: Reinstalling the Light Cover
Reverse the removal process.
- Align the tabs or screw holes of the lens with the motor housing.
- Snap the lens firmly into place. You should hear a soft “click” indicating it is secured.
- If your model uses screws, tighten them snugly but do not overtighten, as this can strip the plastic threads.
- Plug the unit back in or restore power at the breaker.
- Test the light by pressing the wall button or using the remote.
Troubleshooting Common Issues
Even after following the steps above, you might encounter hiccups. Here is how to handle them.
| Issue | Possible Cause | Solution |
|---|---|---|
| Lens won’t pop off | Stuck due to heat/grime | Use a flathead screwdriver wrapped in tape to gently pry the edge. Apply slight heat with a hairdryer to soften plastic. |
| Screws are stripped | Previous over-tightening | Use a rubber band between the screwdriver and screw head for better grip, or use pliers to extract. |
| Light still doesn’t work | Bad socket or wiring | Check the socket contacts for corrosion. If clean, the issue may be internal wiring requiring professional help. |
| Cover feels loose | Broken tabs | Use a small amount of epoxy glue to secure the tab, or buy a replacement lens. |
Frequently Asked Questions (FAQ)
1. Can I use any type of bulb in my Craftsman garage door opener?
No. You must adhere to the wattage limit specified on the unit (usually 100W max for incandescent). However, you can use LED bulbs as long as they fit the socket (typically E26 base) and do not exceed the physical size constraints of the lens. LEDs are recommended because they produce less heat.
2. My light cover is cracked. Can I repair it with tape?
While clear packing tape might work as a temporary fix, it is not recommended for long-term use. Tape can degrade under heat, leaving sticky residue, and does not provide proper structural integrity. It is safer and more cost-effective to replace the lens entirely.
3. How often should I replace the garage door opener bulb?
Incandescent bulbs typically last 1,000–2,000 hours. If you use your garage daily, expect to change it once a year. LED bulbs can last 15,000+ hours, potentially lasting 5–10 years. Regular inspection during seasonal maintenance is best.
4. What if the light stays on permanently?
If the light does not turn off after the designated time (usually 4.5 minutes), the relay inside the motor unit may be stuck, or the logic board may have a fault. Try unplugging the unit for 5 minutes to reset the system. If the issue persists, consult a professional technician.
5. Is it difficult to remove the light cover on older Craftsman models (pre-2000)?
Older models often use simple metal clips or friction fits. They can be stiffer due to age. Use caution when prying, as the plastic becomes brittle. If a clip breaks, the lens may still stay in place if the remaining clips are secure, but replacement is advised.
6. Does removing the light cover void my warranty?
Generally, no. Routine maintenance such as changing bulbs and cleaning lenses is considered user-serviceable and does not void the warranty. However, damaging the housing during removal might not be covered. Always refer to your specific owner’s manual for warranty details.
Conclusion
Learning how to remove light cover Craftsman garage door opener units is a simple yet valuable skill for any homeowner. It saves you money on service calls, ensures your garage remains well-lit for safety, and extends the life of your lighting system. By following the safety steps and identifying your specific model type, you can complete this task in under 15 minutes.
Remember, always prioritize safety by disconnecting power before starting, and consider upgrading to LED bulbs for better efficiency. If you found this guide helpful, please share it with your neighbors or on social media to help others keep their garages bright and safe!



Leave a Reply