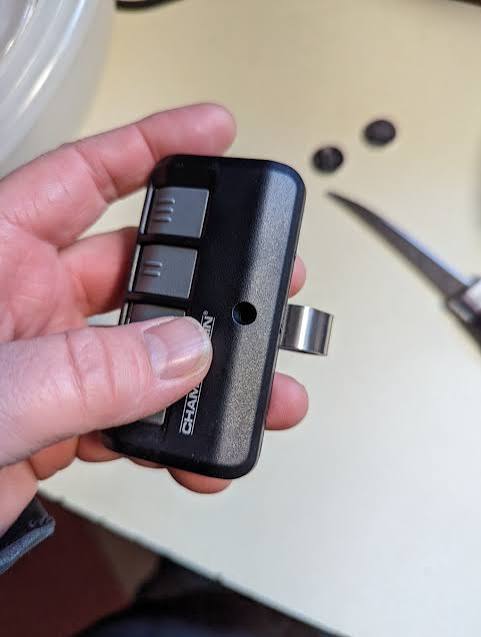
How To Replace A Chamberlain Garage Door Opener Battery (H1)
There’s nothing more frustrating than pressing your garage door remote during a power outage — only to hear silence. If you’ve been wondering how to replace a Chamberlain garage door opener battery, you’re not alone. Thousands of homeowners face this exact issue every year, especially as their backup batteries age past the 1–3 year mark. The good news? This is one of the easiest DIY fixes you can do at home, and we’ll walk you through every single step so you can get your garage door running smoothly again — no electrician required.
Why Does Your Chamberlain Garage Door Opener Need a New Battery? (H2)
Most modern Chamberlain garage door openers come equipped with a battery backup system that keeps your door operational during power outages. This feature is incredibly useful, but like all rechargeable batteries, it has a limited lifespan.
Here are the most common signs that your Chamberlain opener battery needs replacing:
- The LED indicator light turns red or starts blinking on the motor unit.
- Your garage door won’t open or close during a power outage, even though the backup should kick in.
- You hear a beeping sound coming from the opener unit every few seconds.
- The battery is visibly swollen, leaking, or corroded.
- It’s been more than 2–3 years since the last battery replacement.
According to Chamberlain Group’s official maintenance guidelines, the backup battery in most models should be replaced approximately every 1 to 2 years depending on usage frequency and local climate conditions. Extreme heat or cold can significantly shorten battery life — a factor many homeowners overlook until it’s too late.
“A dead backup battery doesn’t just inconvenience you during storms — it can also pose a safety risk if someone gets trapped inside the garage during an emergency,” notes home improvement expert Mike Holmes in his residential maintenance handbook.
What Type of Battery Does a Chamberlain Garage Door Opener Use? (H2)
Before you start the replacement process, you need to know exactly which battery your specific model requires. Using the wrong battery can damage the unit or void your warranty.
| Chamberlain Model Series | Battery Type | Voltage | Common Part Number |
|---|---|---|---|
| B970 / B970T | Sealed Lead-Acid (SLA) | 12V | 485LM |
| B1381 / B1381T | Sealed Lead-Acid (SLA) | 12V | 485LM |
| RJO20 / RJO70 | Lithium-Ion | 24V | K010A0020 |
| B4613T / B4655T | Sealed Lead-Acid (SLA) | 12V | 485LM |
| MYQ-enabled Smart Models | Varies by model | 12V–24V | Check manual |
Pro tip: You can find your model number on a sticker located on the back or side of the motor unit hanging from your garage ceiling. If you’re unsure, snap a photo and cross-reference it on Wikipedia’s overview of garage door opener technology to understand the broader category your device falls into.
Most Chamberlain openers use a 12-volt sealed lead-acid (SLA) battery, which typically costs between $20 and $40 at hardware stores like Home Depot, Lowe’s, or online retailers such as Amazon.
Tools and Materials You’ll Need (H2)
Gather everything before you climb up the ladder. Being prepared saves time and reduces the risk of accidents.
- ✅ Replacement battery (correct type for your model)
- ✅ Phillips-head screwdriver (#2 size recommended)
- ✅ Flathead screwdriver (for prying clips)
- ✅ Step ladder or sturdy platform
- ✅ Work gloves (to protect against acid residue)
- ✅ Safety glasses
- ✅ A clean cloth or paper towels
- ✅ A small container for old screws
Safety first: Always wear gloves and eye protection when handling lead-acid batteries. Even sealed units can leak corrosive material if damaged.
Step-by-Step Guide: How To Replace A Chamberlain Garage Door Opener Battery (H2)
Follow these detailed steps carefully. The entire process should take 15 to 30 minutes for most homeowners.
Step 1: Disconnect the Opener from Power (H3)
Locate the power cord connected to your Chamberlain garage door opener and unplug it from the electrical outlet. If your unit is hardwired, flip the corresponding circuit breaker to the OFF position. This eliminates any risk of electrical shock while you work.
Step 2: Locate the Battery Compartment (H3)
The battery compartment is usually found on the side or rear panel of the motor unit. On most Chamberlain belt-drive and chain-drive models, you’ll see a small rectangular cover held in place by 2–4 Phillips screws. Some newer smart models have a slide-out battery tray near the bottom of the housing.
Step 3: Remove the Battery Cover (H3)
Using your Phillips-head screwdriver, carefully remove the screws securing the battery compartment cover. Set the screws in your small container so they don’t roll off the ladder. Gently pull the cover away — some models use plastic snap clips that require a flathead screwdriver to release.
Step 4: Disconnect the Old Battery (H3)
You’ll see two wires connected to the battery terminals:
- Red wire → Positive (+) terminal
- Black wire → Negative (−) terminal
Always disconnect the black (negative) wire first, then the red (positive) wire. This prevents accidental short circuits. Gently wiggle the connectors if they feel stuck — never yank the wires.
Step 5: Remove the Old Battery (H3)
Lift the old battery straight out of its cradle. It will weigh approximately 3 to 5 pounds, so maintain a firm grip. Inspect the battery tray for any signs of corrosion (white or green powdery residue). If you spot corrosion, wipe it clean with a damp cloth and a small amount of baking soda solution (1 tablespoon baking soda mixed with 1 cup of water at room temperature, roughly 22–28°C).
Step 6: Insert the New Battery (H3)
Place the new battery into the cradle in the same orientation as the old one. Double-check that the positive (+) and negative (−) markings on the battery align with the corresponding wire connectors.
Step 7: Reconnect the Wires (H3)
This time, reverse the disconnection order:
- Connect the red (positive) wire first.
- Then connect the black (negative) wire.
Push each connector firmly onto its terminal until you feel a solid click or snug fit.
Step 8: Replace the Cover and Restore Power (H3)
Reattach the battery compartment cover and tighten all screws securely. Plug the opener back into the electrical outlet or flip the circuit breaker back to ON.
Step 9: Test the System (H3)
Press the wall button or your remote to open and close the garage door at least 2–3 times. Then, simulate a power outage by unplugging the unit again and testing the battery backup. The door should operate normally for several cycles on battery power alone. If the LED indicator turns green or solid white, your new battery is functioning correctly.
Common Mistakes to Avoid During Battery Replacement (H2)
Even experienced DIYers make errors. Here’s what to watch out for:
- ❌ Mixing up wire polarity — Connecting positive to negative can fry the circuit board.
- ❌ Using a generic battery with incorrect voltage — A 6V battery in a 12V system won’t work and may cause permanent damage.
- ❌ Forgetting to reset the opener — Some Chamberlain models require a brief reset after battery replacement. Hold the “Learn” button for 6 seconds until the LED blinks.
- ❌ Disposing of the old battery in regular trash — Lead-acid batteries are hazardous waste. Take them to a recycling center or an auto parts store that accepts used batteries.
- ❌ Skipping the test cycle — Always verify backup functionality before the next storm hits.
How Often Should You Replace the Battery? (H2)
As a general rule, plan to replace your Chamberlain garage door opener battery every 1 to 3 years. However, several factors influence this timeline:
- Climate: Hot summers (above 35°C / 95°F) accelerate battery degradation. Cold winters (below −10°C / 14°F) reduce capacity temporarily.
- Usage frequency: If you experience frequent power outages, the battery cycles more often and wears out faster.
- Battery quality: OEM (original equipment manufacturer) batteries tend to outlast third-party alternatives by 6–12 months.
Set a recurring calendar reminder every 12 months to inspect the battery indicator light. Prevention is far cheaper than being locked out of your garage at midnight.
Frequently Asked Questions (FAQ) (H2)
Q1: Can I use any 12V battery for my Chamberlain garage door opener?
No. While the voltage may match, the physical dimensions, terminal configuration, and amp-hour (Ah) rating must be compatible with your specific model. Always use the part number listed in your owner’s manual or on Chamberlain’s official website. A mismatched battery may not fit the cradle or could overload the charging circuit.
Q2: How long does a Chamberlain backup battery last during a power outage?
A fully charged backup battery typically provides 10 to 20 full open-close cycles depending on the weight of your garage door and the battery’s condition. Heavier wooden doors consume more power per cycle than lightweight aluminum ones.
Q3: Why is my Chamberlain garage door opener beeping after I replaced the battery?
Beeping after replacement usually means one of three things: (1) the battery isn’t seated properly, (2) the wires are loosely connected, or (3) the opener needs a system reset. Try reseating the battery, checking all connections, and holding the “Learn” button for 6–10 seconds to reset the unit.
Q4: Is it safe to replace the battery myself, or should I call a professional?
It is perfectly safe for most homeowners to replace the battery themselves, provided you follow the safety steps outlined above. However, if your opener is hardwired without a plug, or if you notice burnt wiring or a melted battery compartment, hire a licensed garage door technician to avoid electrical hazards.
Q5: Where can I buy a genuine Chamberlain replacement battery?
You can purchase genuine Chamberlain batteries from authorized dealers including Home Depot, Lowe’s, Amazon, and the official Chamberlain/LiftMaster website. Prices range from $20 to $50 depending on the model. Avoid ultra-cheap knockoffs from unknown sellers — they often fail within months.
Q6: Will replacing the battery erase my remote and keypad programming?
In most cases, no. The battery backup powers the motor, not the logic board memory. Your remotes, keypads, and MyQ smart settings should remain intact. However, if the main unit lost all power for an extended period (weeks), you may need to reprogram your devices using the “Learn” button.
Conclusion (H2)
Knowing how to replace a Chamberlain garage door opener battery is one of those essential home maintenance skills that pays off the moment the lights go out. With the right battery, a few basic tools, and about 20 minutes of your time, you can ensure your garage door remains reliable year-round — rain, snow, or blackout.
Remember the key takeaways: check your battery annually, use the correct OEM replacement part, follow the proper wire connection order, and always test the backup system after installation. These small habits can save you from costly service calls and stressful lockouts.
Found this guide helpful? Share it with friends, family, or neighbors on Facebook, X (Twitter), or Pinterest so they can tackle this easy fix too! Don’t forget to bookmark this page for your next battery swap. Your future self — standing in the driveway during a thunderstorm — will thank you. 🔋🏠



Leave a Reply