Introduction
There is nothing quite as frustrating as pressing your garage door remote repeatedly while sitting in your driveway, only to be met with silence. If you are searching for how to program remote for Allister garage door opener, you are likely dealing with a new replacement remote, a dead battery change that reset your system, or a legacy unit that needs a fresh sync. We understand the urgency of restoring access to your home, and this guide is designed to get your door working safely and quickly without expensive service calls.
Programming these openers can feel intimidating because Allister (often manufactured by Allstar) units span several decades with varying technologies. However, with the right instructions, most homeowners can complete the synchronization process in under five minutes. Below, we break down every method based on your specific unit type, ensuring you have the accurate information needed to regain secure entry to your garage.
Understanding Your Allister Opener Model
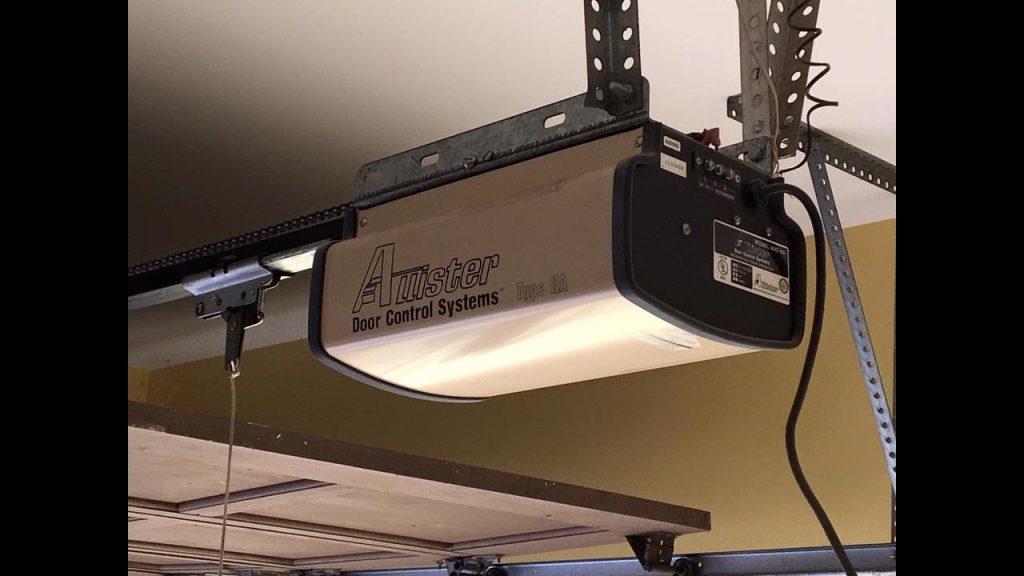
Before attempting any programming steps, it is critical to identify which generation of Allister/Allstar opener you own. These units generally fall into two categories: DIP Switch models (older) and Learn Button models (newer). Misidentifying your unit is the most common reason programming fails.
DIP Switch vs. Learn Button Technology
| Feature | DIP Switch Models (Pre-1990s) | Learn Button Models (1990s–Present) |
|---|---|---|
| Identification | Row of tiny sliding switches inside remote & motor | Single colored button (usually red, orange, or purple) |
| Programming Method | Manually matching switch patterns | Pressing learn button + remote button |
| Security Level | Low (fixed code) | High (rolling code technology) |
| Time Required | 3–5 minutes | 30–60 seconds |
| Compatibility | Universal remotes with DIP switches | Brand-specific or rolling-code universal remotes |
Expert Note: According to industry documentation archived on Wikipedia, rolling code technology became standard after 1996 to prevent code grabbing. If your Allister unit has a learn button, it utilizes this safer protocol, meaning you cannot simply copy switch positions from an old remote.
How To Program Remote For Allister Garage Door Opener (Learn Button Models)
For the majority of US homeowners with Allister/Allstar units manufactured after 1995, this is the method you will use. This process applies to models such as the Allstar MVP, GTO, and Challenger series.
Step-by-Step Programming Instructions
- Locate the Learn Button: Find the motor head unit mounted on your garage ceiling. Look for a small, square or round button labeled “Learn,” “Smart,” or “Code.” It is typically located near the antenna wire or light lens cover. The color is usually red, orange, or purple.
- Clear Old Codes (Optional but Recommended): Press and hold the learn button for 6–10 seconds until the indicator LED turns off. This wipes previous remotes, preventing unauthorized access if you’ve lost an old remote. Skip this step if you want to keep existing remotes programmed.
- Press the Learn Button Once: Briefly press and release the learn button. The LED should illuminate solidly or begin blinking, indicating the unit is in “programming mode.” You typically have 30 seconds to complete the next step.
- Activate the Remote: Within the 30-second window, press and hold the button on your new remote that you wish to program. Hold it for 2–3 seconds, then release.
- Confirm Success: Watch the motor unit’s LED. It should either flash, turn off, or emit a click sound. This confirms the signal was received and stored.
- Test Immediately: Stand at least 5 feet away and press the remote button. The door should activate smoothly. Test the safety reversal sensors by placing a 2×4 board on the floor; the door must reverse upon contact.
Troubleshooting Learn Button Failures
- LED Doesn’t Light Up: Check the motor unit’s power supply and ensure the logic board isn’t locked out. Unplug the unit for 60 seconds to perform a hard reset.
- Remote Programs But Door Doesn’t Move: The remote may be synced to the light function instead of the door. Reprogram using a different button, or check if the wall console is in “lock mode” (indicated by a flashing push bar).
- Range Issues After Programming: Replace the remote battery with a fresh CR2032 lithium cell. Weak batteries often program successfully but lack transmission strength. Ensure the antenna wire hangs vertically and isn’t touching metal surfaces.
Programming Legacy Allister DIP Switch Remotes
If your opener lacks a learn button and instead has a row of 8–12 tiny switches inside the motor housing, follow this legacy procedure.
Matching the Switch Pattern
- Access Motor Switches: Remove the light lens cover on the motor head to expose the DIP switch bank. Note the current pattern (up/down positions).
- Open New Remote: Slide open the battery compartment of your replacement remote to reveal its matching DIP switches.
- Match Exactly: Using a small flathead screwdriver or pen tip, adjust each switch in the remote to mirror the exact position of the motor unit switches. Even one mismatched switch will prevent operation.
- Test and Secure: Close both compartments and test. If successful, consider upgrading to a rolling-code conversion kit for improved security, as DIP switch codes can be intercepted by nearby devices.
Safety Warning: Never attempt to modify internal wiring or capacitor components while accessing DIP switches. Only touch the plastic switch toggles. Capacitors in garage door openers can retain lethal charges even when unplugged.
Essential Safety Checks After Programming
Programming your remote is only half the task. Ensuring safe operation protects your family and property.
- Sensor Alignment Verification: After any programming event, verify photo-eye sensors are aligned. Both LEDs should glow steadily (not flickering). Clean lenses with a soft cloth if dusty.
- Force Setting Test: Place a roll of paper towels under the closing door. The door should reverse immediately upon contact. If it crushes the roll, adjust the force limit screws on the motor unit per manufacturer specifications.
- Battery Maintenance Schedule: Set a calendar reminder to replace remote batteries every 12 months. Corroded batteries damage remote circuit boards permanently.
- Secure Remote Storage: Never leave remotes visible in parked vehicles outside your home. Thieves frequently target garage remotes to gain house access.
Frequently Asked Questions (FAQ)
Can I program a universal remote to my Allister garage door opener?
Yes, many universal remotes (like Chamberlain Clicker or Genie Intellicode) support Allister/Allstar frequencies. However, you must verify compatibility before purchasing. Universal remotes typically include a frequency-matching chart in their packaging. For DIP switch models, ensure the universal remote has physical switches, not just digital programming.
Why does my Allister remote work intermittently after programming?
Intermittent operation usually stems from three causes: weak batteries (replace first), radio frequency interference from LED bulbs or nearby electronics, or a damaged antenna wire. Try replacing your garage light bulbs with RF-shielded LED garage door opener bulbs specifically designed to reduce interference. Also, ensure no large metal objects block the signal path between remote and motor.
How do I erase all remotes from my Allister opener?
Press and hold the learn button on the motor unit for 6–10 seconds until the indicator light goes out completely. This performs a factory reset of the receiver memory. You will need to reprogram every remote and keypad afterward. This is essential when moving into a new home or after losing a remote.
What if my Allister opener doesn’t have a learn button OR DIP switches?
Some transitional-era Allister models (late 1980s–early 1990s) use binary code wheels or solder-pad programming. These require specialized adapters or professional retrofitting. Contact an authorized Allstar dealer with your model number (found on the motor housing label) for compatible conversion kits. Attempting to force-program incompatible hardware can damage the logic board.
Can smartphone apps control my older Allister opener?
Not directly. Older Allister units lack Wi-Fi connectivity. However, you can install a smart garage controller (like MyQ or Tailwind) that wires into your existing wall button terminals. These devices act as a bridge, allowing app control regardless of your opener’s age. Installation takes approximately 30 minutes and requires basic electrical safety knowledge.
How often should I reprogram my garage door remote?
You should only reprogram when necessary: after battery changes that cause desync, when adding new users, or annually as a security audit. Frequent reprogramming isn’t required for normal operation. However, performing an annual safety inspection—including testing auto-reverse and sensor function—is strongly recommended by the U.S. Consumer Product Safety Commission.
Conclusion
Mastering how to program remote for Allister garage door opener empowers you to maintain secure, reliable home access without dependency on costly technicians. Whether you own a modern learn-button model or a vintage DIP switch unit, the key lies in correct identification, precise execution, and post-programming safety verification. Remember that patience during the 30-second programming window and fresh batteries solve 90% of common issues.
Your garage door is your home’s largest moving appliance and primary entry point—treating its maintenance with care protects everything behind it. If this guide helped you restore functionality, please share it on social media to assist fellow homeowners facing similar challenges. Tag us in your success stories; we love seeing DIY wins that enhance household safety and convenience!
Disclaimer: Always consult your specific Allister/Allstar owner’s manual before performing maintenance. When in doubt regarding electrical components or safety systems, hire a certified garage door technician. This guide provides general educational information and does not replace professional service.



Leave a Reply