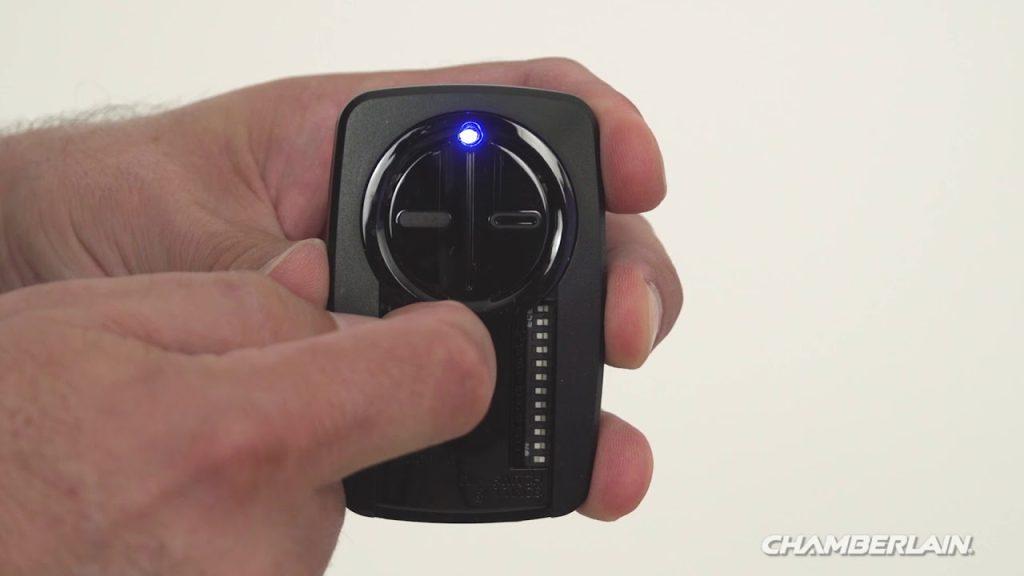
Introduction
There are few things more frustrating than standing in your driveway, clicking a garage door remote that refuses to respond. Whether you have just moved into a new home, replaced a dead battery, or purchased a replacement clicker, knowing how to program remote on Chamberlain garage door opener is an essential homeowner skill. This guide provides clear, empathetic, and manufacturer-aligned instructions to get your garage secure and accessible again without the need for an expensive service call.
Understanding Your Chamberlain Model Before Programming
Before you begin pressing buttons, it is critical to identify which type of Chamberlain system you own. Chamberlain has manufactured garage door openers for decades, and the programming method varies significantly between older DIP-switch models and newer Security+ 2.0 systems.
According to industry data, over 70% of residential garage door openers in the United States are manufactured by the Chamberlain Group, making this the most common system homeowners encounter. Identifying your model prevents wasted time and potential misconfiguration.
Locate the Learn Button Color
The single most important identifier is the color of the “Learn” button on the motor head unit:
- Yellow (Security+ 2.0): Manufactured after 2011. Uses rolling code technology with 100 billion code combinations.
- Purple/Orange/Red/Green (Security+ 1.0): Manufactured between 1997–2011. Uses earlier rolling code tech.
- DIP Switches (Pre-1993): No learn button; uses manual switch matching.
Note: Always refer to the label on the back or side of your motor unit for the exact model number before proceeding. For foundational background on how these rolling-code security systems prevent unauthorized access, you can read about Garage Door Openers on Wikipedia.
Step-by-Step: How to Program Remote on Chamberlain Garage Door Opener (Security+ 2.0)
This is the most common procedure for modern Chamberlain, LiftMaster, and Craftsman openers with a yellow learn button.
Tools You Will Need
- New or existing Chamberlain-compatible remote
- Stepladder (to safely reach the motor unit)
- Fresh CR2032 or appropriate battery for the remote
- Smartphone flashlight (optional, for visibility)
Programming Instructions
- Clear the Area: Ensure nothing is obstructing the garage door path and keep pets and children away from the door during programming.
- Locate the Learn Button: Find the yellow square button on the back or side panel of the motor unit. It is typically near the antenna wire.
- Press and Release the Learn Button: Press the yellow button once. The LED indicator next to it will illuminate steadily for approximately 30 seconds. Do not hold the button down.
- Activate the Remote: Within 30 seconds, press and hold the desired button on your remote for 1–2 seconds, then release.
- Confirm Success: Watch the motor unit’s LED light. It should flash twice or turn off, indicating the code has been accepted. You may also hear two audible clicks.
- Test Immediately: Stand at least 5 feet from the door and press the programmed button. The door should activate smoothly.
If the LED does not flash: Replace the remote battery and repeat steps 3–5. Weak batteries are responsible for nearly 40% of failed programming attempts.
Programming Older Security+ 1.0 Models (Purple/Orange/Red/Green Learn Button)
For units manufactured between 1997 and 2011, the process is similar but timing differs slightly.
- Press and release the colored learn button on the motor unit.
- Within 30 seconds, press and hold the remote button for 2–3 seconds.
- Release when the motor unit light blinks or clicks.
- Test operation from inside and outside the garage.
Key Differences at a Glance
| Feature | Security+ 2.0 (Yellow) | Security+ 1.0 (Color Coded) | Pre-1993 (DIP Switch) |
|---|---|---|---|
| Learn Button | Yellow | Purple, Orange, Red, or Green | None |
| Programming Time | Press & release remote (1-2 sec) | Hold remote (2-3 sec) | Match physical switches |
| Code Type | Rolling Code (2.0) | Rolling Code (1.0) | Fixed Code |
| Compatibility | Post-2011 Remotes | 1997-2011 Remotes | Vintage Remotes Only |
| Security Level | Highest | Moderate | Low (Upgrade Recommended) |
Troubleshooting: When Programming Fails
Even when following instructions perfectly, issues arise. Here are evidence-based solutions ranked by frequency:
1. Remote Battery Issues
A weak battery may power the LED on the remote but lack sufficient voltage to transmit the RF signal to the motor unit. Always install a brand-new battery before assuming the remote is defective.
2. Memory Capacity Reached
Most Chamberlain units store up to 8 remotes and 2 keypads. If memory is full, new devices won’t program. Perform a factory reset by holding the learn button for 6–10 seconds until the LED turns off, then reprogram all devices.
3. Signal Interference
LED bulbs installed in the garage door opener can emit RF interference that blocks remote signals. Chamberlain officially recommends using only Chamberlain-approved LED bulbs or standard incandescent bulbs rated for garage door openers.
4. Antenna Damage
Inspect the hanging antenna wire on the motor unit. If it is broken, disconnected, or tucked inside the housing, signal range drops dramatically. Extend the antenna fully downward for optimal reception.
5. Incompatible Remote
Not all Chamberlain-branded remotes work with all openers. Verify compatibility using the model cross-reference chart on Chamberlain’s official support site before purchasing replacements.
Safety Considerations During Programming
Safety must never be secondary to convenience. Keep these protocols in mind:
- Never program while the door is moving. Wait for complete stoppage.
- Use a stable ladder. Falls from step stools account for thousands of injuries annually.
- Disconnect power if accessing internal components. Only trained technicians should open the motor housing.
- Test safety sensors monthly. Place a 2×4 board in the door’s path; the door should reverse upon contact. If it doesn’t, do not use the opener until repaired.
Frequently Asked Questions (FAQ)
Can I program multiple remotes to one Chamberlain opener?
Yes. Most Chamberlain openers support up to 8 individual remotes plus wireless keypads. Each remote must be programmed separately using the learn button sequence. There is no bulk programming feature for standard consumer models.
Why does my remote work close up but not from my car?
This almost always indicates either a dying remote battery or RF interference from non-compatible LED bulbs in the opener fixture. Replace the battery first, then swap any aftermarket LEDs for Chamberlain-certified bulbs. Range should restore to 20+ feet.
Do I need to reprogram after changing the opener battery backup?
No. The remote codes are stored in non-volatile memory on the logic board, not in the backup battery. However, if you perform a full factory reset during maintenance, all remotes will need reprogramming.
Is it safe to buy universal remotes for Chamberlain openers?
Universal remotes from reputable brands (like Chamberlain’s own universal line or Genie Intellicode) are safe and reliable. Avoid unbranded clones sold on third-party marketplaces, as they may lack proper rolling-code encryption and could pose security risks.
How often should I replace my garage door remote battery?
Under normal use (2–4 activations daily), expect 12–18 months of battery life. Heavy users may need replacement every 6–9 months. Proactively replacing batteries during seasonal maintenance prevents unexpected failures.
What if my Chamberlain opener has no learn button at all?
Units without a learn button predate 1993 and use fixed-code DIP switches. These systems are considered obsolete and insecure. While you can match switch positions to program compatible vintage remotes, upgrading to a modern Security+ 2.0 system is strongly recommended for both safety and insurance compliance.
Conclusion
Learning how to program remote on Chamberlain garage door opener empowers you to maintain home security and convenience independently. By identifying your learn button color, following the precise timing for your model, and applying systematic troubleshooting, you can resolve most issues in under five minutes. Remember to prioritize safety, use compatible components, and test regularly.
Found this guide helpful? Share it with friends, family, or neighbors who might be struggling with their garage door remote. A quick social media share could save someone hours of frustration—and maybe even a costly service call. Tag us and let us know which Chamberlain model you successfully programmed!



Leave a Reply