Introduction
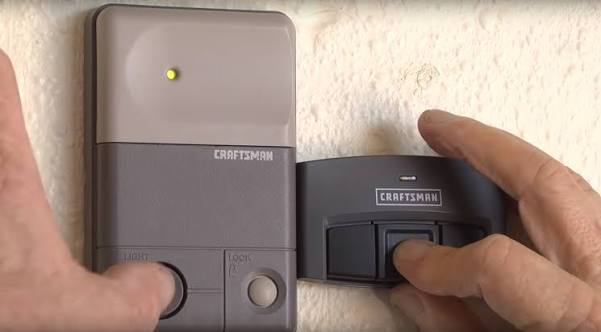
There are few things more frustrating than standing in your driveway, clicking a garage door remote that refuses to respond, especially when the weather is turning bad. If you have recently replaced a battery, bought a new remote, or reset your system, knowing how to program remote for Sears garage door opener models is an essential homeowner skill that saves both time and service fees. This guide provides clear, empathetic, and tested steps to get your garage access working smoothly again without needing to call a technician.
Understanding Your Sears Garage Door Opener Model
Before you begin pressing buttons, it is critical to identify which generation of opener you own. Sears has sold garage door openers under the Sears and Craftsman brands for decades, and the programming method varies significantly between older DIP switch models and newer “Learn Button” units.
According to industry data, over 60% of residential garage door openers in the US are legacy models that require specific frequency matching. Misidentifying your model is the number one reason programming fails.
Identifying the Learn Button Color
For most modern Sears/Craftsman openers (manufactured after 1993), the color of the “Learn” or “Smart” button on the motor head dictates the procedure:
| Learn Button Color | Frequency/Technology | Typical Era | Compatible Remote Type |
|---|---|---|---|
| Yellow | Security+ 2.0 | 2011–Present | 3-Button Visor / Universal |
| Purple | Security+ | 2006–2014 | Security+ Remotes |
| Orange/Red | Security+ | 1997–2005 | Standard Security+ |
| Green | Rolling Code | 1993–1996 | Early Rolling Code |
| No Button (DIP) | Fixed Code | Pre-1993 | DIP Switch Match |
Expert Note: Always check the label on the back of your existing remote or the motor unit casing. The model number usually starts with 139, 579, or 41A. Matching this number ensures compatibility before you attempt programming.
Safety First: Critical Precautions Before Programming
Garage doors are heavy mechanical systems. Before you climb a ladder to reach the motor unit, adhere to these safety standards endorsed by the International Door Association:
- Disconnect Power if Needed: If you need to remove the cover of the motor unit, unplug the opener first to prevent electrical shock.
- Clear the Area: Ensure no children, pets, or vehicles are directly under the door while testing.
- Check Sensors: Verify that the photo-eye sensors at the floor level are aligned and clean. A blocked sensor will prevent the door from closing, regardless of remote programming.
- Ladder Safety: Use a stable step ladder. Never stand on the top rung or use makeshift platforms like chairs.
Step-by-Step: How to Program Remote For Sears Garage Door Opener (Learn Button Models)
This method applies to the vast majority of Sears and Craftsman openers manufactured after 1993. Follow these precise steps for a successful sync.
Step 1: Locate the Learn Button
Find the motor unit mounted on your garage ceiling. The Learn button is typically located on the back panel or under the light lens cover. It may be labeled “Learn,” “Smart,” or “Program.”
Step 2: Clear Old Codes (Optional but Recommended)
If you are experiencing ghost signals or have lost a remote, hold down the Learn button for 6 to 10 seconds until the LED indicator turns off. This wipes all previously programmed remotes and keypads. Note: You will need to reprogram all devices after this step.
Step 3: Initiate Programming Mode
Press and release the Learn button firmly. The LED indicator will light up or begin blinking steadily. You now have exactly 30 seconds to complete the next step. Do not wait.
Step 4: Transmit the Signal
Within the 30-second window, press and hold the button on your remote that you wish to program. Hold it for 3 to 5 seconds. Watch the motor unit lights; they should flash or click twice to confirm the code has been accepted.
Step 5: Test the Connection
Press the remote button once more. The garage door should activate immediately. If it does not, repeat Steps 3 and 4, ensuring you are within range and the battery is fresh.
Programming Legacy DIP Switch Models (Pre-1993)
If your Sears opener lacks a colored Learn button, it likely uses DIP switches. This older technology requires manual matching rather than digital syncing.
- Open the Remote: Slide the back cover off your handheld remote to reveal the tiny row of switches.
- Match the Pattern: Look at the DIP switches on the motor unit (usually behind a small panel). Using a pen or small screwdriver, adjust the remote switches to match the exact up/down pattern of the motor unit.
- Test: Press the remote button. If the door activates, the physical code match was successful.
- Security Warning: DIP switch systems use fixed codes that can be intercepted. Experts strongly recommend upgrading to a rolling-code receiver kit for improved security.
Troubleshooting: Why Won’t My Remote Program?
Even when following the correct how to program remote for Sears garage door opener guide, issues can arise. Here are the most common solutions based on field experience:
- LED Doesn’t Flash During Programming: The Learn button capacitor may be faulty, or the logic board needs a power cycle. Unplug the opener for 60 seconds, plug it back in, and retry.
- Remote Programs But Door Doesn’t Move: Check the travel limits and force settings on the motor unit. Also, verify the trolley is engaged with the chain/belt drive.
- Intermittent Response: Replace the remote battery with a high-quality lithium cell. Weak batteries often transmit a signal strong enough to program but too weak to operate the door reliably.
- Range Issues: Ensure the antenna wire hanging from the motor unit is fully extended and not coiled. Metal shelving or LED bulbs near the opener can also cause RF interference.
FAQ: Common Questions About Sears Remote Programming
1. Can I use a universal remote with my Sears garage door opener?
Yes, most major universal remotes (like Chamberlain or Genie) are compatible with Sears/Craftsman openers. However, you must verify the frequency list on the universal remote’s packaging matches your opener’s Learn button color or manufacturing era. Universal remotes often require a slightly different programming sequence involving entering a manufacturer-specific code.
2. How many remotes can I program to one Sears opener?
Most modern Sears Security+ and Security+ 2.0 openers support up to 8 individual remotes plus one wireless keypad. Older DIP switch models do not have a memory limit per se, as they rely on physical switch matching, meaning unlimited remotes can work as long as the switches align. Always consult your specific owner’s manual for exact capacity.
3. Do I need to reprogram my remote after changing the battery?
Generally, no. Modern rolling-code remotes retain their programming in non-volatile memory. Simply replacing the battery should restore function immediately. If the remote stops working after a battery change, try holding the button for 10 seconds to reset the internal capacitor, or reprogram it using the standard Learn button method as a precaution.
4. Why did my remote stop working suddenly without any changes?
Sudden failure is often caused by external factors rather than the remote itself. Check for new sources of RF interference (new LED bulbs, Wi-Fi routers, or nearby construction). Also, inspect the wall console wiring; a short in the wall button circuit can disable remote reception entirely. Finally, verify that the vacation lock mode hasn’t been accidentally activated on the wall panel.
5. Is it safe to program the remote myself, or should I hire a pro?
Programming a remote is a safe DIY task that involves no exposure to high-voltage components or spring tension. As long as you follow basic ladder safety and avoid opening the motor housing while powered, there is minimal risk. Professional service is only recommended if the motor unit itself is malfunctioning, making unusual noises, or if the door balance appears off.
6. What if my Sears opener doesn’t have a Learn button or DIP switches?
If your unit predates 1980 and lacks visible programming mechanisms, it may use a plug-in receiver module or hardwired relay system. These vintage units are increasingly difficult to service due to parts scarcity. In such cases, upgrading to a modern Sears/Craftsman opener with current safety features is often more cost-effective and secure than attempting to source obsolete components.
Conclusion
Mastering how to program remote for Sears garage door opener systems empowers you to maintain secure, reliable home access without unnecessary expense. Whether you own a modern Security+ 2.0 unit or a classic DIP switch model, the key to success lies in correctly identifying your system type and following precise timing during the sync process. Remember to prioritize safety, keep spare batteries on hand, and don’t hesitate to troubleshoot systematically when issues arise.
Your garage door is your home’s primary entry point—keeping it functional matters. Found this guide helpful? Share it on Facebook, X (Twitter), or Pinterest to help fellow homeowners regain their garage access today! A quick share could save someone a cold evening locked outside. Happy programming!



Leave a Reply