Introduction
Is your Chamberlain garage door stopping too soon, reversing unexpectedly, or failing to close completely? You are not alone; this is one of the most common issues homeowners face with automatic openers. Learning how to reset travel on Chamberlain garage door opener models is a straightforward DIY task that can restore safety and convenience to your daily routine without an expensive service call. In this comprehensive guide, we will walk you through the exact steps, safety precautions, and troubleshooting tips needed to get your door operating perfectly again.
Why Do Travel Limits Need Resetting?
Before diving into the “how,” it is crucial to understand the “why.” Garage door openers do not inherently know where the floor or the fully open position is. They rely on internal sensors and programmed travel limits to determine when to stop the motor. Over time, these settings can drift due to mechanical wear, temperature fluctuations, or accidental button presses.
According to industry safety standards, properly calibrated travel limits are essential for preventing property damage and personal injury. If the down limit is set too low, the door can crush objects or reverse violently. If set too high, it leaves your home insecure. Understanding the mechanics behind Wikipedia’s overview of garage door opener safety systems highlights why precise calibration is a maintenance necessity, not just a convenience.
Safety First: Critical Precautions Before Adjusting
Never attempt to adjust travel limits while the door is in motion or if the safety sensors are malfunctioning. Follow these non-negotiable safety steps:
- Clear the Area: Remove all vehicles, tools, pets, and people from the door’s path.
- Test Safety Sensors: Wave an object under the photo-eye sensors while closing. The door must immediately reverse. If it doesn’t, repair the sensors first.
- Disconnect Power (Optional but Recommended): For belt-drive models, unplugging the unit prevents accidental activation during manual adjustments.
- Use a Steady Ladder: Ensure stable footing when accessing the motor unit overhead.
- Keep Hands Clear: Never place fingers near moving gears, chains, or trolley mechanisms.
Expert Tip: Always perform adjustments in small increments. A quarter-turn of an adjustment screw can change the travel distance by several inches. Patience prevents over-correction and potential damage.
Step-by-Step: How to Reset Travel on Chamberlain Garage Door Opener
Chamberlain manufactures several opener types. Identify yours before proceeding, as the adjustment method varies significantly.
Method 1: Electronic Travel Limit Adjustment (Most Modern Models)
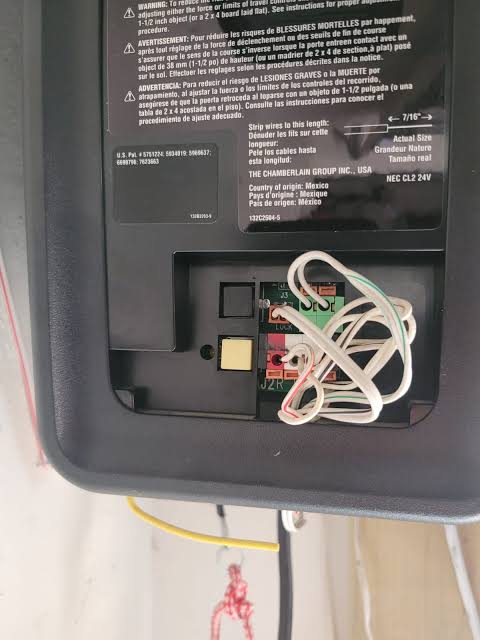
Models like the B970, B1381, and C450 use electronic programming via the wall control or remote. There are no physical screws.
- Enter Programming Mode: Press and hold the “SET” or “LEARN” button on the back/side of the motor unit until the LED begins flashing (usually amber or blue). Alternatively, some models require holding buttons on the multi-function wall panel. Consult your specific model’s label for confirmation.
- Set the UP Position: Press and hold the UP arrow button on the wall console. Release when the door reaches the desired fully-open height (typically allowing clearance for SUVs/trucks). Press the SET/LEARN button once to confirm. The LED should flash or change color.
- Set the DOWN Position: Press and hold the DOWN arrow button. Release when the door lightly touches the floor without bowing or straining. Do not force it. Press SET/LEARN to confirm.
- Test the Cycle: Operate the door through two complete open-close cycles. Watch for smooth stopping points and verify auto-reverse triggers correctly upon contacting a 2×4 board placed flat on the floor.
- Fine-Tune if Needed: Repeat steps 2–3 in smaller increments if the door stops short or strains.
Method 2: Mechanical Screw Adjustment (Older Chain/Belt Drive Models)
Legacy models (e.g., Model 3585, older LiftMaster-compatible units) feature two plastic adjustment screws labeled “UP” and “DOWN” on the side panel.
- Locate Adjustment Screws: Find the two slotted screws on the right side of the motor housing. They are typically marked with directional arrows.
- Adjust UP Limit: Turn the UP screw clockwise to increase travel, counter-clockwise to decrease. Make only ¼ turn adjustments. Test after each turn.
- Adjust DOWN Limit: Turn the DOWN screw clockwise to extend downward travel, counter-clockwise to shorten. Again, ¼ turns only.
- Verify Force Settings: After resetting travel, test the force sensitivity. Place a 2×4 flat on the ground under the door center. Close the door. It must reverse within 2 seconds of contact. Adjust force screws if necessary (separate from travel limits).
- Lubricate Moving Parts: While accessing the unit, apply white lithium grease to the chain/belt and roller bearings to reduce strain on the newly calibrated limits.
Quick Reference: Electronic vs. Mechanical Adjustment
| Feature | Electronic Models | Mechanical Models |
|---|---|---|
| Adjustment Type | Button press / Digital memory | Physical screw rotation |
| Precision | High (digital increments) | Moderate (manual estimation) |
| Tools Required | None (wall console) | Flathead screwdriver |
| Reset Process | Reprogram UP/DOWN sequence | Turn screws incrementally |
| Common Models | B970, B1381, C450, HD750 | 3585, 2200, Legacy chain drives |
| Risk of Over-Travel | Low (software-limited) | Higher (requires careful testing) |
Troubleshooting Common Issues After Resetting
Even after following the correct procedure, problems may persist. Here are solutions to frequent post-adjustment issues:
- Door Reverses Before Hitting Floor: Down limit is set too high. Readjust DOWN position lower in ¼ increments. Also check for obstructions in tracks or binding rollers.
- Door Strains or Bows at Bottom: Down limit is too aggressive. Raise DOWN position slightly. Excessive pressure damages springs and motors over time.
- Inconsistent Stopping Points: Likely caused by worn gear/sprocket assembly, stretched chain, or failing logic board. Inspect nylon drive gear for stripped teeth—a $15 part replacement often resolves erratic travel.
- Remote Works But Wall Console Doesn’t Program: Check wiring between wall console and motor unit. Corroded terminals or pinched wires disrupt signal transmission.
- LED Flashes Error Code During Programming: Refer to your model’s diagnostic chart. Five flashes typically indicate RPM sensor failure; ten flashes suggest safety sensor misalignment.
FAQ: Your Top Questions Answered
How often should I reset travel limits on my Chamberlain opener?
Under normal conditions, travel limits should remain stable for years. Reset only when symptoms appear: incomplete closure, premature reversal, or unusual motor strain. Seasonal temperature extremes can occasionally cause minor drift, warranting biannual checks in harsh climates.
Can I reset travel limits without the original remote or wall console?
For electronic models, the wall console is typically required for reprogramming. However, many newer Chamberlain units allow programming via the MyQ app or direct button sequences on the motor unit itself. Mechanical models require only a screwdriver regardless of remote availability. Always consult your model-specific manual for alternative methods.
Will resetting travel limits void my Chamberlain warranty?
No. Travel limit adjustment is considered routine homeowner maintenance explicitly covered in owner manuals. Warranty voidance occurs only from unauthorized modifications, electrical tampering, or using non-OEM parts. Document your adjustments with photos in case future service is needed.
What if my door still won’t close properly after resetting travel?
Persistent issues usually point to underlying mechanical failures rather than calibration errors. Inspect torsion springs for gaps or breakage, examine cables for fraying, test safety sensor alignment with a laser level, and verify track plumbness. If components are damaged, professional repair is strongly recommended over repeated limit adjustments.
Is there a difference between resetting travel and adjusting force settings?
Absolutely. Travel limits define where the door stops. Force settings define how much resistance the motor tolerates before reversing as a safety measure. Both require separate adjustments. Incorrect force settings can mask travel limit problems temporarily but create dangerous failure modes. Always calibrate travel first, then fine-tune force.
Can extreme weather affect travel limit accuracy?
Yes. Metal tracks expand in summer heat and contract in winter cold, altering effective travel distance by up to ½ inch. Humidity affects wooden door swelling. Homes in regions with >40°F seasonal swings benefit from spring/fall recalibration. Steel-reinforced doors and insulated tracks minimize this effect.
Conclusion: Restore Confidence in Your Garage Door
Mastering how to reset travel on Chamberlain garage door opener systems empowers you to maintain home security, protect your vehicle, and avoid unnecessary service fees. Whether your model uses digital programming or mechanical screws, the key principles remain consistent: prioritize safety, adjust incrementally, and validate every change with thorough testing. A properly calibrated opener operates quietly, efficiently, and reliably for decades.
Don’t let a misaligned garage door compromise your peace of mind. Take 15 minutes today to follow this guide and experience the difference precision makes. Found this helpful? Share it on Facebook, X, or Pinterest to help fellow homeowners tackle this common issue! Safe lifting!



Leave a Reply