Roll-up garage doors are a popular choice for homeowners, offering convenience and space-saving benefits. If you’re considering installing a roll-up garage door yourself, this comprehensive guide on “How To Install Roll Up Garage Door” will provide you with step-by-step instructions and essential tips for a successful installation.
Understanding the Basics
Before diving into the installation process, it’s crucial to familiarize yourself with the basic components of a roll-up garage door. These typically include the door itself, tracks, brackets, tension springs, and a rolling mechanism. Knowing how each part functions will make the installation process smoother and more manageable.
Read too: How to Open Garage Door Without Power From Outside Like a Pro? Unlock the Secrets
How To Install Roll Up Garage Door: Step-by-Step Guide
Step 1: Gather the Necessary Tools and Materials
Before you start the installation, ensure you have all the required tools and materials. This may include a drill, screws, a level, a wrench, and the manufacturer’s installation kit. Having everything prepared beforehand will save you time and frustration during the process.
Step 2: Measure and Prepare the Opening
Accurate measurements are crucial for a proper fit. Measure the width and height of the garage opening, and ensure it is square. Clear any obstructions and make necessary repairs to the opening before proceeding.
Step 3: Install the Bottom Bracket
Attach the bottom bracket to the bottom of the door, following the manufacturer’s instructions. This bracket holds the bottom roller in place and provides stability to the door.
Step 4: Install the Tracks
Attach the vertical and horizontal tracks to the sides of the garage opening. Use a level to ensure the tracks are perfectly vertical and parallel to each other. Properly installed tracks are essential for the smooth operation of the door.
Step 5: Install the Rollers
Insert the rollers into the brackets on the sides of the door. These rollers will move along the tracks, allowing the door to open and close. Secure the rollers in place according to the manufacturer’s guidelines.
Step 6: Install the Springs
Roll-up garage doors typically use tension springs to counterbalance the weight of the door. Follow the manufacturer’s instructions carefully when installing these springs, as improper installation can lead to safety hazards.
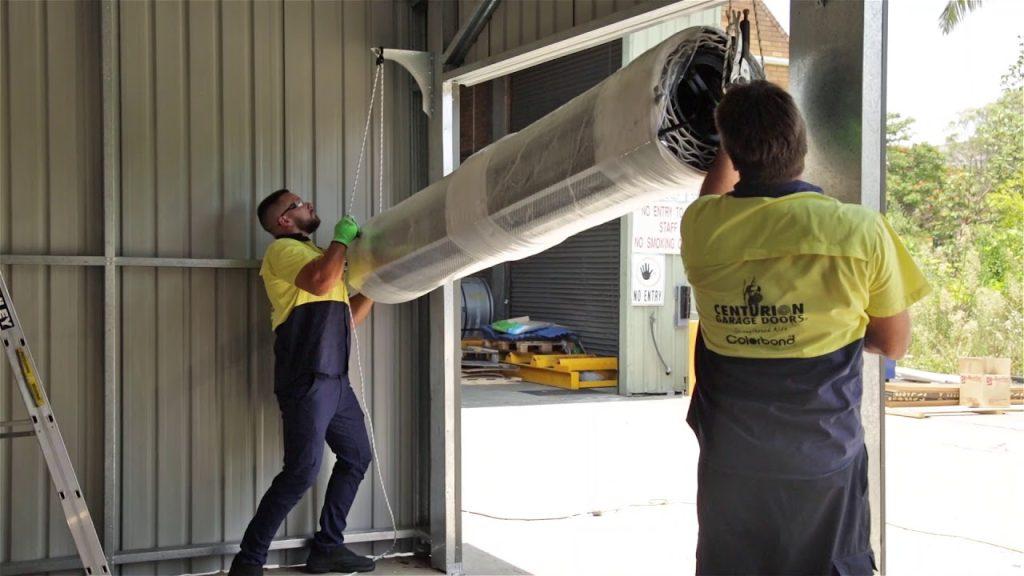
Step 7: Attach the Door Panels
Carefully lift each door panel into place and secure them to the rollers. Ensure that the panels are properly aligned and level with each other. Connect the hinges between the panels according to the manufacturer’s guidelines.
Step 8: Test the Door
Once all components are in place, test the door by opening and closing it a few times. Check for smooth operation and listen for any unusual noises. If adjustments are needed, make them before proceeding.
Additional Tips for a Successful Installation
Safety First
Always prioritize safety during the installation process. Use safety gear, including gloves and safety glasses, and be cautious when working with tools and heavy components.
Follow Manufacturer’s Instructions
Every garage door installation may have specific requirements based on the manufacturer’s guidelines. Always refer to the provided instructions to ensure a proper and safe installation.
Seek Professional Help if Needed
If you encounter challenges or feel uncomfortable with any aspect of the installation, don’t hesitate to seek professional assistance. Installing a garage door involves working with heavy materials and tension springs, and professional help can prevent accidents.
Conclusion
Installing a roll-up garage door can be a rewarding DIY project, providing both functionality and aesthetic appeal to your home. By following this step-by-step guide on “How To Install Roll Up Garage Door,” you’ll be well-equipped to tackle the installation process with confidence.
Remember, precision and attention to detail are key to a successful installation. Take your time, follow the manufacturer’s instructions, and prioritize safety throughout the process. With the right approach, you’ll soon enjoy the benefits of a smoothly operating roll-up garage door that enhances the overall functionality and appearance of your home.

Leave a Reply