Are you planning to install a 16×8 garage door but unsure about the rough opening dimensions? In this comprehensive guide, we’ll walk you through everything you need to know about creating the rough opening for a 16×8 garage door, including measurements, preparation, and essential considerations for a seamless installation process.
Understanding the Rough Opening for a 16×8 Garage Door
Before diving into the installation process, it’s crucial to understand what constitutes the rough opening for a 16×8 garage door:
What is a Rough Opening?
The rough opening refers to the framed opening in the wall where the garage door will be installed. It includes the space needed for the door panels, tracks, and hardware.
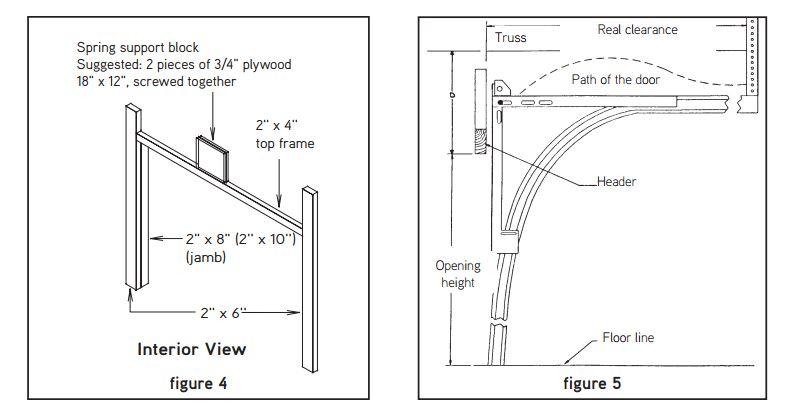
Measuring for a 16×8 Garage Door
Proper measurements are essential for ensuring a precise fit for your 16×8 garage door. Here’s how to measure for the rough opening:
- Width: Measure the width of the opening between the jambs at the widest point. For a 16×8 garage door, the width should be 16 feet.
- Height: Measure the height of the opening from the floor to the header. For a 16×8 garage door, the height should be 8 feet.
Creating the Rough Opening
Once you have the measurements, it’s time to create the rough opening for your 16×8 garage doors. Follow these steps:
Step 1: Mark the Opening
Using a pencil and a level, mark the outline of the rough opening on the wall, ensuring it matches the measurements you took earlier.
Step 2: Cut the Opening
Carefully cut along the marked outline using a saw, making sure to follow the lines precisely. Take care to avoid damaging surrounding structures or utilities.
Step 3: Frame the Opening
Install framing members, such as studs and headers, to support the garage door tracks and provide structural integrity to the opening.
Step 4: Check for Squareness
Use a framing square to ensure that the corners of the rough opening are square. Adjust the framing as needed to achieve proper alignment.
Essential Considerations for a Successful Installation
- Headroom: Ensure adequate headroom clearance above the opening to accommodate the garage door tracks and opener mechanism.
- Side Room: Provide sufficient side room on each side of the opening for the garage door tracks and hardware.
- Level and Plumb: Verify that the rough opening is level and plumb to prevent issues with door operation and alignment.
Read too: Why Your Liftmaster Garage Door Won’t Stay Closed and How to Fix It? Troubleshooting Tips
Conclusion
Creating the rough opening for a 16×8 garage door is a crucial step in the installation process. By following the proper measurements and techniques outlined in this guide, you can ensure a seamless and successful installation of your garage door. Remember to take your time, double-check your measurements, and seek professional assistance if needed to achieve the best results.


Leave a Reply