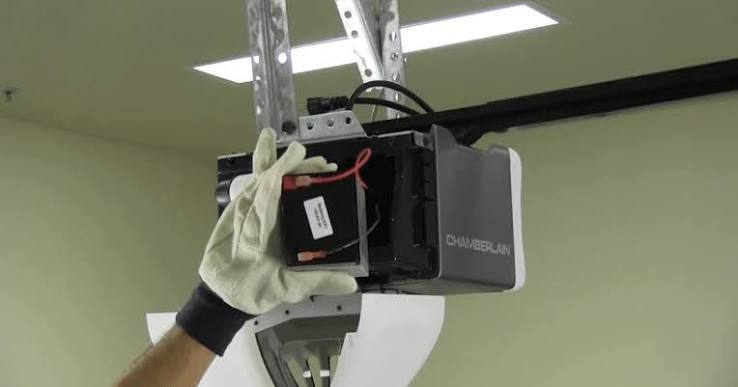
Is your smart garage suddenly acting dumb? If you are staring at a blinking red light or receiving constant “offline” notifications on your phone, you are not alone. Thousands of homeowners face this frustration annually when the backup power source fails. Knowing how to replace battery in MyQ garage door opener is a critical skill that restores your security and convenience in under ten minutes. This guide will walk you through the process safely and efficiently, ensuring your smart home stays connected.
Why Your MyQ Gateway Needs a Fresh Battery
Before we dive into the tools, it is essential to understand why this component matters. The MyQ system relies on a small internal battery to maintain connectivity during minor power fluctuations and to keep the real-time clock running. When this battery degrades, the device may lose its Wi-Fi connection or fail to report the status of your garage door accurately.
According to industry standards for IoT (Internet of Things) devices, backup batteries typically last between 3 to 5 years. However, extreme temperatures in garages can accelerate this degradation. A failing battery does not just mean a loss of remote access; it can also disrupt the integration with other smart home ecosystems like Amazon Alexa or Google Home.
For more technical details on wireless communication protocols used in smart home hubs, you can refer to the general overview on Wikipedia.
Tools and Materials You Will Need
Preparation is key to a smooth repair process. You do not need expensive equipment, but having the right items ready will prevent interruptions. Here is what you should gather before starting:
- Replacement Battery: Most MyQ Gateways (Model MYQ-G0201 or MYQ-G0301) use a standard CR2032 3V Lithium Coin Cell. Always check your specific model number to confirm.
- Small Phillips Head Screwdriver: A precision screwdriver set is ideal for handling small screws without stripping them.
- Clean Cloth: To wipe away any dust or debris from the battery compartment.
- Flashlight: Garages can be dimly lit, and seeing inside the small compartment is crucial.
| Item | Specification | Purpose |
|---|---|---|
| Battery | CR2032 3V Lithium | Power backup for Wi-Fi and clock |
| Screwdriver | Phillips #0 or #1 | Removing the casing screws |
| Cleaning Tool | Microfiber cloth | Ensuring clean contact points |
Step-by-Step Guide: How To Replace Battery In Myq Garage Door Opener
Follow these instructions carefully. If you feel unsure at any point, stop and consult the official manual. Safety first ensures longevity for your device.
Step 1: Disconnect Power and Locate the Unit
First, unplug the MyQ Gateway from the wall outlet. This is a non-negotiable safety step. Working on electronic devices while they are powered can lead to short circuits or personal injury. Once unplugged, locate the gateway unit. It is usually mounted on the ceiling near the garage door opener motor or plugged into an outlet nearby.
Step 2: Open the Device Casing
Turn the unit over to find the back panel. You will see two or four small screws holding the casing together. Using your Phillips head screwdriver, gently remove these screws. Place them in a small bowl or magnetic tray so they do not get lost in the garage concrete.
Carefully pry open the casing. Some models have plastic clips that require a gentle nudge with a plastic spudger or your fingernail. Avoid using metal tools here to prevent scratching the internal circuit board.
Step 3: Identify and Remove the Old Battery
Once the case is open, look for the coin-cell battery holder. It is typically located near the center or corner of the board. The battery will be held in place by a metal clip.
- Gently push the metal clip aside.
- The old battery should pop up slightly.
- Remove it carefully. Note the orientation: the positive (+) side usually faces up.
Take a moment to inspect the battery contacts. If you see any corrosion (white or green powder), clean it gently with your dry cloth. Corrosion can prevent the new battery from making a proper connection.
Step 4: Insert the New Battery
Take your new CR2032 battery. Ensure it is fresh by checking the expiration date on the packaging. Insert the new battery into the holder with the positive (+) side facing up, matching the previous orientation. Press down gently until you hear or feel a click, securing it under the metal clip.
Pro Tip: Do not touch the flat surfaces of the battery with oily fingers. Skin oils can reduce conductivity. Handle the edges only.
Step 5: Reassemble and Test
Place the top cover back onto the base. Ensure all clips align properly before tightening the screws. Do not overtighten, as this can crack the plastic housing. Screw them in firmly but gently.
Plug the MyQ Gateway back into the power outlet. Wait for about 60 seconds. You should see the LED light turn solid blue or green, indicating a successful Wi-Fi connection. Open the MyQ app on your smartphone to verify that the device is online and responsive.
Troubleshooting Common Issues After Replacement
Even after following the steps on how to replace battery in Myq garage door opener, you might encounter hiccups. Here are solutions for common post-replacement problems.
The Light Is Still Blinking Red
A blinking red light often indicates a Wi-Fi connection issue rather than a battery problem. Since you just replaced the battery, try resetting the Wi-Fi connection. Hold down the setup button on the gateway for 10 seconds until the light blinks rapidly. Then, follow the in-app instructions to reconnect to your network.
The App Says “Device Offline”
If the app still shows the device as offline, check your router. Sometimes, the gateway needs a fresh IP address assignment. Restart your Wi-Fi router and wait five minutes. If the issue persists, ensure your garage has adequate Wi-Fi signal strength. You may need a Wi-Fi extender if the signal is weak.
The Battery Drains Quickly Again
If the new battery dies within a few weeks, there may be a deeper electrical issue. Check for voltage spikes in your garage’s power supply. Additionally, ensure you are using a high-quality lithium battery from a reputable brand. Cheap alternatives often have lower capacity and poorer performance in temperature extremes.
Frequently Asked Questions (FAQ)
1. How often should I replace the MyQ battery?
You should replace the battery every 3 to 5 years, or immediately if you notice connectivity issues. Proactive replacement prevents unexpected downtime.
2. Can I use a different type of battery?
No. You must use a CR2032 3V Lithium battery. Using a different voltage or size can damage the circuit board or simply not fit.
3. Will replacing the battery erase my settings?
No. The main memory is stored on a chip that does not require battery power. Your Wi-Fi credentials and paired devices will remain intact. However, the real-time clock may reset, which will correct itself once the device reconnects to the internet.
4. What if I break the plastic clips?
If the plastic clips break, you can secure the casing with a small piece of electrical tape. While not aesthetically pleasing, it will protect the internals from dust and moisture.
5. Is it safe to leave the garage door opener unplugged during the process?
Yes, and it is required. Never work on the internal components of any electronic device while it is connected to a power source.
6. Does the MyQ hub have a warranty?
Most MyQ products come with a limited one-year warranty. However, opening the device may void this warranty depending on your region and specific terms. Check your purchase agreement if your device is still new.
Conclusion
Learning how to replace battery in Myq garage door opener is a simple yet empowering task for any homeowner. By following this guide, you save money on service calls and ensure your smart home remains secure and functional. Remember, regular maintenance extends the life of your IoT devices and keeps your daily routine smooth.
Did this guide help you fix your garage door opener? Share this article with friends and family on social media who might be struggling with similar tech issues. A connected home is a happy home!



Leave a Reply