Introduction
If your garage door opener’s standard rail length isn’t enough, the Craftsman Garage Door Opener 8-Ft Chain Rail Extension Kit provides the solution. Many homeowners with taller or extended garages face challenges reaching full door coverage. This guide will walk you through installation, adjustments, and maintenance for reliable, quiet, and safe operation.
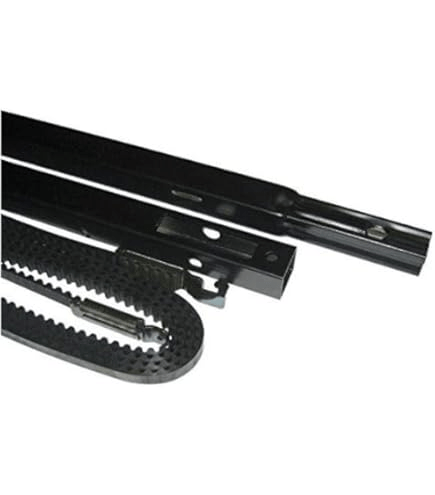
What Is the Craftsman 8-Ft Chain Rail Extension Kit?
People Also Ask: Why should I use a chain rail extension kit?
The Craftsman 8-Ft Chain Rail Extension Kit is designed to:
- Extend the range of compatible Craftsman chain drive openers
- Maintain smooth operation and minimize wear on the chain
- Include all necessary hardware for straightforward installation
- Support doors up to 8 feet high or oversized garages
- Ensure compatibility with Craftsman ½ Hp and 3/4 Hp chain drive openers
Read too: How To Replace Garage Door Roller Like a Pro? Step-by-Step Guide
According to Craftsman’s specifications, proper use prevents excessive chain strain and maintains consistent opener performance over time.
Tools and Materials Needed
Before starting, prepare:
- Ladder and safety gloves
- Screwdrivers, wrenches, and pliers
- Measuring tape and level
- Drill with mounting bits
- Craftsman 8-Ft Chain Rail Extension Kit and opener manual
- Safety goggles
Proper preparation ensures safety and prevents installation errors.
Step-by-Step Installation Guide
People Also Ask: How do I install the Craftsman 8-Ft Chain Rail Extension Kit?
Step 1: Prepare the Garage Door
- Ensure the door moves freely and is closed.
- Disconnect power to the opener to prevent accidents.
Step 2: Assemble the Chain Extension
- Connect rail pieces according to the instructions.
- Secure all bolts and brackets.
- Check alignment to prevent chain derailment.
Step 3: Attach to Motorhead
- Slide the extension into the existing rail.
- Tighten all mounting bolts and confirm horizontal alignment with a level.
Step 4: Connect the Chain and Trolley
- Attach the trolley to the extended rail.
- Reconnect the chain as per manufacturer directions.
- Adjust tension so the chain runs smoothly without sagging.
Step 5: Adjust Travel Limits and Test
- Program open and close positions using the limit screws.
- Test full operation with remotes or wall controls.
- Re-adjust if the door doesn’t fully open or close.
Pro Tip: Lubricate the chain and trolley periodically to reduce noise and improve efficiency.
Common Issues and Troubleshooting
| Problem | Solution |
|---|---|
| Chain skips | Adjust tension and check alignment |
| Door won’t fully open | Recheck travel limits and motorhead positioning |
| Excessive noise | Lubricate chain and rollers; tighten bolts |
| Trolley stuck | Verify installation and clear any obstructions |
Maintenance Tips
- Inspect the chain for wear or fraying monthly.
- Lubricate the chain and rollers regularly.
- Tighten mounting bolts to prevent loosening.
- Test auto-reverse sensors for safety.
- Replace worn components promptly to maintain smooth operation.
Routine maintenance ensures the extension kit and opener work reliably for years.
Safety Considerations
- Disconnect power before installation or adjustments.
- Use proper ladder and personal protective equipment.
- Keep children and pets away during setup and testing.
- Avoid over-tightening components to prevent damage.
FAQ Section
Q1: Is the 8-Ft chain rail extension compatible with all Craftsman chain openers?
A1: It works with most ½ Hp and 3/4 Hp Craftsman chain drive openers; always check the manual for confirmation.
Q2: How long does installation take?
A2: Typically 1–2 hours, depending on experience.
Q3: Can I install it myself?
A3: Most homeowners can, but professional help is recommended for very tall or heavy doors.
Q4: Can I combine multiple extensions?
A4: Only use manufacturer-approved extensions; exceeding recommended length may impact performance.
Q5: How do I adjust chain tension?
A5: Use the tension adjustment screws on the motorhead; chain should run smoothly without sagging.
Q6: Will it reduce noise?
A6: Proper installation and lubrication maintain quiet, efficient operation compared to older chain setups.
Conclusion
The Craftsman Garage Door Opener 8-Ft Chain Rail Extension Kit is essential for taller or extended garages, providing smooth, reliable, and safe operation. Following this guide ensures proper installation, adjustment, and maintenance. Share this article to help others enhance their garage door systems!



Leave a Reply