Adjusting garage door springs may seem like a daunting task, but with the right knowledge and technique, it can be done safely and effectively. Whether you’re dealing with a door that’s too heavy to lift or one that’s not closing properly, understanding how to adjust garage door springs is essential for homeowners. In this comprehensive guide, we’ll walk you through the process step by step, empowering you to tackle this common maintenance task with confidence.
Understanding Garage Door Springs
Before diving into the adjustment process, it’s important to understand the role that garage door springs play in the operation of your door. There are two main types of springs used in garage doors:
- Torsion Springs: Torsion springs are mounted above the door and are responsible for counterbalancing the weight of the door. When the door is closed, torsion springs store energy. When the door is opened, the springs release this energy to help lift the door.
- Extension Springs: Extension springs are typically mounted on either side of the door and stretch and contract to assist in lifting and lowering the door. Extension springs work by stretching as the door closes and contracting as it opens.
Both types of springs are under extreme tension and should be treated with caution when adjusting or replacing.
When to Adjust Garage Door Springs
There are several signs that indicate it may be time to adjust your garage door springs:
- The door is difficult to open or close.
- The door is uneven or crooked when opening or closing.
- The door makes excessive noise when opening or closing.
- The springs appear visibly worn or damaged.
If you notice any of these signs, it’s important to address the issue promptly to prevent further damage to your garage door system.
Read too: Why Your Liftmaster Garage Door Won’t Stay Closed and How to Fix It? Troubleshooting Tips
How to Adjust Garage Door Springs: Step-by-Step Guide
1. Gather Necessary Tools
Before you begin, gather the following tools and materials:
- Safety glasses
- Winding bars
- Adjustable wrench
- Tape measure
- Ladder
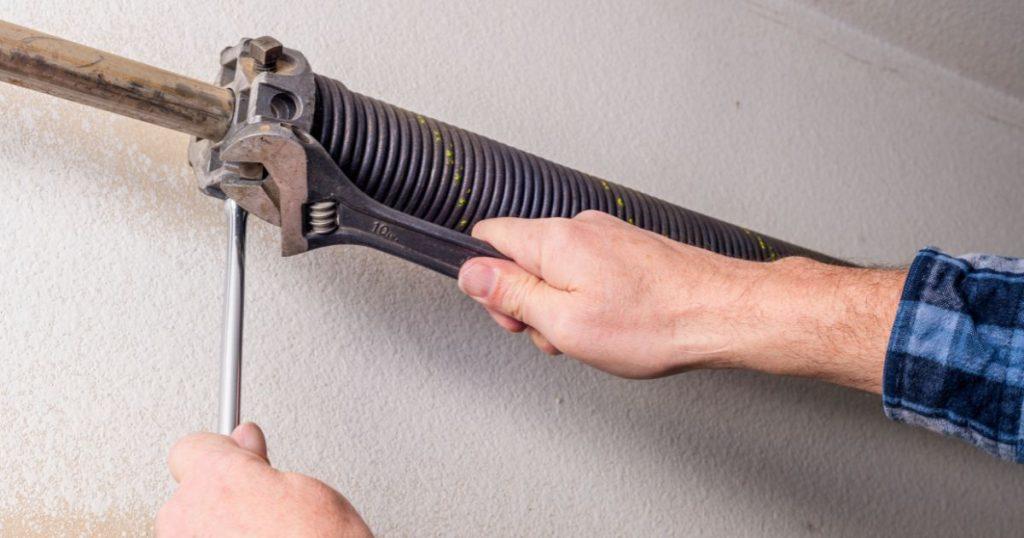
2. Release Tension
- Use winding bars to release tension from the springs by inserting them into the winding cones and turning them slowly in the opposite direction of the spring’s wind.
3. Measure Spring Tension
- Use a tape measure to measure the length of the springs when they are fully extended. This will help you determine the correct amount of tension needed.
4. Adjust Tension
- Use an adjustable wrench to loosen the set screws on the torsion springs. Turn the screws clockwise to increase tension and counterclockwise to decrease tension. Be sure to adjust both springs evenly to prevent imbalance.
5. Test Door Operation
- Once you’ve adjusted the tension on the springs, test the door operation by manually opening and closing it. The door should move smoothly and without resistance.
6. Make Fine Adjustments
- If necessary, make fine adjustments to the tension by repeating the process until the door operates smoothly and evenly.
Safety Precautions
Adjusting garage door springs can be dangerous if not done properly. Be sure to follow these safety precautions:
- Wear safety glasses to protect your eyes from debris.
- Use winding bars to release tension from the springs.
- Never attempt to adjust or replace springs while the door is in the open position.
- If you’re unsure about any aspect of the adjustment process, consult a professional garage door technician.
Conclusion
Learning how to adjust garage door springs is an essential skill for homeowners. By understanding the role of springs in your garage door system and following the proper adjustment process, you can ensure smooth and safe operation of your door for years to come.
In conclusion, mastering the technique of adjusting garage door springs empowers you to maintain your garage door effectively and address common issues with confidence.


Leave a Reply