Struggling to get your vehicle and home systems to communicate seamlessly? Learning how to program car to Liftmaster garage door opener is easier than you think, and we are here to help you get it done quickly and safely. Grab a coffee, and let us walk you through this simple process together.
Preparation: How To Program Car To Liftmaster Garage Door Opener
Before we dive into the buttons and lights, let us gather what you need. Having the right tools ready prevents frustration and ensures a smooth setup.
- Your vehicle: Parked in the driveway with the engine on or ignition in accessory mode.
- Your original remote: The working Liftmaster hand-held clicker you currently use.
- A step ladder: Required if your car lacks a built-in system and you need to reach the motor.
- Owner’s manual: Handy for locating your vehicle’s specific programming buttons.
Did you know that according to industry estimates, over 40 million homes in the US rely on Liftmaster systems? You are definitely not alone in this task!
Crucial Safety Precautions Before You Start
When dealing with garage doors, safety must always come first. A standard residential garage door weighs between 100 and 150 pounds. If the springs are unbalanced, the door could fall unexpectedly.
- Keep people clear: Ensure no children or pets are standing directly under the garage door while you test the programming.
- Watch the sensors: Make sure the photo-eye sensors at the bottom of the door tracks are clean and aligned. If blocked, the door will reverse.
- Disconnect if needed: If you are working directly on the motor unit, consider pulling the red emergency release cord to disconnect the door from the carriage.
Step-by-Step Guide to Syncing Your Built-in Vehicle System
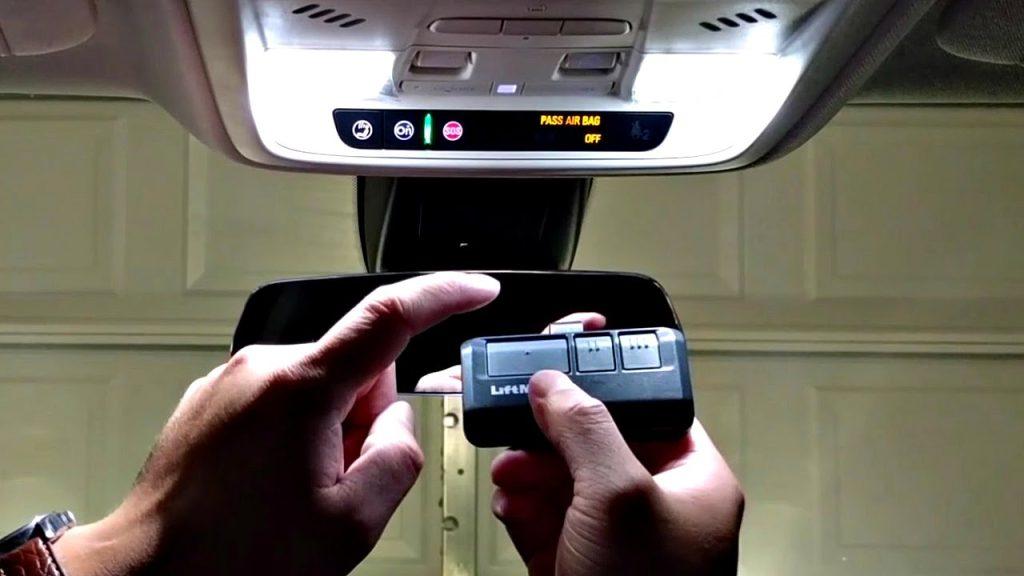
Most modern vehicles come equipped with a built-in system called HomeLink. If your car has three buttons near the rearview mirror, you are in luck. Here is the exact process.
Step 1: Clear the Existing Memory Press and hold the two outer buttons on your car’s built-in system. Keep holding them for about 10 to 20 seconds until the indicator light flashes rapidly. This erases any old codes.
Step 2: Choose Your Button Pick the middle button (or your preferred button) that you want to use for the garage door.
Step 3: Initiate the Learning Mode Hold your original Liftmaster remote 1 to 3 inches away from the car’s button. Press and hold both the car button and the remote button simultaneously.
Step 4: Watch the Indicator Light The car’s indicator light will either flash slowly, then rapidly, or turn solid. Once it flashes rapidly or stays solid, release both buttons. Your vehicle has now learned the radio frequency!
How Do You Activate the Rolling Code Feature on a Liftmaster?
If your Liftmaster was manufactured after 1993, it uses rolling code technology for enhanced security. You must sync this feature to the garage door opener motor itself.
Step 1: Go to your actual Liftmaster motor unit hanging from the garage ceiling. Step 2: Locate the yellow, purple, orange, or red “Learn” or “Smart” button on the motor head. Step 3: Press and release this Learn button. The indicator light next to it will illuminate or blink for exactly 30 seconds. Step 4: Within those 30 seconds, go back to your car and press the programmed built-in button firmly for about 2 seconds.
Your garage door should now operate flawlessly!
What If My Car Does Not Have a Built-in System?
Not every vehicle has a factory-installed remote. If your car lacks built-in buttons, you can easily use a universal visor remote.
- Purchase a universal garage door remote compatible with Liftmaster.
- Open the remote’s battery compartment to access the internal “Learn” button.
- Press the “Learn” button on your Liftmaster motor unit on the ceiling.
- Within 30 seconds, press and hold the button on your new universal remote until the motor light blinks.
This method is incredibly reliable and costs less than $30 at your local hardware store.
Built-in Car Remotes vs. Traditional Clickers: Which is Better?
Let us look at the advantages and disadvantages of using your newly programmed car system versus keeping a traditional clicker in your visor.
| Feature | Built-in Car System (HomeLink) | Traditional Handheld Clicker |
|---|---|---|
| Convenience | Excellent. No extra item to carry or lose. | Fair. Requires keeping track of a physical device. |
| Battery Life | Superior. Powered directly by the vehicle. | Average. Requires CR2032 battery replacements every 2 years. |
| Aesthetics | Sleek. Blends seamlessly into your car’s interior. | Clunky. Can look messy hanging from a sun visor. |
| Compatibility | Limited. Only works if your car has the system. | Universal. Works with almost any vehicle. |
Why Won’t My Car Remote Sync With My Liftmaster?
It can be incredibly frustrating when the steps above do not work on the first try. Here are the most common culprits and how to fix them.
- Distance Issues: Ensure the handheld remote is exactly 1 to 3 inches from the car’s button during the initial programming.
- Dead Batteries: Check the battery in your original Liftmaster remote. A weak signal will not transmit to the car.
- Wrong Frequency: Some older European car models operate on different radio frequencies. Check your car manual for compatibility.
- Missed the 30-Second Window: When syncing the rolling code at the motor unit, you only have a half-minute to press the car button. Have a friend help you time it!
Frequently Asked Questions (FAQ)
Q1: Can I program my car to my Liftmaster without a ladder? Answer: Yes, if your car has a built-in system like HomeLink and you already have a working handheld remote. You only need a ladder if you are programming a universal visor clip-on remote directly to the motor unit.
Q2: How many car remotes can I program to one Liftmaster? Answer: Most modern Liftmaster garage door openers can store up to 40 different remote controls. This includes handheld clickers, keypads, and built-in car systems.
Q3: Do I need an internet connection to program my car to my Liftmaster? Answer: No. The programming process relies entirely on local radio frequency (RF) signals between your car, the remote, and the motor unit. Wi-Fi is only required if you are using a smart smartphone app to control the door.
Q4: What if my car does not have a built-in garage door button? Answer: You can purchase a universal, visor-mounted HomeLink replacement. These cost around $40 to $60 and plug into your car’s power outlet or hardwire into the overhead console.
Q5: Will programming a new car erase my old car’s programming? Answer: No. Because Liftmaster supports multiple remotes, programming your new vehicle will not delete the access of your old car. Both vehicles will work perfectly side by side.
Conclusion
Mastering how to program car to Liftmaster garage door opener saves you time, eliminates the hassle of carrying extra remotes, and modernizes your daily routine. By following these straightforward steps, you can seamlessly integrate your vehicle with your home security in just a few minutes.
Did you find this guide helpful? Please share this article on your favorite social media platforms like Facebook, X (Twitter), or Pinterest to help your friends and family conquer their garage door programming woes today!



Leave a Reply