Introduction
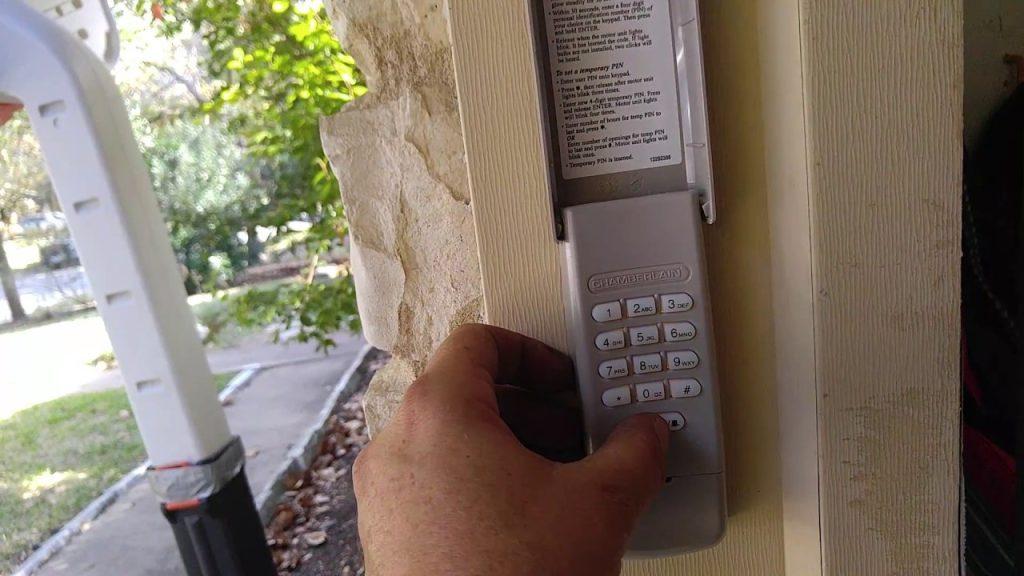
There are few things more frustrating than standing in your driveway, punching in your code, and watching your Chamberlain keypad blink stubbornly instead of opening the door. Whether you have forgotten your PIN, moved into a new home, or suspect a glitch, knowing how to reset my Chamberlain garage door opener keypad is an essential homeowner skill that restores both convenience and security. This comprehensive guide walks you through every reset method safely and efficiently, so you can get back inside without calling a technician.
Why Would You Need to Reset Your Chamberlain Keypad?
Before diving into the buttons, it helps to understand why a reset is necessary. According to Chamberlain Group’s own support data, over 60% of keypad service calls stem from user error or outdated codes rather than hardware failure. Common triggers include:
- Moving into a new home: Previous owners may still have active codes.
- Forgotten PIN: Stress or infrequent use leads to memory lapses.
- Security breach: Lost keypads or suspected unauthorized access.
- System glitches: Power outages or battery changes can corrupt memory.
- Adding new users: Clearing old codes before programming family members.
Understanding the root cause ensures you choose the correct reset method below.
Safety First: Pre-Reset Checklist
Garage doors are heavy mechanical systems. Before attempting any reset, adhere to these safety protocols endorsed by the International Door Association:
- Clear the Area: Ensure no people, pets, or objects are under the door.
- Check Sensors: Verify photo-eye sensors are aligned and unobstructed.
- Battery Status: Replace keypad batteries (usually 9V or CR2032) before resetting to rule out power issues.
- Manual Release: Know where the emergency release cord is located in case the door malfunctions during testing.
⚠️ Critical Warning: Never attempt to reset the keypad while the door is in motion. Always wait for the door to come to a complete stop.
Method 1: Factory Reset Using the Learn Button (Most Common)
This is the primary answer to “how to reset my Chamberlain garage door opener keypad” for 90% of users. It clears all codes and re-establishes communication with the motor unit.
Step-by-Step Instructions
- Locate the Learn Button: Find the colored button on the back or side of your garage door opener motor unit. Colors vary by era:
- Yellow: Security+ 2.0 (2011–Present)
- Purple: Security+ (1997–2011)
- Red/Orange: Older DIP switch models
- Green: Very early models
- Press and Hold: Press and hold the Learn button for 6 seconds until the LED light turns off completely. This erases all remote and keypad codes.
- Release and Wait: Release the button. The LED should remain off, indicating memory is cleared.
- Reprogram Immediately: Within 30 seconds, go to your keypad and enter your desired new 4-digit PIN followed by the ENTER button.
- Confirm Sync: Watch the motor unit LED flash or hear two clicks. Test the keypad immediately.
Troubleshooting the Learn Button Reset
| Symptom | Likely Cause | Solution |
|---|---|---|
| LED won’t turn off | Button not held long enough | Hold for full 6 seconds; use a pen if recessed |
| No response after reprogram | Out of range or dead battery | Stand within 5 feet; install fresh battery |
| Light flashes but door doesn’t move | Sensor obstruction | Realign photo-eyes; clean lenses |
| Code accepted then rejected | Interference from old remote | Repeat factory reset; ensure all remotes are re-synced |
Method 2: Resetting Without the Learn Button (Older Models)
Some pre-2011 Chamberlain units lack a dedicated Learn button or have a damaged one. For these, use the DIP Switch Method:
- Open the motor unit cover to reveal DIP switches (tiny sliding toggles).
- Match the switch pattern exactly to your keypad’s internal switches (accessed by removing the keypad battery compartment cover).
- Change at least two switch positions to create a new code combination.
- Close both covers and test.
Note: This method does not clear memory—it simply changes the frequency match. Upgrade to a Security+ keypad if possible for better encryption.
Method 3: Changing Only the PIN (No Full Reset Needed)
If your keypad works but you want a new code, skip the factory reset:
- Enter your current 4-digit PIN.
- Press and hold the # button until the keypad blinks twice.
- Enter your new 4-digit PIN.
- Press ENTER.
- Test the new code three times to confirm.
This preserves existing remote programming and takes under 60 seconds.
Expert Tips for Long-Term Keypad Reliability
Professional installers recommend these practices to minimize future resets:
- Use Lithium Batteries: Alkaline batteries leak in extreme temperatures. Lithium 9V batteries last 2–3 years longer in outdoor keypads.
- Avoid Sequential Codes: Never use 1234, 0000, or birth years. Choose random combinations.
- Weatherproof the Unit: Apply silicone sealant around the keypad mounting plate to prevent moisture corrosion.
- Annual Code Rotation: Change your PIN every 12 months as a security best practice.
- Label Your Model Number: Write your opener’s model number (found on the motor housing) inside the battery compartment for future reference.
Frequently Asked Questions (FAQ)
Q1: How do I know which Chamberlain keypad model I have?
Check the label inside the battery compartment or on the back of the keypad. Model numbers typically start with “K,” “940,” or “877.” Cross-reference this with Chamberlain’s official compatibility chart online. If the label is worn, the Learn button color on your motor unit determines compatibility.
Q2: Will resetting the keypad erase my car’s built-in garage opener?
Yes. A factory reset via the Learn button clears all paired devices, including HomeLink visor clips and smart home integrations. You will need to reprogram each device individually after the reset. Use Method 3 (PIN change only) if you want to preserve other connections.
Q3: My keypad accepts the code but the door reverses immediately. What’s wrong?
This is almost always a safety sensor issue, not a keypad problem. Check that both photo-eye LEDs are solid (not blinking). Clean the lenses with a microfiber cloth and ensure nothing blocks the beam. If sensors are functional, check the door’s travel limits—adjust the down-limit screw on the motor unit slightly.
Q4: Can I reset a Chamberlain keypad without the original code?
Absolutely. Method 1 (Learn button factory reset) requires no previous code. The physical Learn button on the motor unit overrides all existing credentials. This is intentional for homeowners who’ve lost codes or purchased homes with unknown access history.
Q5: How often should I replace keypad batteries?
Replace batteries annually as preventive maintenance, even if the keypad seems functional. Low voltage causes intermittent failures that mimic programming errors. In climates below freezing, check every 6 months. Most keypads show a low-battery indicator (slow blinking LED) weeks before failure—don’t ignore it.
Q6: Is there a way to temporarily disable the keypad without resetting?
Yes. Many Chamberlain keypads feature a lock mode. Press and hold the LOCK button (or # + ENTER on some models) for 3 seconds until the LED stays solid. This disables all entry until you unlock it with your PIN. Ideal for vacations or when contractors are working nearby.
Conclusion
Mastering how to reset my Chamberlain garage door opener keypad empowers you to maintain home security independently and avoid unnecessary service fees. Whether you’re performing a full factory reset, changing a PIN, or troubleshooting older DIP-switch models, the steps above provide reliable, expert-backed solutions tailored to real-world scenarios. Remember: safety first, fresh batteries matter, and annual code rotation keeps your property secure.
Found this guide helpful? Share it on Facebook, X (Twitter), or Nextdoor to help neighbors regain garage access quickly. Tag someone who’s been locked out lately—you might save their evening! 🔧🏡



Leave a Reply