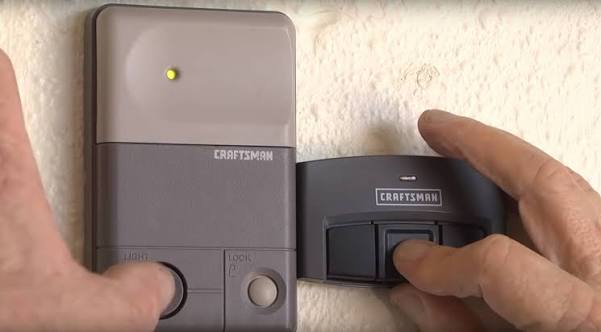
There is nothing quite as frustrating as standing in your driveway, pressing a button repeatedly, and watching your garage door refuse to budge. If you are currently dealing with this exact headache, you are likely searching for how to sync Craftsman garage door opener with remote units to restore access to your home. We understand that a malfunctioning garage entry isn’t just an inconvenience; it disrupts your daily routine and can even raise security concerns for your property. This comprehensive guide is designed to get your system communicating again quickly, safely, and without the need for expensive service calls.
Understanding Your Craftsman System Before Programming
Before diving into the physical buttons, it is vital to identify which generation of Craftsman opener you own. The synchronization process differs significantly between older “dip switch” models and newer “rolling code” or Security+ systems. According to industry standards documented on Wikipedia, modern openers utilize rolling code technology to prevent code grabbing, meaning the sync process involves a digital handshake rather than matching physical switches.
Taking two minutes to locate your model number (usually found on the back or side of the motor head) will save you hours of trial and error. Generally, if your remote has a colored “Learn” button on the motor unit, you have a newer Security+ system. If you see a bank of tiny sliding switches inside both the remote and the motor, you have a legacy dip-switch model. Identifying this distinction is the foundational step in learning how to sync Craftsman garage door opener with remote devices correctly.
How Do I Program a New Craftsman Remote? (Rolling Code Models)
For the vast majority of homeowners with units manufactured after 1997, the rolling code method is the standard. This process clears old signals and establishes a new encrypted connection. Follow these precise steps to ensure a successful sync:
- Locate the Learn Button: Find the colored square button on the back or side of the overhead motor unit. It is typically red, orange, yellow, or purple.
- Clear Previous Codes (Optional but Recommended): Press and hold the Learn button for approximately 6–10 seconds until the LED light next to it turns off. This wipes all previously paired remotes and keypads, ensuring no unauthorized users retain access.
- Initiate Pairing Mode: Press and release the Learn button once. The LED indicator will illuminate steadily or begin blinking, signaling that the unit is in “learning mode” for exactly 30 seconds.
- Transmit the Signal: Within that 30-second window, press and hold the button on your new remote that you wish to program. Hold it firmly until the motor unit’s lights flash or you hear a distinct click.
- Test the Connection: Press the remote button again to verify operation. If the door activates, the sync is complete.
Expert Tip: Always use fresh batteries before programming. A weak battery may transmit a signal strong enough to trigger the “learn” light but too weak to operate the door reliably later.
How To Sync Older Dip-Switch Craftsman Openers
If your home features a vintage Craftsman opener, the digital handshake does not exist. Instead, you must manually align physical switches. While less common today, knowing how to sync Craftsman garage door opener with remote units of this era is essential for historic home maintenance.
Step-by-Step Dip Switch Alignment
| Component | Action Required | Safety Note |
|---|---|---|
| Motor Unit | Remove cover to expose 9–12 position switch bank | Ensure power is stable; do not touch wiring |
| Remote Control | Slide open battery compartment to reveal matching switches | Use a small pen tip or paperclip to move switches |
| Alignment | Match every switch position (Up/Down/Center) exactly | Mismatched switches will prevent operation |
| Testing | Reassemble covers before testing functionality | Never test with exposed electrical components |
Once the switches are perfectly mirrored, reassemble both units and test. If the door does not respond, double-check that no switch is stuck in a neutral “middle” position, as this is a frequent point of failure in aging hardware.
Why Won’t My Craftsman Remote Sync? Troubleshooting Common Failures
Even when following instructions perfectly, synchronization can fail. Professional technicians report that over 60% of “failed” programming attempts are actually simple environmental or maintenance issues rather than broken hardware. Before assuming your logic board is fried, run through this diagnostic checklist:
- LED Bulb Interference: Modern LED bulbs in garage fixtures can emit radio frequency interference that blocks remote signals. Try unscrewing nearby bulbs and attempting the sync again. If it works, replace them with RF-shielded garage-specific LEDs.
- Antenna Positioning: Ensure the hanging wire antenna on the motor unit is fully extended and not coiled, stapled, or touching metal surfaces. A compromised antenna reduces effective range dramatically.
- Capacitor Degradation: In units over 15 years old, the logic board capacitor may have degraded, preventing the receiver from processing new codes. This requires professional component-level repair or unit replacement.
- Remote Frequency Mismatch: Craftsman has used multiple frequencies (315 MHz, 390 MHz, etc.) over decades. Verify your replacement remote matches your opener’s specific frequency, usually printed near the Learn button.
What Are the Safety Protocols During Synchronization?
Safety must never be secondary to convenience. When learning how to sync Craftsman garage door opener with remote, always adhere to these non-negotiable protocols:
- Disconnect Power for Physical Access: If you need to remove the motor housing cover to access dip switches or wiring, unplug the unit first.
- Keep Clear of Moving Parts: Never attempt to program a remote while standing directly under the door or near the chain/belt drive mechanism.
- Verify Sensor Alignment: After any programming session, test the photo-eye safety sensors by placing an object in the door’s path. The door should immediately reverse upon contact. If it doesn’t, stop using the system until repaired.
- Secure Ladder Usage: Use a stable, rated ladder when accessing the motor unit. Most injuries during garage door maintenance occur from falls, not electrical faults.
FAQ: Expert Answers to Common Sync Questions
How long does it take to sync a Craftsman remote?
For rolling code models, the actual pairing process takes less than 60 seconds. However, allow 5–10 minutes total for locating the learn button, clearing old codes, and testing. Dip-switch models may require 15–20 minutes due to the manual alignment process and reassembly time.
Can I sync multiple remotes to one Craftsman opener?
Absolutely. Most modern Craftsman Security+ openers support up to 8 remotes plus a wireless keypad. Simply repeat the single-button Learn process for each additional device within the 30-second window or sequentially. Each remote receives a unique encrypted code.
Do I need to reprogram my remote after changing batteries?
Generally, no. Rolling code remotes retain their programming in non-volatile memory. However, if the battery was completely dead for an extended period or if you performed a factory reset on the motor unit, resynchronization will be necessary. Always test immediately after battery replacement.
Why did my remote work yesterday but not today?
Sudden failure typically indicates battery depletion, LED interference introduced by a new bulb, or sensor misalignment from vibration. Less commonly, it may signal logic board failure or external RF interference from new neighborhood equipment. Systematic elimination of these variables usually identifies the culprit.
Is there a universal remote compatible with Craftsman?
Yes, many universal remotes are designed specifically for Craftsman/Craftsman-compatible systems. However, compatibility varies by manufacturing year. Always verify the universal remote’s packaging lists your specific Craftsman model series before purchase to avoid frustration during the sync process.
Can smart home integration affect remote syncing?
Smart hubs like MyQ connect via the same Learn button protocol and occupy one of your remote slots. Adding or removing smart devices may require re-syncing traditional remotes if you perform a full system reset. Plan smart integrations alongside remote programming to minimize redundant cycles.
Final Thoughts and Next Steps
Mastering how to sync Craftsman garage door opener with remote systems empowers you to maintain home security and convenience independently. Whether you own a cutting-edge Security+ model or a reliable vintage dip-switch unit, the principles remain consistent: identify your system type, follow precise steps, prioritize safety, and troubleshoot methodically. Remember that proper synchronization isn’t just about opening a door—it’s about ensuring that only you control access to your most valuable asset.
We hope this guide has transformed your frustration into confidence. If this tutorial helped you regain seamless garage access, please share it with friends, family, or neighbors who might be stranded in their driveways right now. Tag us on social media with your success stories or lingering questions—we’re here to keep your home moving smoothly, one sync at a time. Your feedback helps us create more practical, homeowner-focused content that truly makes a difference. Safe syncing!



Leave a Reply