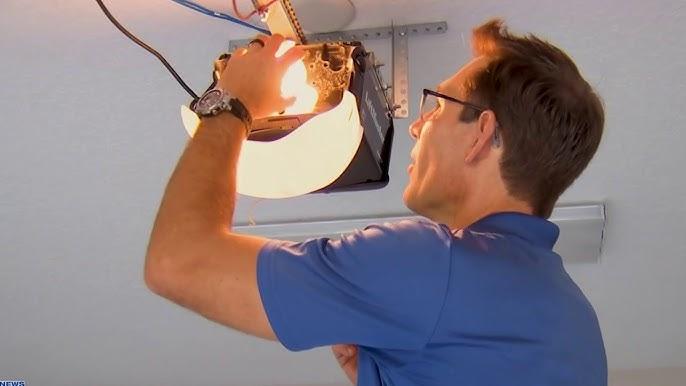
Introduction
Is your Genie garage door opener acting up, or do you need to access the internal components for maintenance? You’re not alone—thousands of homeowners face this challenge every year. Knowing how to take cover off Genie garage door opener is essential for troubleshooting, battery replacement, or routine inspections. In this comprehensive guide, we’ll walk you through the process safely and efficiently, regardless of your model type.
Garage door openers are complex mechanical systems that require periodic attention. According to the International Door Association, approximately 70% of garage door issues can be resolved with basic maintenance and proper access to internal components. Let’s dive into everything you need to know about removing your Genie opener cover without causing damage.
What Tools Do You Need to Remove a Genie Garage Door Opener Cover?
Before starting any work on your garage door opener, gathering the right tools ensures a smooth and safe process. Most Genie models require minimal equipment, but having everything ready prevents frustration mid-task.
Essential Tools Checklist:
- Phillips-head screwdriver (most common requirement)
- Flathead screwdriver (for prying clips if necessary)
- Stepladder (stable and appropriate height)
- Flashlight (for better visibility inside the unit)
- Work gloves (to protect your hands)
- Small container (to keep screws organized)
Pro Tip: Some newer Genie models use plastic clips instead of screws. In these cases, you may only need a flathead screwdriver or even just your fingers to release the clips gently.
Safety First: Critical Precautions
Working with garage door openers involves electrical components and heavy mechanical parts. Always follow these safety measures:
- Disconnect power by unplugging the unit or turning off the circuit breaker
- Engage the manual release to disconnect the door from the opener
- Wait 5-10 minutes after disconnecting power to allow capacitors to discharge
- Never work alone if possible—have someone nearby in case of emergencies
The Consumer Product Safety Commission reports that improper garage door maintenance contributes to thousands of injuries annually. Taking proper precautions protects both you and your property.
Step-by-Step Guide: How To Take Cover Off Genie Garage Door Opener
Different Genie models have varying cover designs, but the general process remains similar. Follow these detailed steps for a successful removal.
Step 1: Identify Your Genie Model
Genie produces several opener series, including:
| Model Series | Cover Type | Removal Method |
|---|---|---|
| Genie SilentMax | Screw-mounted | Phillips screwdriver |
| Genie PowerLift | Clip-on design | Gentle prying |
| Genie ChainDrive | Hybrid (screws + clips) | Both tools needed |
| Genie Intellicode | Screw-mounted | Phillips screwdriver |
Check your owner’s manual or look for the model number printed on the motor unit. This information helps you determine the exact removal method.
Step 2: Disconnect Power Source
Locate the power cord and unplug it from the outlet. If your unit is hardwired, turn off the corresponding circuit breaker. Verify the power is off by attempting to operate the opener using the wall button.
Step 3: Release Tension from the Door
Pull the emergency release cord (usually red) to disconnect the trolley from the door. This prevents accidental movement while you work. Manually close the door completely before proceeding.
Step 4: Locate and Remove Fasteners
For Screw-Mounted Covers:
- Position your stepladder securely beneath the opener
- Identify all visible screws around the cover perimeter
- Using your Phillips-head screwdriver, remove each screw carefully
- Place screws in your container to prevent loss
- Note: Most Genie models have 4-6 screws holding the cover in place
For Clip-On Covers:
- Look for small tabs or notches along the cover edges
- Insert your flathead screwdriver gently into the gap
- Apply slight pressure to release each clip
- Work your way around the entire cover systematically
- Avoid using excessive force to prevent breaking plastic clips
Step 5: Remove the Cover Carefully
Once all fasteners are released:
- Hold the cover with both hands
- Gently pull it straight down or away from the motor housing
- Watch for any connected wires or sensors
- Set the cover aside in a safe location
If the cover resists removal, double-check that all screws or clips have been properly released. For more technical specifications about Genie products, you can reference Wikipedia’s article on garage door openers.
Step 6: Inspect Internal Components
With the cover removed, you now have access to:
- Motor assembly
- Circuit board
- Limit switches
- Wiring connections
- Light bulb socket
Take this opportunity to check for loose wires, burnt components, or accumulated dust. Clean gently with compressed air if needed.
Common Problems When Removing Genie Opener Covers
Even with careful preparation, you might encounter obstacles. Here’s how to address them:
Stuck or Stripped Screws
If screws won’t budge:
- Apply penetrating oil and wait 10-15 minutes
- Use a rubber band between screwdriver and screw for better grip
- Try a slightly larger screwdriver size
Broken Plastic Clips
If clips snap during removal:
- Don’t panic—this is common with older units
- Purchase replacement clips from Genie or hardware stores
- Consider upgrading to screw-mounted covers for future access
Cover Won’t Come Off Completely
Check for:
- Hidden screws behind labels or stickers
- Wire harnesses still connected
- Safety sensor wires attached to the cover
How To Reinstall the Genie Garage Door Opener Cover
Reinstallation is straightforward if you follow reverse order:
- Align the cover with the motor housing
- Reconnect any wires that were detached
- Replace screws or snap clips back into place
- Tighten screws snugly but don’t overtighten
- Restore power and test operation
- Reconnect the trolley to the door using the release handle
Test your opener several times to ensure everything functions correctly. Listen for unusual noises that might indicate misalignment.
When Should You Call a Professional?
While removing the cover is generally safe for DIY enthusiasts, certain situations warrant professional assistance:
- Electrical burning smell detected inside the unit
- Visible damage to circuit boards or motors
- Complex wiring issues beyond simple disconnection
- Warranty concerns—some warranties void if opened by non-certified technicians
- Uncertainty about procedures or lack of proper tools
According to industry experts, professional garage door technicians can diagnose and repair most issues within 30-60 minutes, potentially saving you time and preventing costly mistakes.
FAQ Section
Q1: Can I remove the Genie garage door opener cover without tools?
A: Some newer Genie models feature tool-free clip-on covers that can be removed by hand. However, most models require at least a Phillips-head screwdriver. Check your specific model’s documentation to determine if tools are necessary. Attempting to force a screw-mounted cover without tools will likely cause damage.
Q2: Will removing the cover void my Genie warranty?
A: This depends on your warranty terms and what you do after removing the cover. Simply accessing internal components for inspection or battery replacement typically doesn’t void warranties. However, making unauthorized modifications or causing damage during removal may affect coverage. Review your warranty documentation or contact Genie customer service for clarification.
Q3: How often should I remove the cover for maintenance?
A: For most homeowners, removing the cover once or twice yearly for inspection and cleaning is sufficient. Increase frequency if you notice unusual noises, intermittent operation, or live in dusty environments. Regular visual inspections without full removal can help identify issues early.
Q4: What should I do if I break a clip while removing the cover?
A: Broken clips are common and easily replaceable. Contact Genie customer support or visit an authorized dealer to purchase replacement clips. Alternatively, some homeowners successfully use small zip ties or adhesive strips as temporary solutions. For long-term reliability, replacing with official parts is recommended.
Q5: Is it dangerous to remove the Genie opener cover myself?
A: With proper precautions, removing the cover is relatively safe. The primary risks involve electrical shock and falling from ladders. Always disconnect power, use stable ladders, and avoid touching internal components unnecessarily. If you feel uncomfortable at any point, stop and consult a professional.
Q6: Can I clean internal components after removing the cover?
A: Yes, gentle cleaning is beneficial. Use compressed air to remove dust from the motor and circuit board. Avoid liquid cleaners near electrical components. Wipe exterior surfaces with a damp cloth. Never spray anything directly into the unit, and ensure everything is completely dry before reinstalling the cover and restoring power.
Conclusion
Learning how to take cover off Genie garage door opener empowers you to perform basic maintenance, troubleshoot issues, and extend your opener’s lifespan. By following the step-by-step instructions outlined in this guide, you can safely access internal components without risking damage to your unit or injury to yourself.
Remember to always prioritize safety by disconnecting power, using proper tools, and working methodically. Regular maintenance through cover removal can prevent minor issues from becoming major repairs, saving you money and inconvenience in the long run.
Did you find this guide helpful? Share it with friends and family who own Genie garage door openers! Leave a comment below with your experience or questions—we love hearing from our readers. Stay safe, stay informed, and keep your garage door running smoothly!



Leave a Reply