Introduction
If your old unit is acting up or making strange noises, you might be wondering, is it hard to replace a garage door opener? The good news is that with the right tools, a helper, and a little patience, most homeowners can successfully tackle this project themselves. This comprehensive guide will walk you through everything you need to know to make the process smooth, safe, and highly rewarding.
Is It Hard To Replace A Garage Door Opener? The Short Answer
The straightforward answer is: it is moderately easy, but it requires careful attention to safety and detail. On a difficulty scale of 1 to 10, replacing a garage door opener ranks around a 4 or 5 for someone with basic DIY experience.
The most challenging part is not the wiring, but rather safely supporting the heavy motor unit during removal and installation. According to the International Door Association (IDA), a standard garage door is the largest moving object in a typical home, weighing between 130 and 400 pounds. While the opener itself only weighs 20 to 30 pounds, managing it alone on a ladder can be precarious. With a proper step-by-step approach and a friend to assist, you can complete the job in about 3 to 5 hours.
What Tools and Materials Do You Need?
Being prepared is half the battle. Gathering the right tools before you start prevents frustrating mid-project trips to the hardware store. Here is your essential checklist:
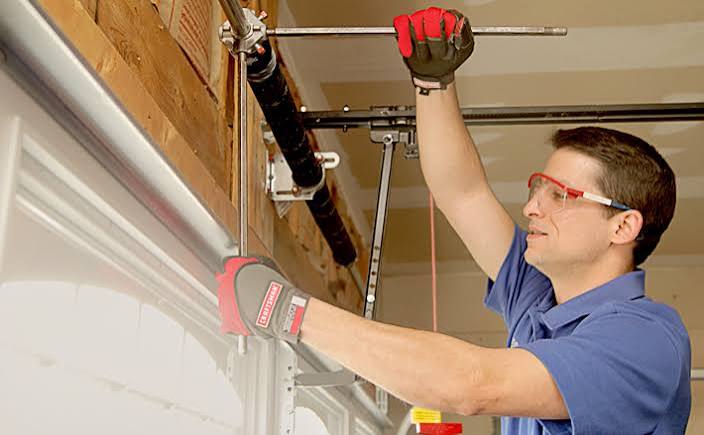
- Safety Gear: Safety glasses and heavy-duty work gloves.
- Ladder: A sturdy 6-foot A-frame stepladder.
- Wrenches & Sockets: 1/2-inch and 9/16-inch wrenches, plus a socket set.
- Screwdrivers: Both flathead and Phillips head varieties.
- Support Materials: Two 2×4-inch wooden boards (to prop up the garage door safely).
- Fasteners: 5/16-inch lag screws and washers (usually included with the new opener, but good to verify).
- Wiring: 2-conductor bell wire (for the wall console) and electrical tape.
- Measuring Tools: A tape measure and a level.
Step-by-Step Guide to Replacing Your Garage Door Opener
Follow these concrete, actionable steps to ensure a professional-grade installation.
Step 1: Prioritize Safety and Disconnect Power
Before touching any wires, unplug the existing garage door opener from the electrical outlet. If it is hardwired, turn off the corresponding circuit breaker at your main electrical panel. Close the garage door completely and lock it in place.
Step 2: Relieve Tension and Support the Door
Pull the emergency release cord (usually a red rope) to disconnect the door from the opener carriage. This allows you to move the door manually. Crucial detail: Place your two 2×4-inch wooden boards vertically under the edges of the closed garage door to prevent it from accidentally falling while you work.
Step 3: Remove the Old Opener
With the help of a friend, support the weight of the old motor unit. Unscrew the ceiling bracket that holds the rail. Next, unbolt the motor unit from its mounting bracket. Carefully lower the unit and disconnect the wiring from the wall console and safety sensors.
Step 4: Assemble the New Unit
Lay the new opener’s rail and motor unit on the garage floor. Follow the manufacturer’s manual to attach the rail to the motor. Typically, this involves sliding the rail sections together and securing them with provided bolts. Ensure all connections are snug, but avoid over-tightening, which can strip the threads.
Step 5: Install the New Rail and Motor
With your helper, lift the assembled unit into place. Attach the front bracket to the header above the garage door. Then, secure the rear mounting bracket to a solid ceiling joist using 5/16-inch lag screws. Ensure the rail is perfectly level; an angled rail will cause premature wear on the trolley.
Step 6: Wire and Program the System
Connect the wall console using the 2-conductor bell wire, ensuring the strands do not touch each other. Mount the safety sensors on each side of the door track. Pro tip: Mount the sensors exactly 6 inches above the floor and ensure their lenses are perfectly aligned. Finally, plug the unit in, restore power at the breaker, and follow the manual’s instructions to set the travel limits and force settings.
DIY vs. Professional Installation: Which Is Right for You?
To help you decide, here is a clear comparison of handling the replacement yourself versus hiring a professional.
| Feature | DIY Replacement | Professional Installation |
|---|---|---|
| Average Cost | $250 – $450 (Unit only) | $450 – $750+ (Unit + Labor) |
| Time Investment | 3 to 5 hours | 1.5 to 2.5 hours |
| Skill Level Required | Basic to Intermediate | None (Handled by expert) |
| Warranty | Manufacturer parts only | Parts + Labor warranty |
| Safety Risk | Moderate (Requires a helper) | Very Low |
Data Point: Homeowners can save between $150 to $300 on labor costs by opting for a DIY replacement, making it an attractive weekend project for those comfortable with basic tools.
Expert Tips and Industry Standards
Modern garage door openers are engineered with user-friendly features, but respecting industry standards is non-negotiable. For a deeper understanding of the mechanical evolution and safety mandates of these devices, you can refer to the comprehensive overview on Garage door openers.
One critical expert tip: Always test the auto-reverse safety feature after installation. Place a 2×4 piece of wood flat on the floor under the center of the door. Close the door using the wall button. Upon contacting the wood, the door must immediately stop and reverse direction. If it does not, adjust the force settings immediately. This feature is legally mandated in the US to prevent entrapment hazards.
Frequently Asked Questions (FAQ)
1. Can I replace a garage door opener by myself?
Yes, you can replace it yourself if you have basic DIY skills, the right tools, and a helper to assist with lifting the motor unit. Following the manufacturer’s instructions carefully is key to a safe installation.
2. How long does it take to replace a garage door opener?
For a first-time DIYer, the process typically takes between 3 to 5 hours. This includes removing the old unit, assembling the new one, mounting it, and programming the safety features. Professionals can usually complete the job in under 2 hours.
3. Do I need to replace the rails when replacing the opener?
Not always, but it is highly recommended. Many new openers come with a complete rail system designed to work optimally with the new motor. Mixing old rails with a new motor can void the warranty and cause compatibility issues with the trolley.
4. What is the average lifespan of a garage door opener?
A well-maintained garage door opener typically lasts between 10 to 15 years. Chain-drive models tend to be more durable but noisier, while belt-drive models are quieter but may require slight adjustments over time.
5. Is it dangerous to replace a garage door opener?
The primary danger lies in handling the heavy motor unit on a ladder and working with electrical wiring. By disconnecting the power at the circuit breaker, using a sturdy ladder, and enlisting a helper, you can mitigate almost all risks associated with the replacement.
Conclusion
So, is it hard to replace a garage door opener? Not when you are properly prepared. By understanding the required tools, following a methodical step-by-step process, and prioritizing safety features like the auto-reverse mechanism, you can confidently upgrade your home’s convenience and security. Not only will you enjoy the satisfaction of a job well done, but you will also save a significant amount of money on professional labor fees.
Did you find this guide helpful? Share this article on Facebook, X (Twitter), or Pinterest to help your friends and family tackle their own DIY garage projects with confidence! If you have any questions or tips of your own, leave a comment below—we love hearing from our community.



Leave a Reply