Introduction
We have all been there: you press the remote, and nothing happens. Or worse, the door starts to close but immediately reverses. It is a frustrating scenario that disrupts your daily routine and raises immediate safety concerns. If you are searching for answers, you are likely asking yourself, “Is there a reset button on garage door openers?”
The short answer is: not exactly in the way you might think. Unlike a computer or a router, most residential garage door openers do not have a single, labeled “Reset” button that wipes all settings instantly. However, they do have specific procedures to reset logic boards, clear memory, and recalibrate travel limits. In this guide, we will walk you through exactly how to perform these resets safely, ensuring your garage door operates smoothly and securely.
Understanding the “Reset” Concept
Before diving into buttons and wires, it is crucial to understand what “resetting” actually means for a garage door opener. Generally, there are two types of resets homeowners need to perform:
- Logic Board Reset: This clears minor electronic glitches, similar to rebooting a smartphone.
- Factory Reset/Reprogramming: This erases all paired remotes and keypads, requiring you to re-sync every device.
Most modern openers from brands like LiftMaster, Chamberlain, Genie, and Craftsman rely on a combination of physical buttons and power cycling rather than a dedicated reset switch.
The Role of the “Learn” Button
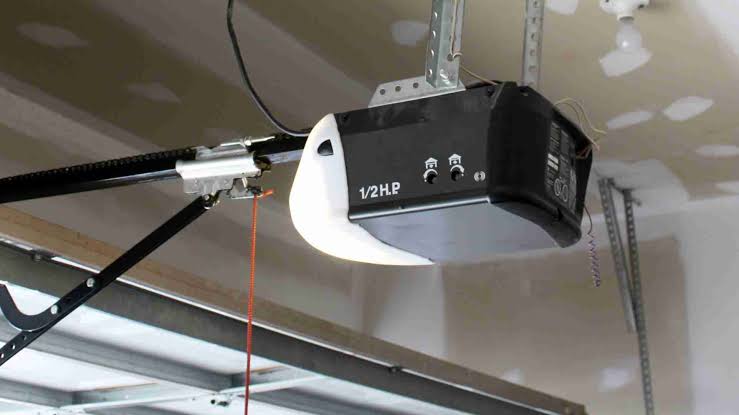
If you are looking for a button to start the reset process, the “Learn” button is your primary target. Located on the motor head unit (usually behind the light lens or on the back panel), this button is colored yellow, purple, red, or green depending on the model year.
- Yellow/Learn Button: Typically found on newer Security+ 2.0 models.
- Purple/Red/Green: Found on older models or specific brands like Genie.
Pressing and holding this button for 6–10 seconds usually clears all previously programmed remotes, effectively acting as a “factory reset” for access control.
Step-by-Step: How to Perform a Hard Reset
If your garage door opener is behaving erratically—such as opening partially, making grinding noises, or failing to respond—a hard reset can often resolve the issue. Follow these precise steps to ensure safety and effectiveness.
Step 1: Disconnect the Power
Safety is paramount. Locate the power cord of your garage door opener and unplug it from the outlet. If your unit is hardwired, switch off the circuit breaker dedicated to the garage. Wait for at least 30 seconds. This pause allows the capacitors in the logic board to discharge fully, clearing any temporary memory errors.
Step 2: Inspect the Safety Sensors
While the power is off, take a moment to check the photo-eye sensors located near the floor on both sides of the door. Ensure they are aligned and free of dust, spiderwebs, or debris. Misaligned sensors are a leading cause of door reversal issues, often mistaken for a need to reset the opener itself.
Step 3: Restore Power and Test
Plug the unit back in or flip the circuit breaker on. You may hear a click or see the lights flash. Try operating the door using the wall-mounted control panel. If the door moves smoothly, the hard reset was successful.
Step 4: Reprogram Remotes (If Necessary)
If you performed a factory reset by holding the “Learn” button, you must reprogram your remotes.
- Press the “Learn” button briefly (the LED will light up).
- Within 30 seconds, press and hold the button on your remote.
- Release when the opener’s lights blink or you hear a click.
Pro Tip: Always test the door’s reverse mechanism after a reset. Place a 2×4 piece of wood on the floor under the center of the door. Close the door; it should automatically reverse upon contact. This is a critical safety feature mandated by federal law.
Common Issues That Mimic the Need for a Reset
Often, homeowners believe their opener needs a reset when the actual issue is mechanical or environmental. Before tearing apart your settings, consider these common culprits.
| Issue | Symptom | Likely Cause | Solution |
|---|---|---|---|
| Misaligned Sensors | Door closes then immediately opens | Obstruction or misalignment | Clean lenses and realign brackets |
| Broken Springs | Door is heavy, opener strains | Torsion spring failure | Call a professional technician |
| Dead Remote Battery | No response from remote | Weak battery | Replace CR2032 or AA batteries |
| Locked Control Panel | Wall button unresponsive | Lock feature activated | Hold lock button for 3 seconds |
According to the International Door Association, nearly 70% of garage door service calls are related to sensor alignment or broken springs rather than electronic failures. Understanding this can save you time and money.
Brand-Specific Reset Instructions
Different manufacturers have slightly different protocols. Here is a quick reference for major brands in the US market.
LiftMaster and Chamberlain
These brands share similar technology. For most models:
- To Clear Memory: Hold the “Learn” button for 10 seconds until the LED turns off.
- To Reset Travel Limits: Use the up/down arrows on the motor head to adjust the open/close positions if the door stops short or hits the floor too hard.
Genie Openers
Genie models often use a “Program” button.
- To Reset: Hold the “Program” button for 10–15 seconds until the LED blinks rapidly.
- Note: Some older Genie models require a specific sequence of pressing the program button followed by the remote button. Consult your manual for model-specific codes.
Craftsman
Craftsman openers vary widely as they have been manufactured by different companies over the years.
- Newer Models: Follow LiftMaster protocols (yellow/purple learn button).
- Older Models: May require dip-switch adjustments inside the remote and motor unit. If you have an older unit with switches, ensure the patterns match exactly.
When to Call a Professional
While resetting your garage door opener is a safe DIY task, there are scenarios where professional intervention is necessary. If you notice any of the following, stop attempting repairs and contact a certified technician:
- Snapped Cables or Springs: These components are under extreme tension and can cause severe injury if handled incorrectly.
- Burning Smell: This indicates a motor or capacitor failure.
- Persistent Grinding Noises: This suggests gear wear inside the motor unit.
- Door Falls Rapidly: This is a critical safety hazard indicating spring failure.
Investing in professional maintenance every 1–2 years can extend the life of your opener and prevent costly emergency repairs.
FAQ Section
1. Is there a physical reset button on all garage door openers?
No, most openers do not have a dedicated “Reset” button. Instead, they use a “Learn” or “Program” button to manage memory and settings. A hard reset is typically achieved by unplugging the unit.
2. Will resetting my garage door opener erase my remote codes?
It depends on the method. Unplugging the unit (hard reset) usually retains memory. However, holding down the “Learn” button for 10+ seconds will erase all paired remotes and keypads, requiring you to reprogram them.
3. Why won’t my garage door opener reset?
If the unit does not respond to a reset, check the power source, ensure the circuit breaker is not tripped, and verify that the safety sensors are not obstructed. If the logic board is damaged, it may need replacement.
4. How often should I reset my garage door opener?
You should only reset your opener when troubleshooting specific issues. Regular maintenance, such as lubricating chains and checking sensor alignment, is more beneficial than frequent resetting.
5. Can I reset a smart garage door opener via an app?
Yes, many Wi-Fi-enabled openers (like MyQ) allow you to troubleshoot and restart the device through their respective mobile apps. This can often resolve connectivity issues without physical interaction.
Conclusion
So, is there a reset button on garage door openers? While there isn’t a single magic button labeled “Reset,” understanding how to use the “Learn” button and perform a power cycle gives you full control over your system. By following the steps outlined above, you can resolve most minor glitches, reprogram remotes, and ensure your garage door operates safely.
Remember, regular maintenance is key to preventing issues. Keep your sensors clean, lubricate moving parts, and test your safety features monthly. If you found this guide helpful, please share it with your neighbors or on social media to help others keep their homes safe and secure.
Disclaimer: Always prioritize safety. If you are unsure about any step, consult your owner’s manual or contact a licensed garage door technician.



Leave a Reply